
Deck your home out in red, white, and blue with this Patriotic Pom Pom Wreath!
Come Independence Day, everything looks better with stars and stripes. I always love to put out my little American flags and all things red, white, and blue for the 4th of July. This year, I wanted to spruce up my 4th of July decor by making a cute new wreath and I love how it turned out! So, grab out your scissors and your hot glue gun and give your home the star-spangled treatment with this easy Patriotic Pom Pom Wreath.

Here’s What You’ll Need to Get Started:
- Red, white, and blue yarn
- A wire wreath frame
- A spatula (or something similar to help you make your pom poms)
- A pair of sharp scissors
- Hot glue gun
- Embellishments (like stars, USA letters, etc.)
- A piece of tin foil (optional, to help sharpen scissors)
Making Your Patriotic Pom Pom Wreath
Once you have all of your supplies gathered together, it’s time to start building out the pom poms for this patriotic wreath. You’ll need your spatula (any standard spatula out of your kitchen will do) and yarn. For this project, I found the cutest sparkly Caron Simply Soft Party Yarn in red, white, and blue at Joann. Begin wrapping the yarn around the spatula (like shown below), about 25 times. The more you wrap it around the spatula, the bigger and fluffier your pom pom will be.

After you have finished wrapping it, cut the yarn, leaving an excess about about 5-6 inches or so. Now, cut that excess yarn off, right up against where you stopped wrapping. This piece will now be what you will use to tie off your pom pom. Gently sliding the pom pom off from the spatula and keeping it together, tie the string around the center and tie tight. You will now have two loops on either side of the knot. Next, take your scissors and slide them through the loops, one side at a time, and cut so you’ll have a frayed, tassel-like edge (like shown below).

Next, trim up the ends. The closer you cut the pom pom down, the more traditional your pom pom will be. You can always use two cardboard circles cut according to how big you want your pom pom to be and sandwich your pom pom (flip your pom pom so its now all spread out unlike shown above) between the cardboard rounds to trim it up. This will help to give it more of that typical pom pom look. However, I decided to keep mine more loose and frilly like a tassel to make it look more fun and firework-like.
Once you have your pom pom to your liking, cut another piece of yarn to fasten it to the wire wreath frame. I got this particular wire wreath from Dollar Tree.
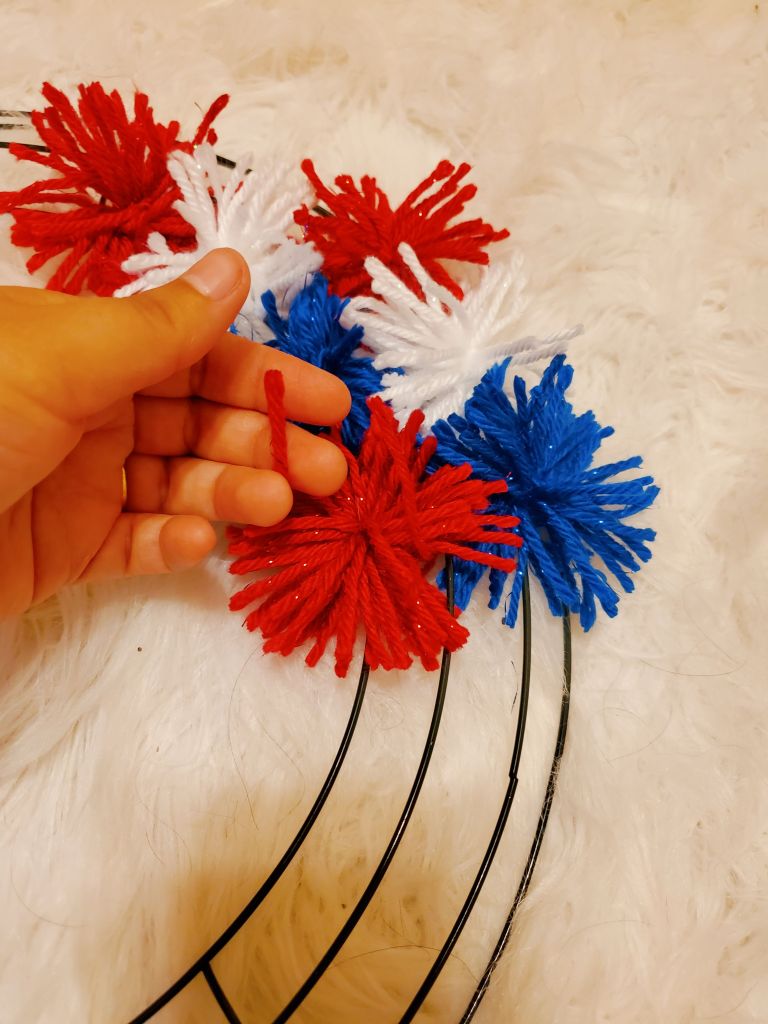
Keep repeating the steps and make as many pom poms as you need/want. If for whatever reason your scissor become dull or they’re just not sharp enough while you’re trying to make your pom poms (trust me, you’ll know), take a large piece of tin foil and fold it up several times into a small square and cut the foil with your scissors about 5-6 times. This will help sharpen them again. (Just make sure to do this on ordinary, inexpensive scissors. If you have nice crafting scissors, a more professional sharpening technique would be best.)
While making your pom poms and attaching them to your wire wreath frame, get creative with the pattern of colors. I kept mine in the traditional red, white, and blue, but make it however you would like! I also decided to make a few bigger pom poms with the help of a wider spatula just to give the wreath a little variety. Play around with different sizes and just have fun with it!

Once you have all of your pom poms attached to the wreath, it’s time to add some embellishments!
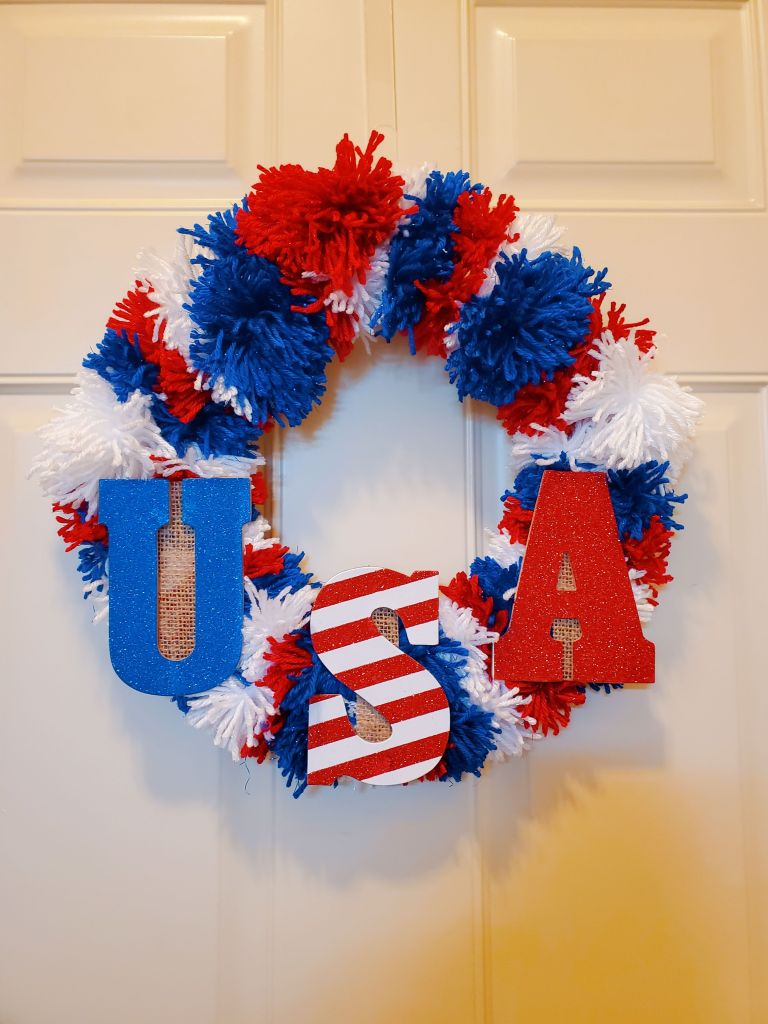
I found a cute USA sign at Dollar Tree. The letters were attached to a burlap strip and hung down one below the other. I cut the letters off of the burlap so I had three individual letters.

I kept the burlap on the back of the letters to help them stand out from the red, white, and blue behind it. I played around with the letters, positioning them in different spots until I was happy with the layout, then I added some hot glue to the back of each letter and pressed them down onto the pom poms, holding them in place until the glue set.
And here is the finished product! Isn’t it cute?!
I hope you enjoyed this little patriotic craft and that it adds a little star-spangled touch to your home for the 4th of July! Remember to have fun with it and get creative!
Happy 4th of July! 🎆 🇺🇸

Love your wreath idea! Way to stay patriotic while having fun!
LikeLiked by 1 person
Thank you! The wreath is super easy to make and so much fun! Happy 4th of July!
LikeLiked by 1 person
We don ‘t have a 4th of july, but its looking real good!
LikeLiked by 1 person
Thank you! The great part is that this wreath is easily customizable for any holiday or occasion!
LikeLiked by 1 person