
You’ll be turning heads this summer with these cute DIY summer hats.
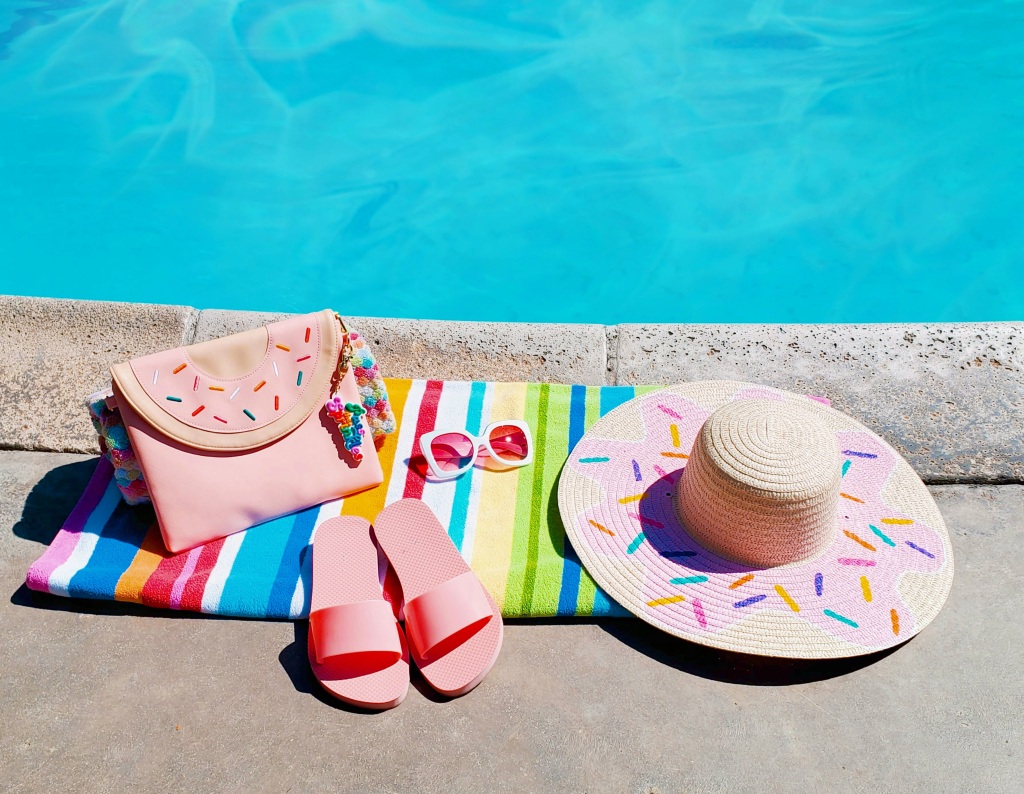
Hello, Summer! Oh how I’ve missed you. Okay, well, maybe I didn’t necessarily miss the heat, but I love all that summer brings: Going on picnics, visiting the beach, hanging out by the pool, enjoying being out in the sun, and, of course, wearing adorable summer hats! After all, a floppy hat is a must with any summer outfit. If you’re looking to give your favorite summer hat a little extra sparkle, I have 2 super easy DIYs that will completely upgrade your hat for the summer and will make everyone turn their heads whether you’re lounging by the pool or at the beach.

The Donut Hat
This hat is by far the cutest thing that I have ever set my eyes upon. The sprinkles, to me, really make the hat. It’s just so fun! Plus, with this hat, you’ll be looking like a ~snack~ this summer. 😉
Here’s What You Need to Make the Donut Hat:
- A floppy summer hat
- Paint for your glaze and sprinkles
- Paint brushes
- A paint tray
- A pencil

Here’s How to Make It:
For this project, you can use any floppy hat you have. If you don’t have one, but want to make the craft anyway, you can pick up some really nice ones from the Target dollar section right now for only $7! Also, if you have a drawstring or anything of the sort on your hat, make sure to remove it before you start working.
To begin making your hat, take your pencil and lightly freehand wavy lines (like shown below) around the brim of your hat. I highly suggest you make light pencil marks first, so if you don’t like the shape or want to make any changes, you can easily erase the pencil marks and draw again. No need to fret about it, though—simply make loose, wavy lines to mimic the dripping effect that a donut’s frosting has when the donut shop just dipped the donut. Once the frosting outline is to your satisfaction, go back and make your lines slightly darker so you can easily see them when you start painting.

Now it’s time to start painting! For my painting, I used some all-purpose brushes from The Fine Touch. I used paint that I had on hand, so if you already have some in your craft drawer, make use of it! (Just make sure that your paint is suitable for fabric.) For my frosting, I used Plaid’s Fabric Creations Soft Fabric Ink in Carnation. It is the prettiest light pink and makes for the perfect donut frosting color. You can, of course, use whatever color you would like for your frosting (like a pretty light purple or yellow!); I only suggest that your frosting color be a lighter hue so the sprinkles really pop later.

Following along the lines I drew, I covered the lines with the paint and painted within the lines up to the base of the crown. I wanted to leave the crown unpainted so it acted as the center of the donut and the donut shape was more obvious.
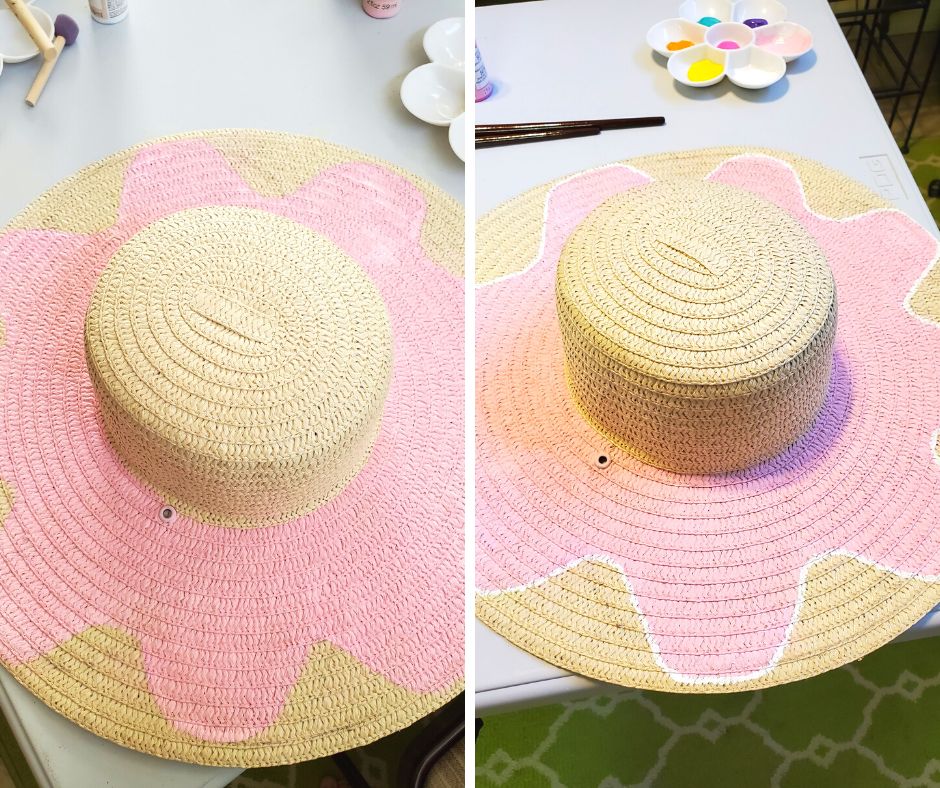
After you have filled in your frosting completely, let it sit to dry. Once it’s dry, you can always go back and add a second coat of paint if you want it to be extra vibrant, but I left mine with a single coat of paint so the sprinkles would be the star. I did decide, however, to line the pink frosting with a thin line of white paint (I used Plaid’s Fabric Creations Soft Fabric Ink in White!). I felt like it made the frosting more defined and really let the pink of the frosting shine.
Once that dried, I painted on my sprinkles. For my sprinkles, I used perhaps my favorite paint ever: Martha Stewart’s Multi-Surface Satin Acrylic Paint. The colors are unbelievably vibrant, making it the perfect paint for the sprinkles. I only needed to apply one coat for the sprinkles—it was that bright and colorful! For the sprinkles, I used her paint in Hot Pink, Jungle Green, Lavender Fields, Meyer Lemon, and Orange Floatie. If you have to splurge on anything for this project, I highly recommend getting Martha Stewart’s paint. You will fall in love with it.

For the sprinkles, remember that this is all freehand. Simply make various lines all around your frosting with your different sprinkle paint and fill the donut with as many sprinkles as you’d like.
When you’ve added all of your sprinkles, let the hat rest overnight to dry and voilà! You are now the proud owner of one a-glaze-ing Donut Hat!
The Daisy Hat
Bright and vibrant, this hat is so much fun for the summer. Plus, look at how adorable it is! When everyone sees you in your cute Daisy hat, they’ll all be saying, “You grow, girl!” 🙂
Here’s What You Need to Make the Daisy Hat:
- A floppy summer hat
- Yellow, white, and black paint
- Paint brushes
- A paint tray
- Paper and a pencil
- Painter’s tape (optional)

Here’s How to Make It:
First things first, make sure to have your floppy summer hat ready. Again, if your hat has a drawstring or anything of the sort, remove it before you start working.
I had a little help from my mom with this one (which was so much fun!) because she loves flowers and I wanted her to keep the hat in the end. To start, we took the same leftover yellow paint from the Donut Hat DIY, and painted the entire crown yellow. If you want to make sure that you get a nice, clean line where the crown meets the brim of the hat, line the bottom of the crown with some painter’s tape. I tend to prefer ScotchBlue Multi-Surface Painter’s Tape.
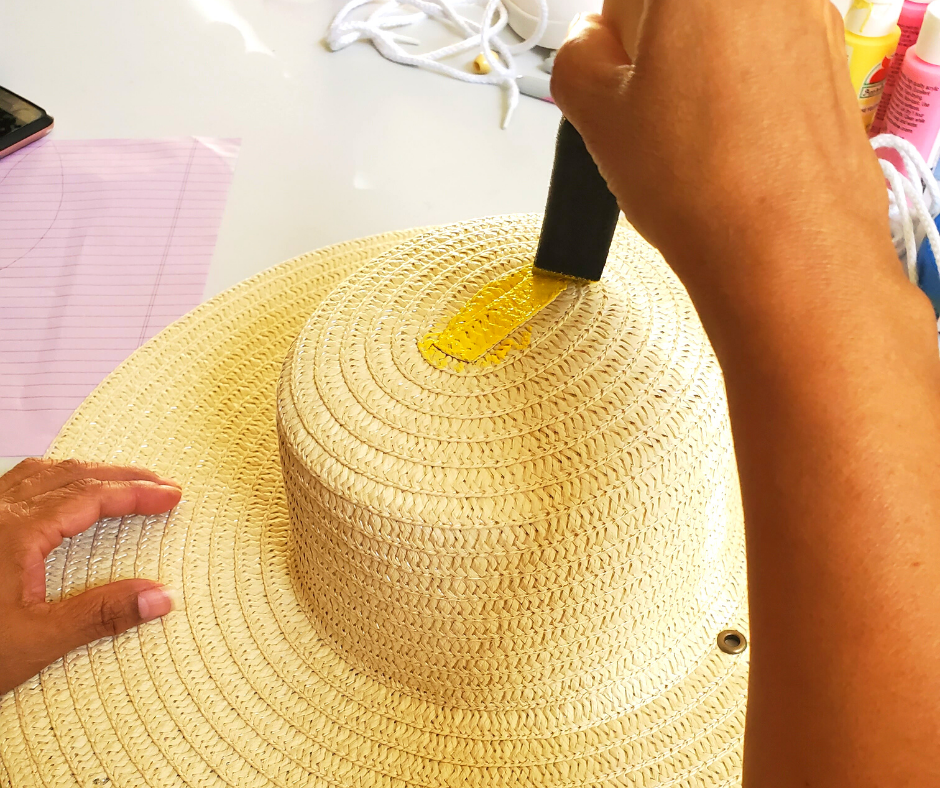
Once you have the entire crown painted yellow, let your hat rest until the yellow paint is dry before moving on to the petals.
After the yellow paint is dry, grab your piece of paper to either draw your petal shape in its entirety and cut it out or simply fold your piece of paper in half and freehand a half-petal shape with your scissors. Now that you have your petal template, take a pencil and lightly trace the petal, going all the way around the brim of the hat. If you’re finding that you still have space left over once you’ve gone completely around the brim, erase your pencil markings and simply adjust your petals with slightly more space between them so your petals look pretty equal distant around the hat.

When all of your petals have been drawn onto the brim of your hat, you can now start filling in the petals with paint. Again, I recycled the paint from the Donut Hat DIY and used the white Plaid paint.
Once you have filled in all of the petals with the white paint, let it sit to dry again to see if you need to make any touch-ups later.
For my mom and I, we just did small, simple touch-ups to the white to make sure the petals were completely filled in.
After sitting with the white petals for a little, we decided to add a thin line of black paint around the edges of the petals to make them pop even more. I used some black paint we had on hand already (Plaid’s Apple Barrel Colors Matte Acrylic Paint in Black). I truly think the black paint made the petals stand out and overall made the daisy look even cuter (if that was even possible!).
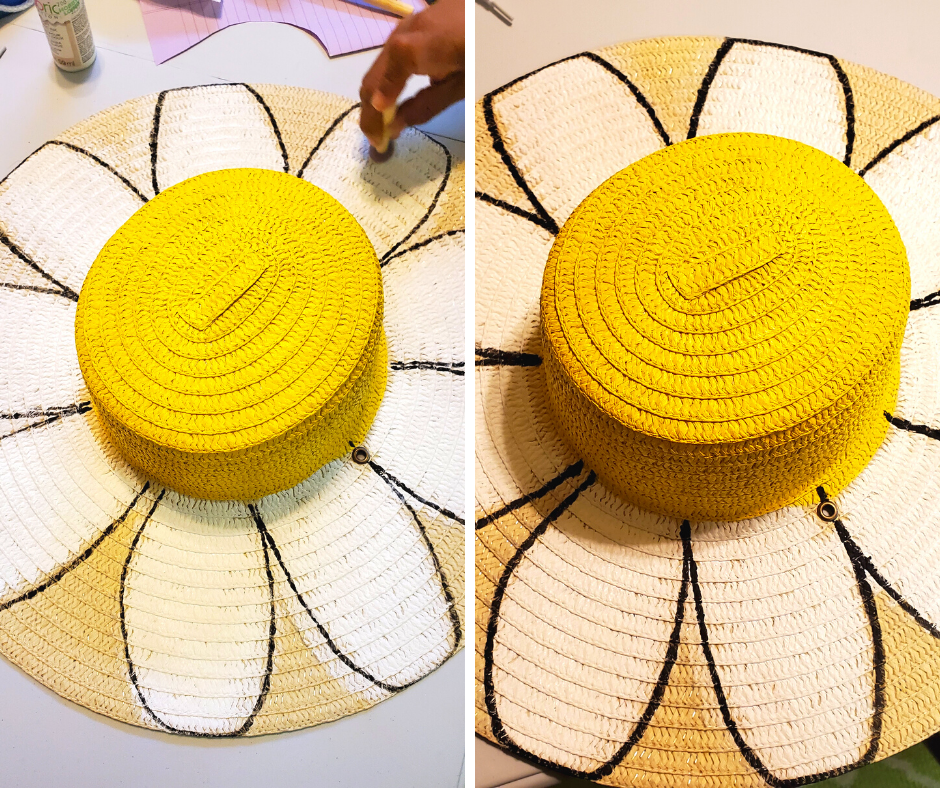
Let your hat sit overnight to dry completely once you’ve finished painting, and now you’ll have a Daisy Hat that you’ll be wild(flower) about!

I truly hope you’ve enjoyed this fun DIY and that you’ll make these to wear for all of your summer outings! Now, which one is your favorite? Let me know in the comments below!
Check out my video tutorials for the Donut Hat and the Daisy Hat on TikTok!

I like the donut hat! you’ve been practicing with that for a bit already ^^
LikeLiked by 1 person
Yup! I definitely love donuts!
LikeLiked by 1 person