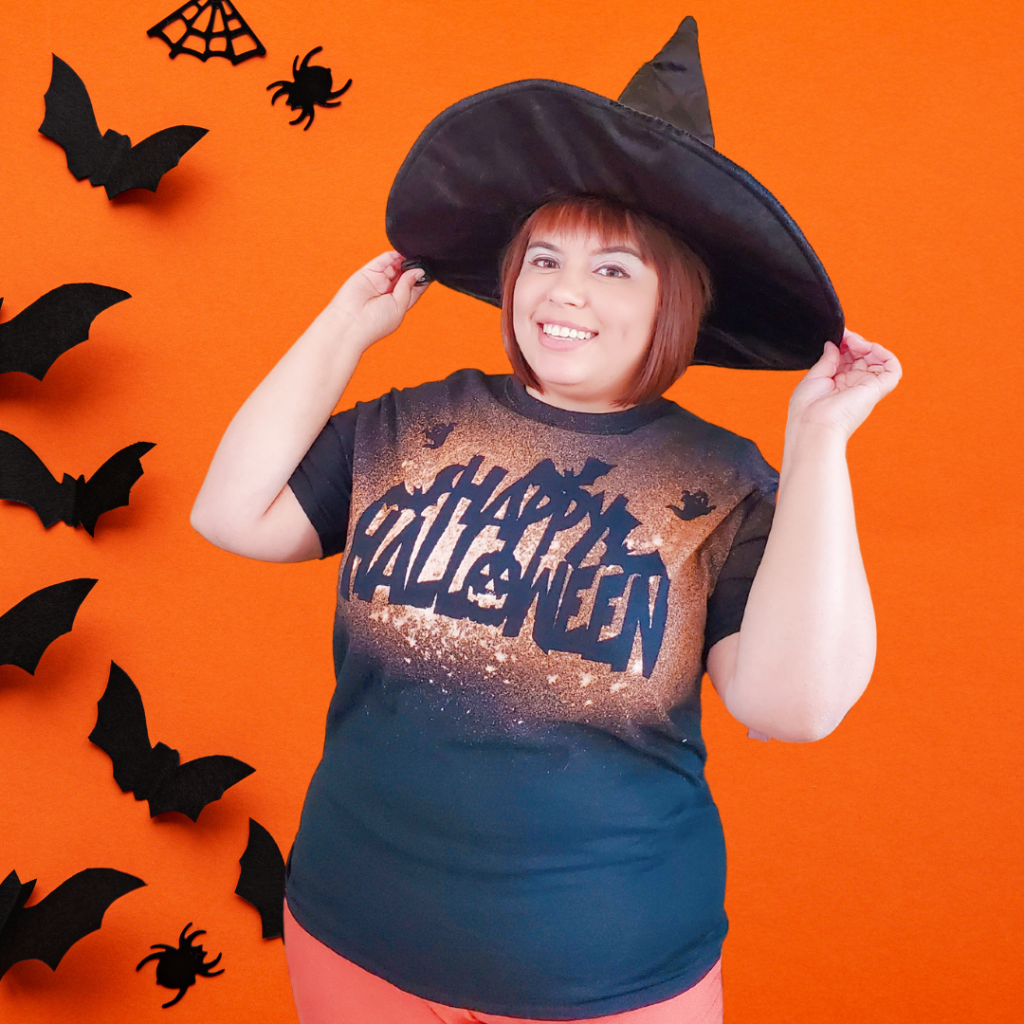
With a black shirt, a decorative sign from Dollar Tree, and some bleach, this spooky season shirt is Halloween “ghouls.”
There’s nothing more spooktacular than dressing up in festive clothing for the Halloween season. What better way to get into the spooky spirit than by DIYing a festive shirt especially for Fright Night? Just because summer is over, doesn’t mean that tie-dyeing is over. In fact, bleach tie-dyeing with a black shirt definitely makes for a spooky shirt!

Using wooden decorative signs from Dollar Tree as a stencil, a black t-shirt, and bleach, this DIY Bleach Tie-Dye Halloween Shirt can be a boo-tiful addition to a costume or a fa-boo-lously fun top to wear for the entire spooky season. The best part is that you can get completely creative with this DIY Bleach Tie-Dye Halloween Shirt through the stencils you choose to use.
So, what are you waiting for? Let’s kick off the spooky season skele-fun and make a gourd-geous shirt!
Read on below to learn how to make your own DIY Bleach Tie-Dye Halloween Shirt!
Here’s What You’ll Need
- A black t-shirt
- Decorative Halloween signs (I got all of mine from Dollar Tree)
- Bleach
- Hydrogen peroxide
- Spray bottles
- T-shirt form/cardboard insert
- Tape (this is optional, but highly recommended if you’re using the Dollar Tree decorative signs)

Here’s How to Make Your Own DIY Bleach Tie-Dye Halloween Shirt
To prep your shirt, start by taking your t-shirt form or cardboard insert and placing it inside the shirt. Lay the shirt on a flat surface.
Choose which decorative signs you would like to use for your shirt. I found lots of fun decorative signs at Dollar Tree that could be used as a fun design for these Halloween shirts. They work great for the bleach tie-dye since these signs are wooden. If you use a decorative sign from Dollar Tree, they do have holes in them for hanging, so you’ll need to cover those up with tape to prevent any bleach from getting through when bleaching the shirt.

Place your decorative elements however you wish on your shirt. Get creative with your design!
Once your design is laid out, pour bleach into a small spray bottle. No need to pour too much as only a little bit of bleach is required. In a separate spray bottle, add some hydrogen peroxide. This will be helpful in setting the bleach and preventing it from further spreading.
With your shirt laid out, spray your shirt with the spray bottle of bleach. Do not oversaturate your shirt with bleach.

As your shirt begins to turn orange from the bleach, immediately spray it with hydrogen peroxide once you are happy with the coloring.
At this point, gently remove the decorative signs from the shirt and slide the shirt form out of the shirt.

Next, place your shirt in the wash to finish setting your shirt. You can run it on a quick cycle with light detergent. Allow your shirt to dry completely.

That’s it! You now have a spooktacularly fun shirt for spooky season!
Isn’t it so fun?! It’s definitely a great way to get creative for Halloween!

If you make your own DIY Bleach Tie-Dye Halloween Shirt at home, make sure to share it on social media using #wearecolorventurers so I can see!
As always, you can find the video tutorial for this DIY Bleach Tie-Dye Halloween Shirt on my TikTok!
Before you go, make sure to save this craft to your Pinterest board! (You can find the Pinterest button at the bottom of this article.)
I hope your upcoming Halloween season is spooky and fun!


I’m dyeing to try this! What a fun idea!
Thanks for sharing a boo-tiful idea!
LikeLiked by 1 person
Yay! I’m glad to hear you like it! Hope you try it out for Halloween!
LikeLiked by 1 person
I bought everything to make the shirts but before I start I have a question… Can I make multiple shirts and wash them together at the end or do they have to be washed individually?
LikeLiked by 1 person
For the best results, I would wash them alone to ensure that no lingering bleach from one shirt impacts the design on another. However, if you don’t have any concerns about that, then you can certainly wash them together.
LikeLiked by 1 person