
These fun and easy DIY Fruit Hats will have you looking fresh! 🍉 🍋
Our favorite fruits are not only great to eat, but make the cutest accessories for spring and summer. Colorful pieces of fruit can serve as a stunning source of delicious fashion inspiration, and there is just something so fresh and exciting about fruit-inspired fashion.
Inspired by my DIY Summer Floppy Hats, I wanted to create another unique clothing DIY to freshen up your #OOTD all while still providing an element of fun for you to showcase your zesty, one in a melon personality! That’s right, I created two new, fun hats for you to rock: a Watermelon Visor and a Lemon Visor! They are so unbelievably cute and add just the right amount of cute, fruity flair to any outfit that everyone will adore when you wear it.

Read on below to learn how to make them! 🍉 🍋
The Watermelon Visor
Just like you, this Watermelon Visor is one in a melon! Vibrant and fresh, this fruit visor will instantly make your outfit just that much cuter.

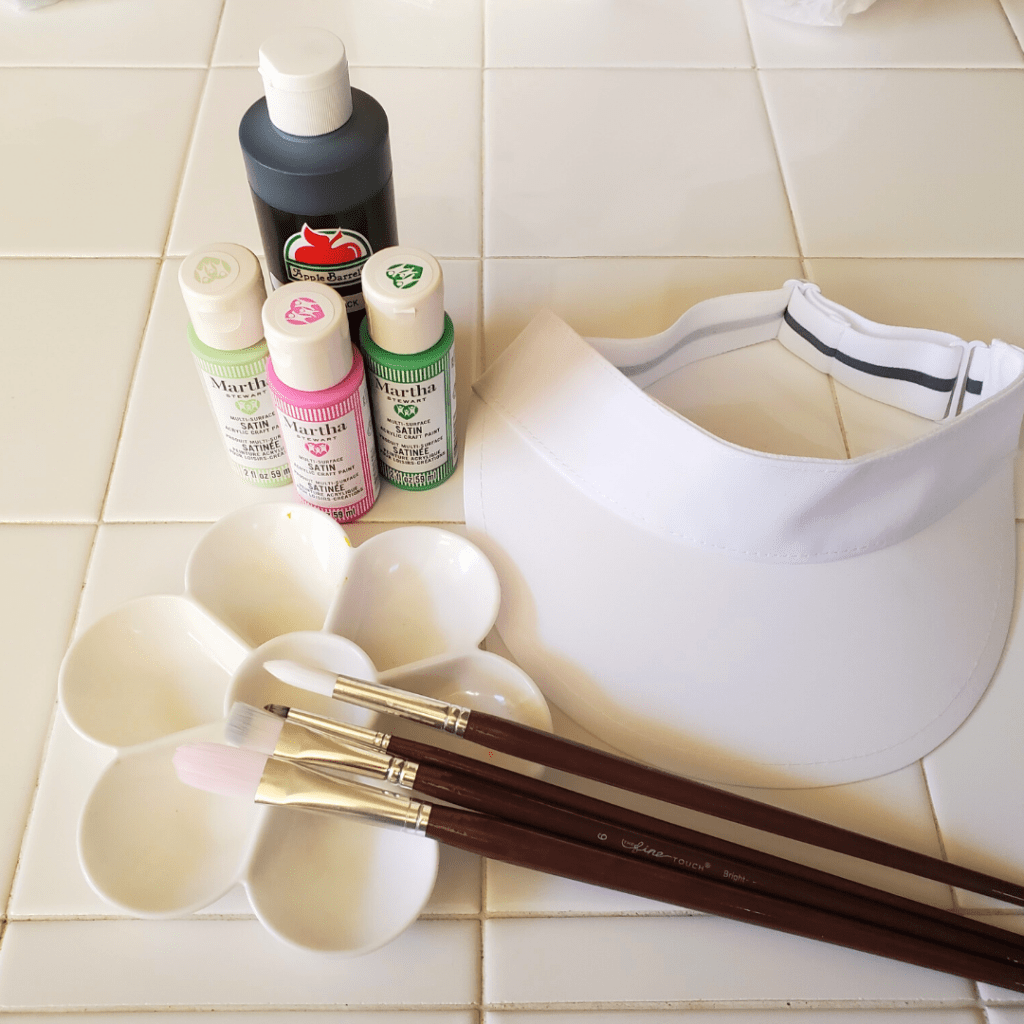
Here’s What You’ll Need to Make It:
- A visor (I got mine from Walmart for only $7!)
- Paint for the rind, center, and seeds (I swear by Martha Stewart’s paint! I got mine from Michael’s.)
- Paint brushes
- A paint tray
- A pencil (optional)
Here’s How to Make the Watermelon Visor:
For this project, you can use any visor you have on hand. Visors work perfectly for these fruit hats so it truly looks like a slice of fruit. I got my white visor from Walmart for only $7 and it is the perfect canvas.
For my visor, I used four different paints: a light green paint (Martha Stewart Crafts®Multi-Surface Satin Acrylic Craft Paint in Pistachio) and a darker shade of green (Martha Stewart Crafts® Multi-Surface Satin Acrylic Craft Paint in Verdant Hills) for my rind, a bright pink paint for the center (Martha Stewart Crafts® Multi-Surface Satin Acrylic Craft Paint in Hot Pink), and black paint for the seeds (Apple Barrel Matte Finish Acrylic Craft Paint in Black [or try Martha Stewart Crafts® Multi-Surface Satin Acrylic Craft Paint in Black Belt]). I highly recommend using the Martha Stewart paint where you can (obviously I used another paint I already had on hand for the seeds), but you will not be disappointed with her paint because the colors come out so vibrant!
To start making your watermelon visor, you’ll need to paint the rind first. You can use a pencil to help you mark how think you’ll want the two sections of the rind to be, or you can freehand it. Do whichever method is best for you!
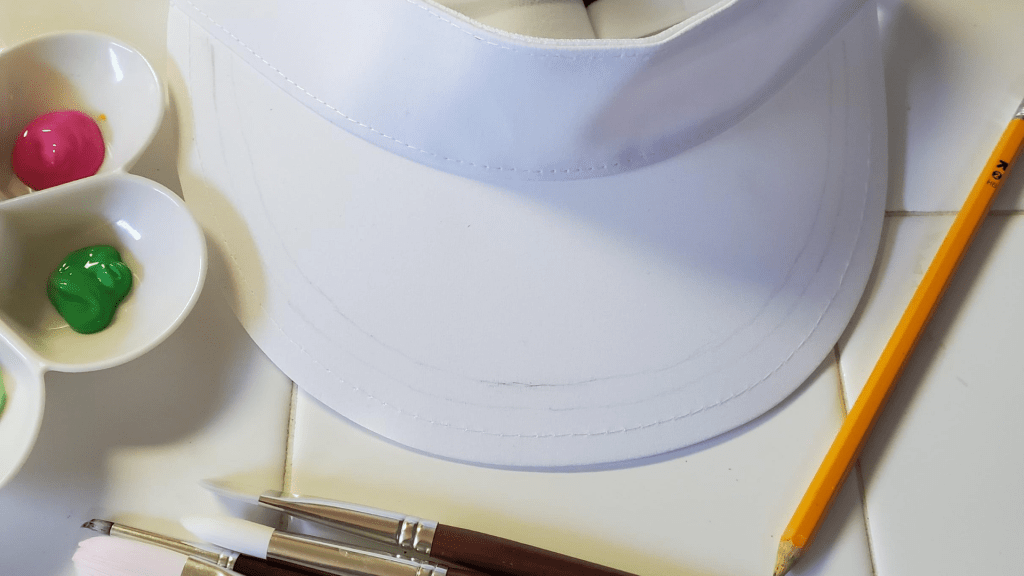
I took a pencil and outlined two thin half circles around the edge of the visor. I made the outer most section slightly thinker so the outer dark green rind was a little bit wider than the inner light green part of the rind (see the photo above!). Next, I painted in my dark green and light green sections, filling in the sections I drew, and let them dry.
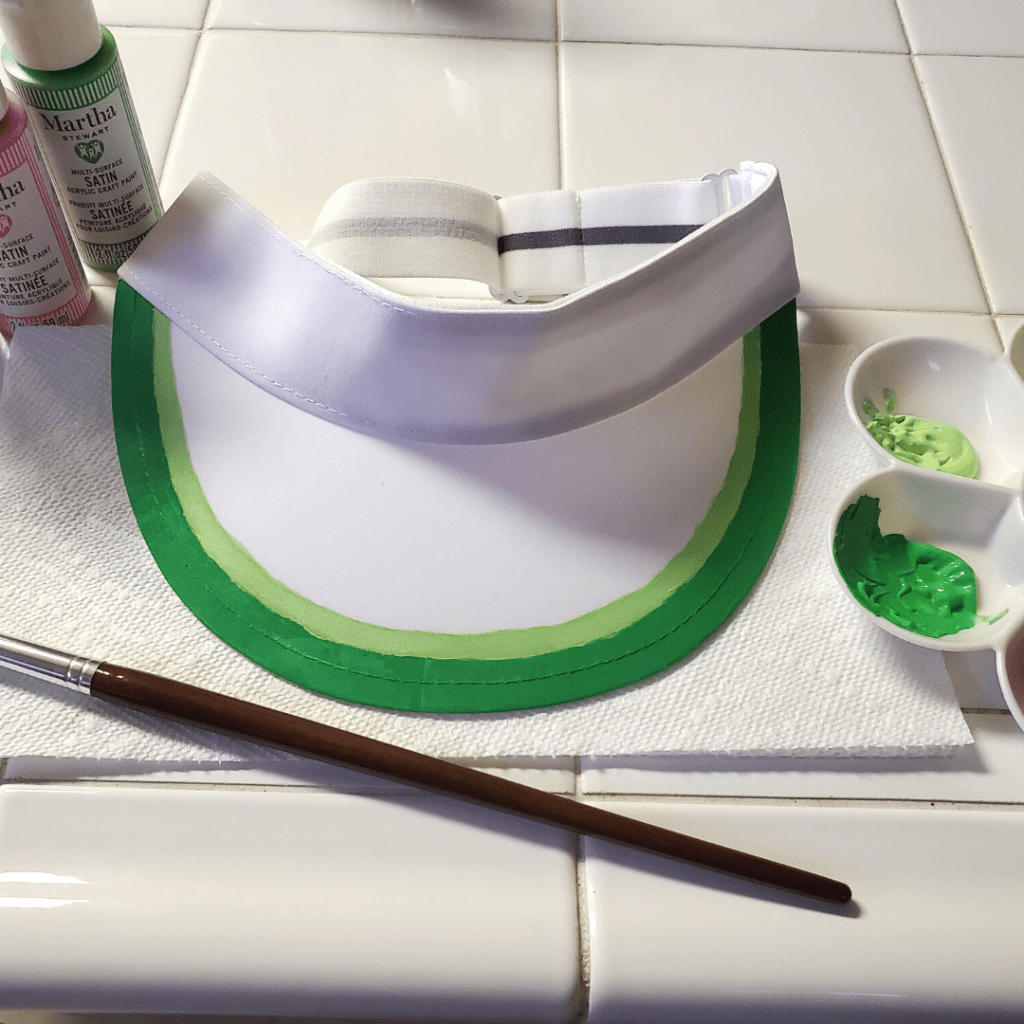
Once the two sections are dry, paint the rest of the hat with the hot pink paint. This was the most time consuming part, but make sure to take it slow, covering the rest of the brim and the headband of the visor and being careful along the line of the rind.

After you have painted the rest of the hat pink, let is sit to dry. It shouldn’t take too long. The visor that I got from Walmart absorbed the paint rather quickly and dried within 15 minutes or so.
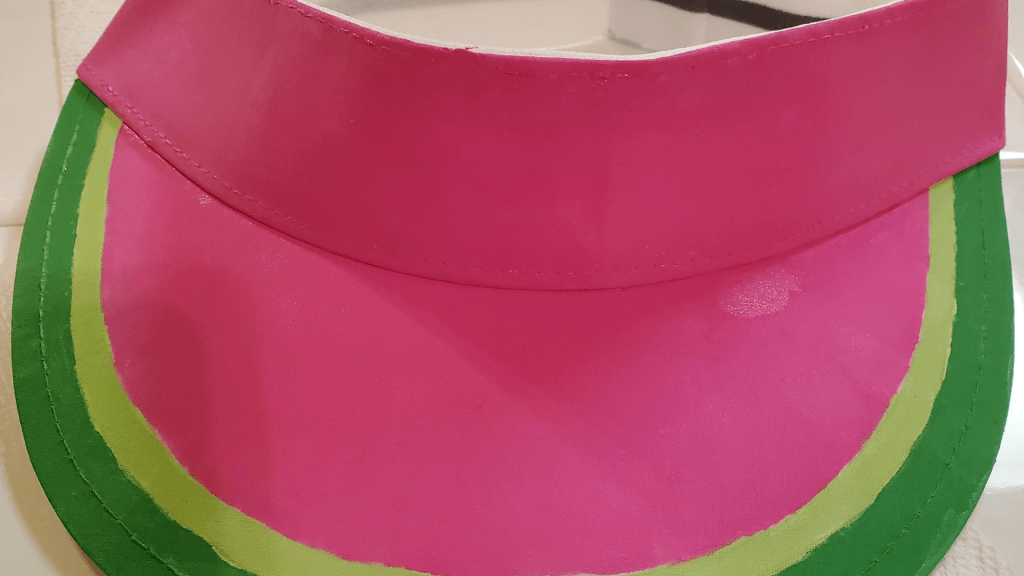
Next, it’s time to paint in the seeds. For this, I again used my pencil to help outline some teardrop-shaped seeds along the end of the rind. I started from the center, drawing one seed, then drew three more seeds on either side of the center one, making sure they were roughly equidistant.
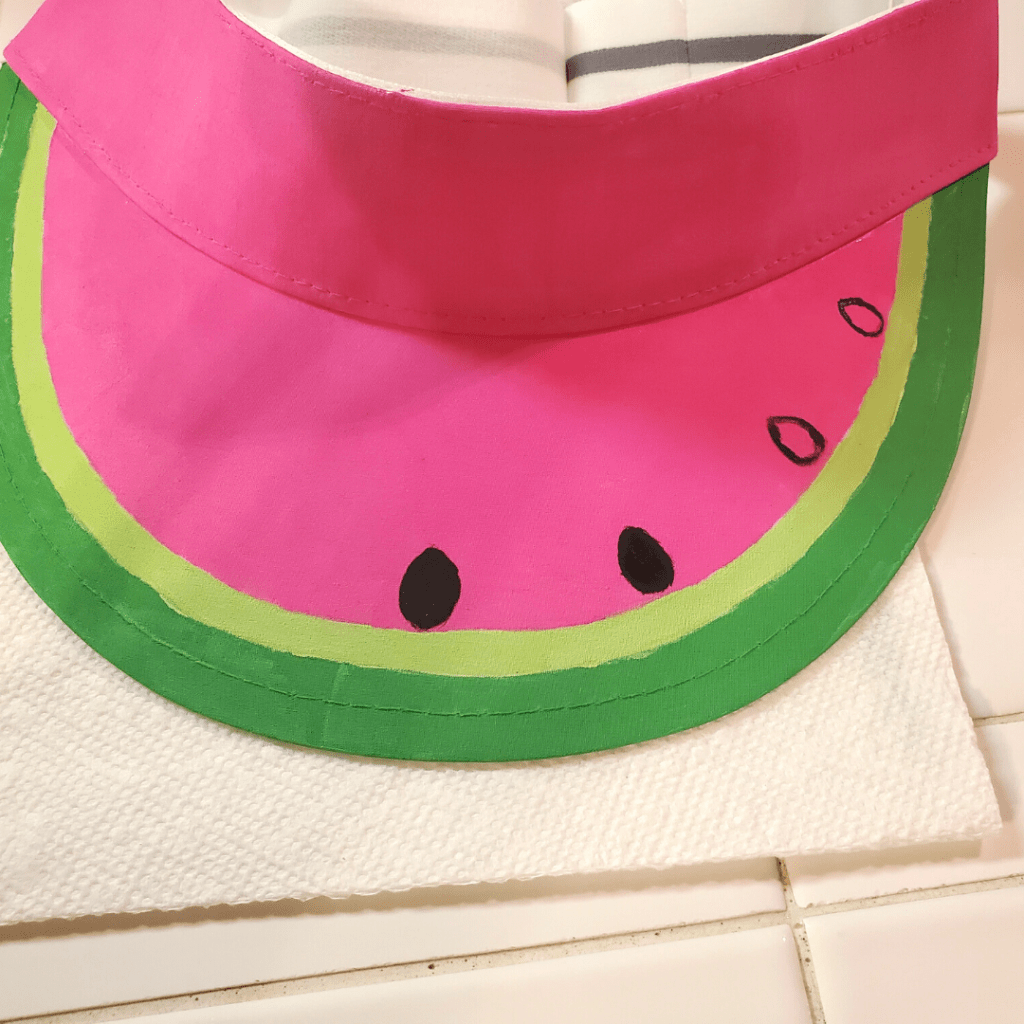
Once all of your seeds are outlined, paint them in with your black paint.
When all of the seeds are painted in, allow your hat to dry completely. I simply left mine out to dry overnight to make sure the paint was set.
And there you go! Now you have the cutest Watermelon Visor that will blow everyone’s “rinds”! 🍉

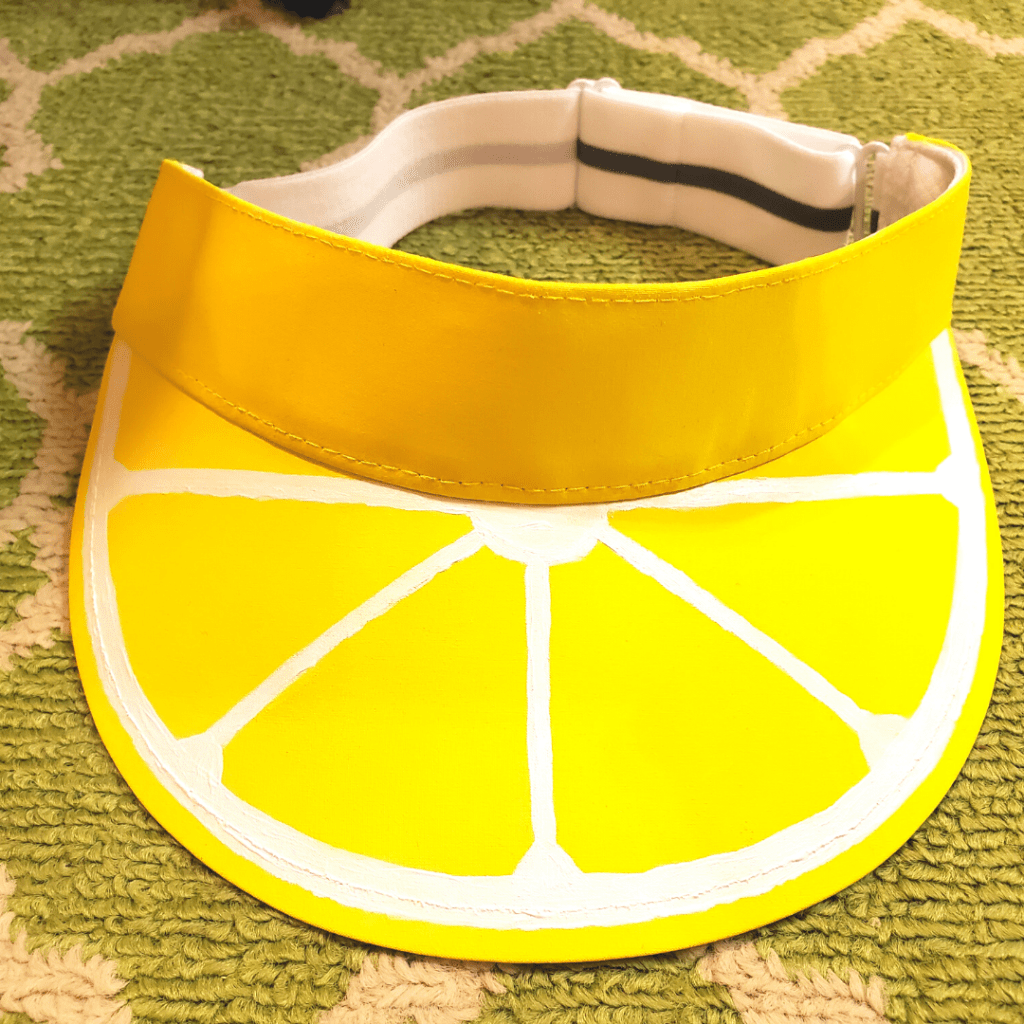
The Lemon Visor
When life gives you lemons, you make a cute hat! This Lemon Visor will add some zesty flair to your outfit with this bright pop of yellow!
Here’s What You’ll Need to Make It:
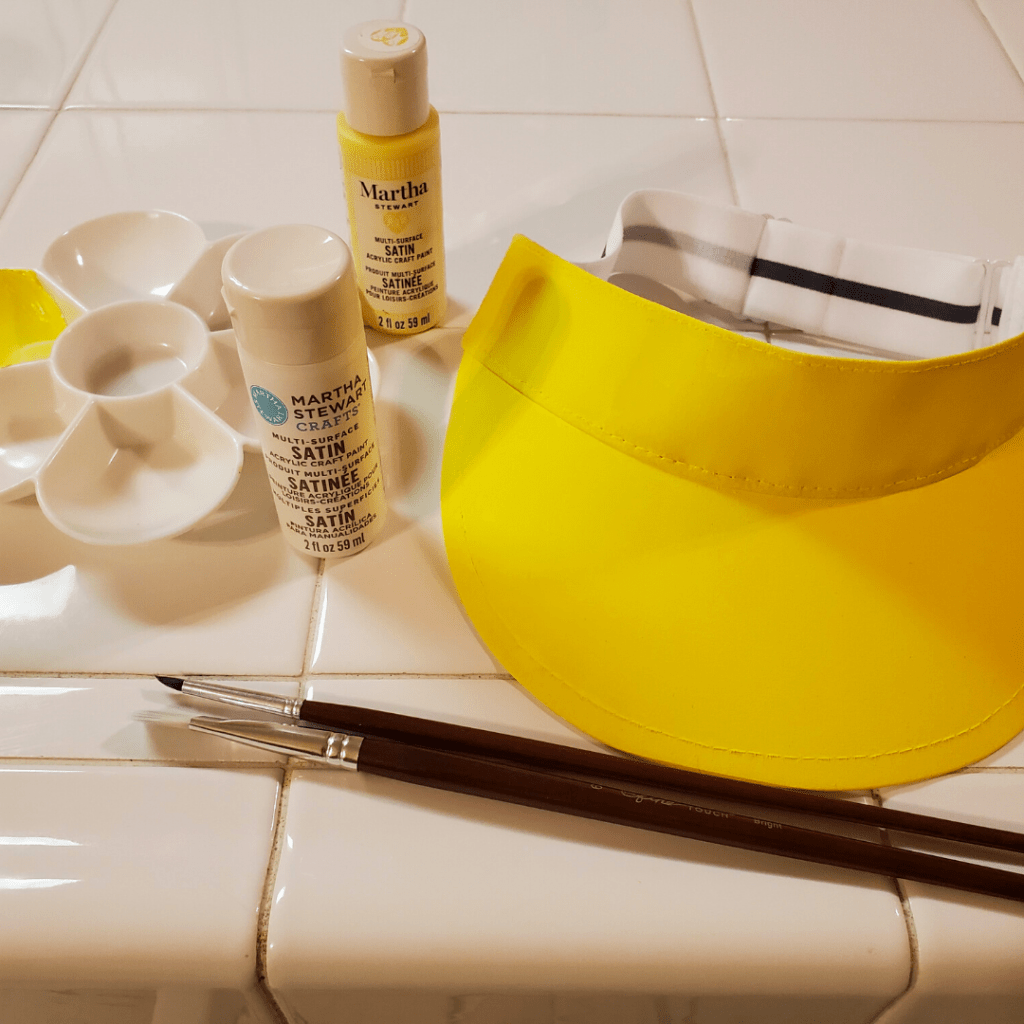
- A visor (I got mine from Walmart!)
- Yellow and white paint (Seriously, use Martha Stewart’s paint! It’s a game changer.)
- Paint brushes
- A paint tray
- A pencil (optional)

Here’s How to Make the Lemon Visor:
Again, for this project, you can use any visor you have on hand. I got my white visor from Walmart for only $7 and it’s the perfect canvas for this Lemon Visor.
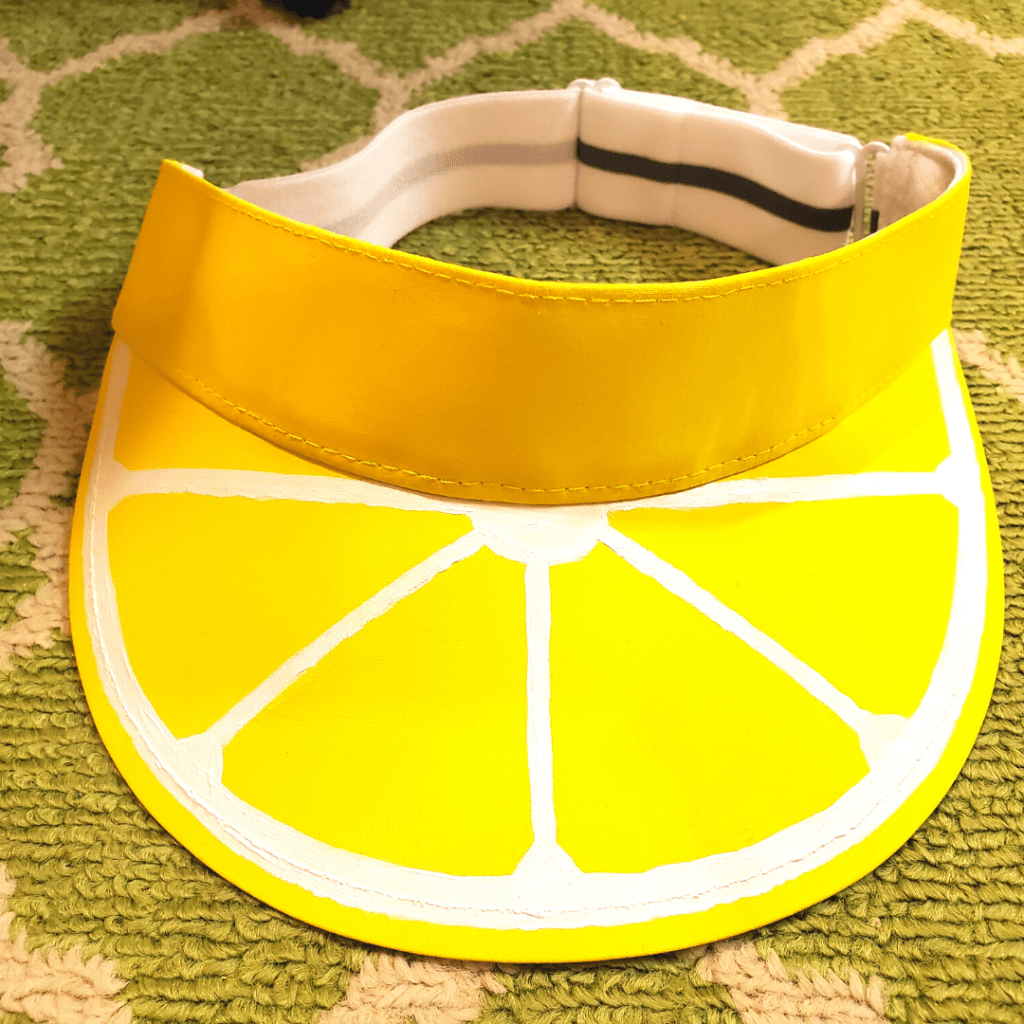
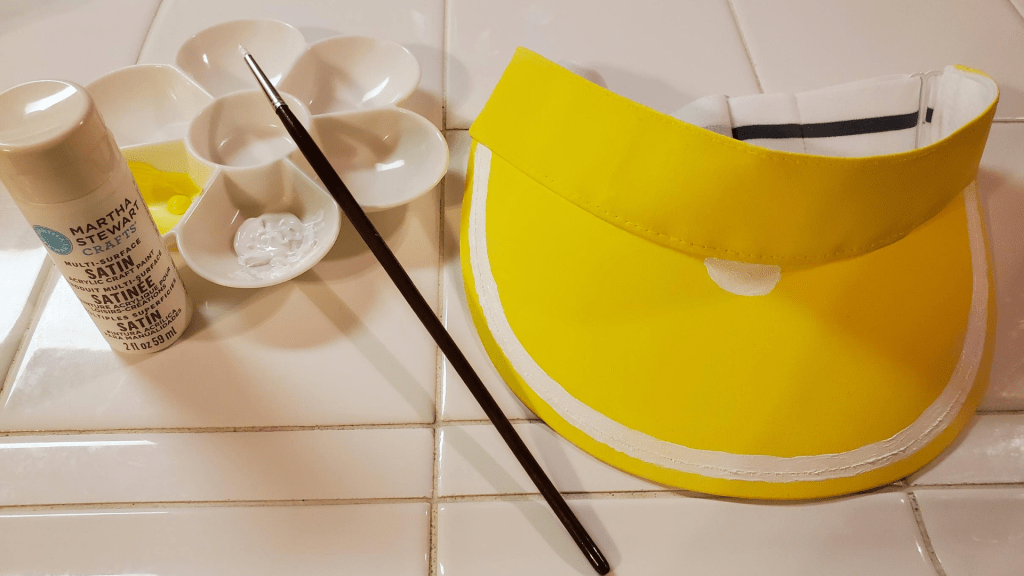
For my visor, I used two paints: a yellow paint (Martha Stewart Crafts® Multi-Surface Satin Acrylic Craft Paint in Sunshine Yellow) and a white paint (Martha Stewart Crafts® Multi-Surface Satin Acrylic Craft Paint in Wedding Cake). Again, I highly recommend using Martha Stewart’s paints, because the colors are so vibrant! The yellow I used here gave it such a bright pop, making it perfect for the lemon.
To make your Lemon Visor, start by painting the entire visor yellow. You will ultimately paint the pith and the segments of the lemon in white, but since the rind of the lemon will also be the same yellow, I decided it was easier to paint the whole visor yellow first, then paint over it with the white for the details of your lemon. If you’d rather draw out the pith and segments first and paint the yellow around them, you can totally do that, too! You can even do that if you have a white visor and want to skip getting the white paint altogether! It’s completely up to you!
Once you have your visor painted entirely yellow and allowed it to dry, it’s time to paint the pith of the lemon. You can use a pencil to lightly mark where you paint the pith along the edge of the visor. I, however, just freehand the white section. Make sure to leave a little bit of yellow on the edge of the hat before the pith so it creates the rind of the lemon.

Next, paint a small half-circle with the white paint on the center of the hat, just below the headband of the visor (as shown below!). This will help to create the segments of the lemon. Allow the paint to dry before adding the segments.
Now, it’ time to add the segments. Start by making a single white line from the center of the half-circle to the pith. At the bottom of the line where it meets the pith, create a triangle between the line and the pith (as shown in the picture below!).

From there, create two more segments lines on either side of the center line (as shown above!), keeping them as equidistant as possible and adding that same triangle on the bottom of of the white lines. In the end, you’ll have six segments to your lemon and it’s so cute how it truly does look like a lemon slice!
There you go! You’ll be “zest” dressed all season long with this Lemon Visor! 🍋
I hope you enjoy these hats and that they add a little fruit flair to your outfits! Which one is your favorite? The Watermelon Visor or the Lemon Visor? 🍉 🍋 Let me know in the comments below!
You can check out the video tutorials for the Watermelon Visor and the Lemon Visor on my TikTok!

Thank you so much for sharing…. Love it. Definitely going to try. My son has entrepreneurs day. And he selling lemonade. Thanks again
LikeLike