
I suggest we form a calming circle…and make this Hocus Pocus sign for Halloween!
I don’t know about you, but one of my favorite things about spooky season is watching all of the Halloween movies. Hands down, my favorite Halloween movie has to be Hocus Pocus. Filled with so many iconic quotes and jokes and catchy songs, I am guaranteed to laugh my socks off every time I watch it (and my watch count is probably in the thousands, ha!).
Inspired by this classic Halloween movie, I decided what better way to celebrate spooky season than by creating the most wicked Halloween sign ever?! That’s right, I created a decorative sign featuring the beloved Sanderson sisters so you can add a little magic to your Halloween scene. Only requiring a handful of supplies and completely customizable to your spooky season style, you’ll have this brew-tiful sign quicker than you can say “Hocus Pocus!”

Read on below to learn how to make your own Hocus Pocus sign!
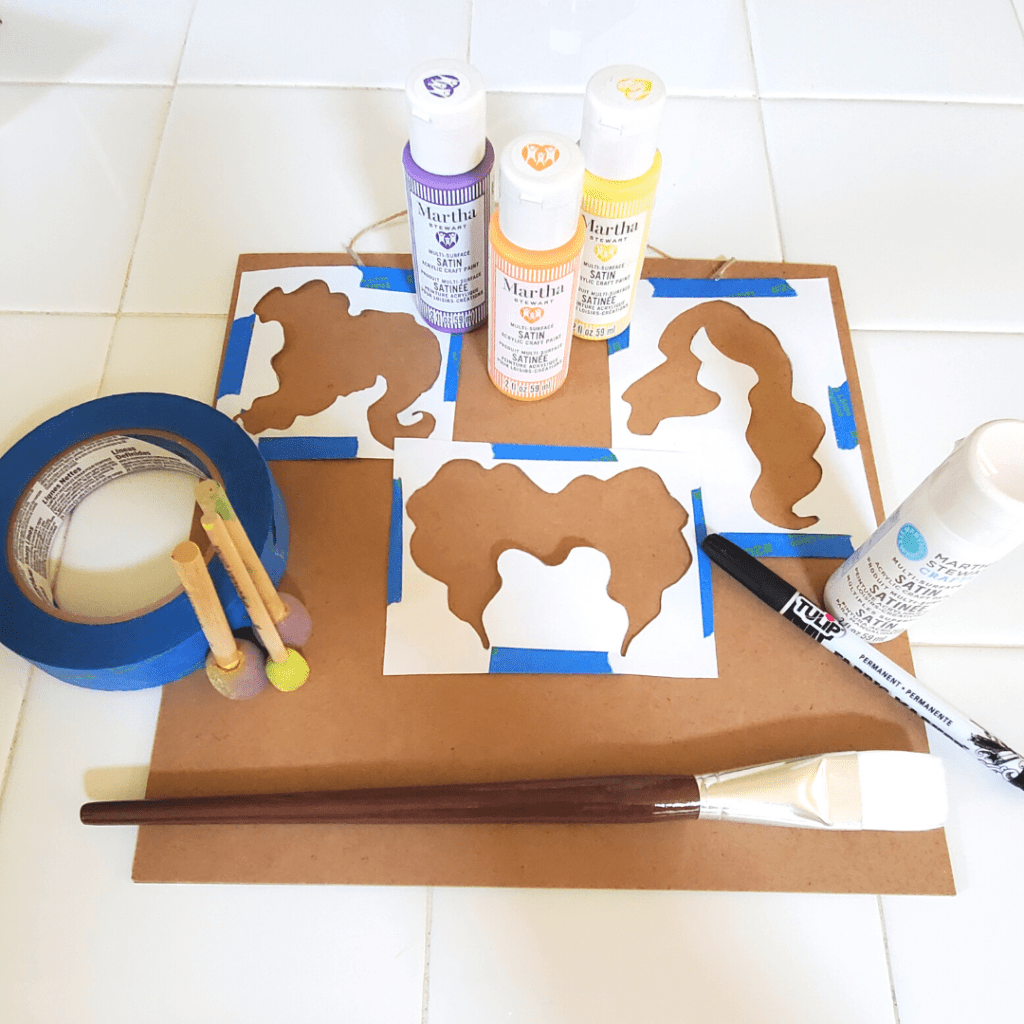
Here’s What You’ll Need:
- Paint (specifically in white, purple, orange, and yellow—my personal favorite is the Martha Stewarts Craft Paints at Michaels!)
- Stencils for the Sanderson sister (I traced mine out on my computer screen with a sheet of paper and a pencil and cut them out)
- A black permanent marker and a pencil
- Paint brushes/dabbers
- Painter’s tape
- A square MDF board (I just used the backside of a sign from Dollar Tree!)
- Ribbon and embellishments (optional)
How to Make Your Hocus Pocus Sign:
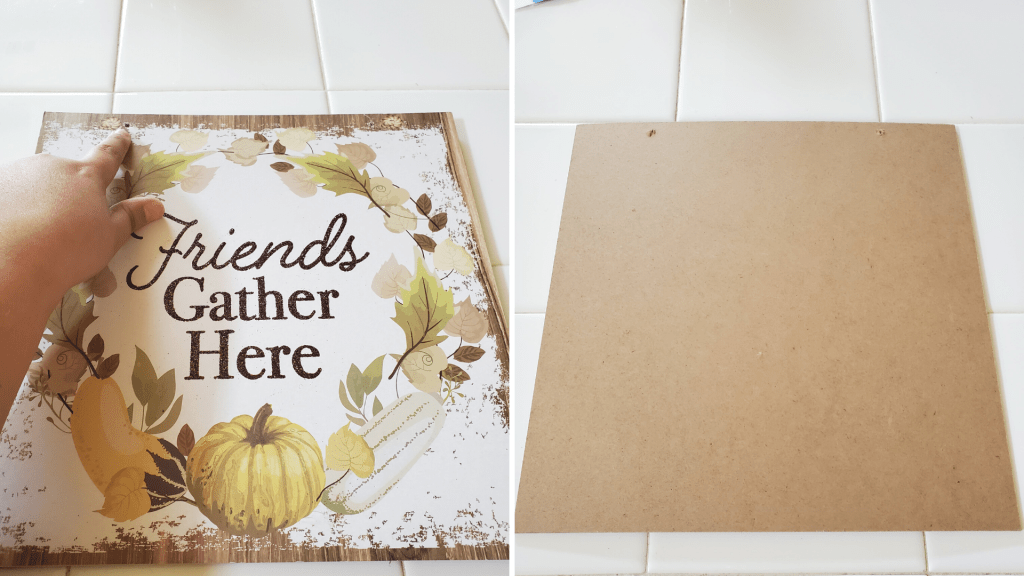
As you prepare to make your Hocus Pocus sign, if you have a sign like mine (I got this little sign from Dollar Tree), remove the jute hanger from the board before you start painting. Once you have the string removed, clean off the backside of your board (we’ll be painting the backside so we don’t have to worry about removing the decorative part on the front) and let’s get painting!
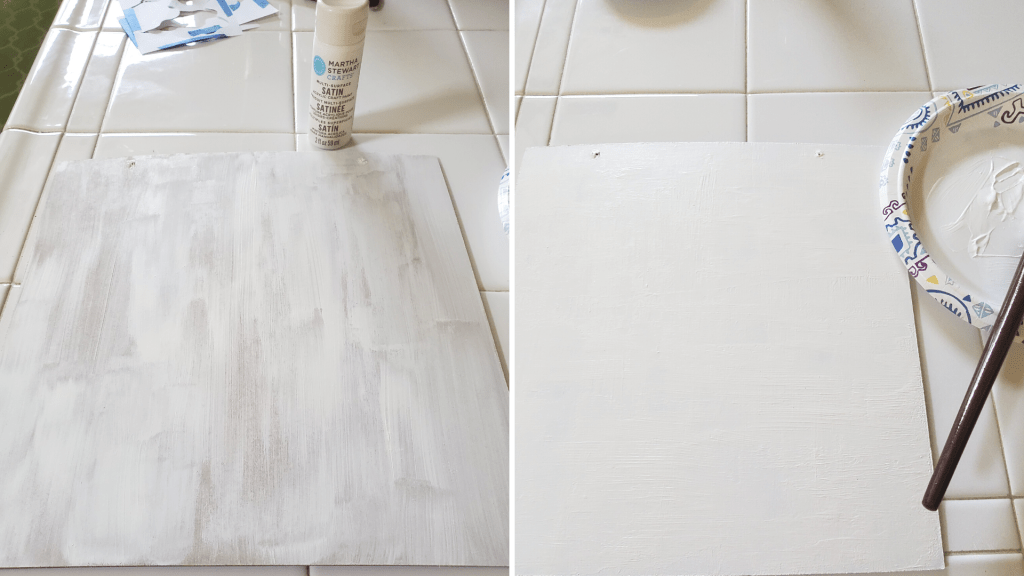
Start by painting a first coat on the backside of the board with your white paint. Once you have the board entirely painted, let it sit and dry completely. You can also grab out a hair dryer to speed up the drying process, which I did.
After letting my first coat dry, I decided to paint a second one. Again, I used the hair dryer to help speed up the drying process. Once the second coat was painted and dried, I decided to paint a third coat to ensure that the board was completely and evenly covered. After letting the third coat dry, I was finally satisfied with the coverage. Feel free to paint your board as many times as you think necessary to ensure you are happy with your sign; just make sure to let the board dry before painting your next coat.
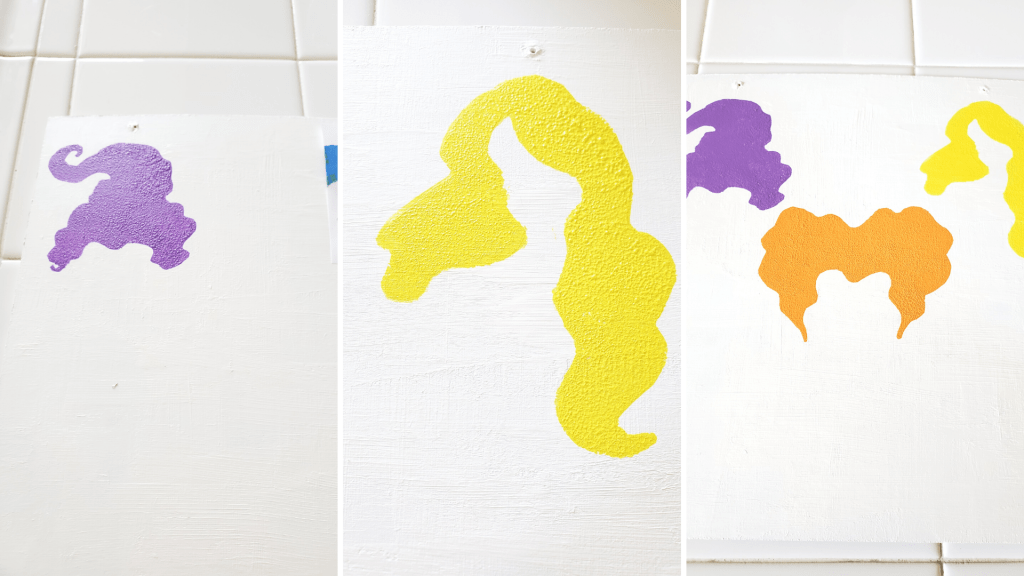
When my board was fully painted, I lined out my stencils I made on the board to see where I wanted to place them. Now for the stencils, I simply found some shapes that I liked of the Sanderson sisters online and traced over them on my computer screen with a sheet of paper and a pencil. I traced each sister on a separate piece of paper and then cut out the center of my tracing to create my own stencils. I decided to put Mary and Sarah a little higher up on the sign and to have Winifred be just below them but in the center (as pictured below), but you can line up the Sanderson sisters however you’d like.
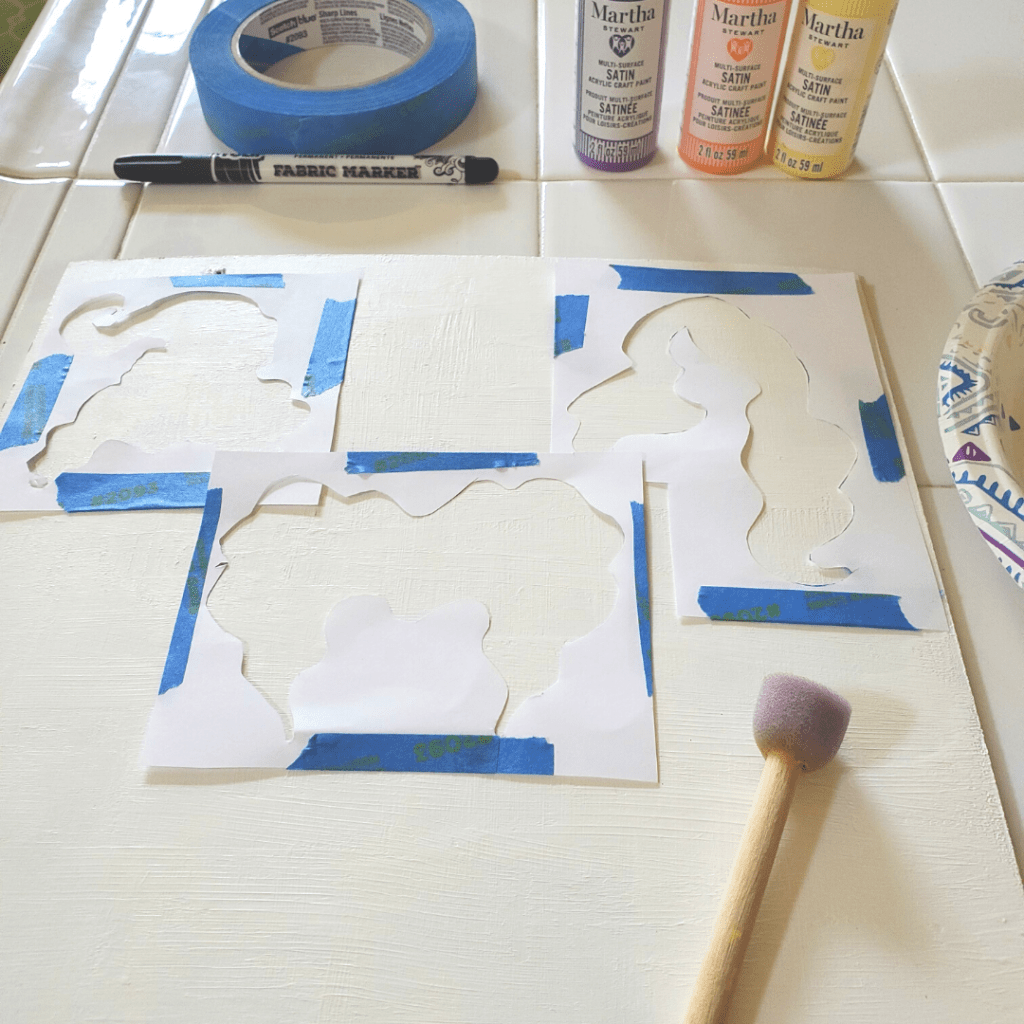
Removing Winifred’s stencil, I taped down Mary (left) and Sarah’s (right) stencils to I could paint them in. Using the purple paint and a paint dabber, I painted in Mary’s shape. Once it was fully filled in, I painted in Sarah’s shape with the yellow paint and another dabber. After both sisters were filled in with paint, I gently removed the stencils and touched up any slight imperfections with a small paint brush. Using the blow dryer again to speed up the drying process, I made sure the two sisters were dry before painting the third. Once they were dry, I taped down Winifred’s stencil and painted it in with the orange paint, then gently removed the stencil and let it dry.
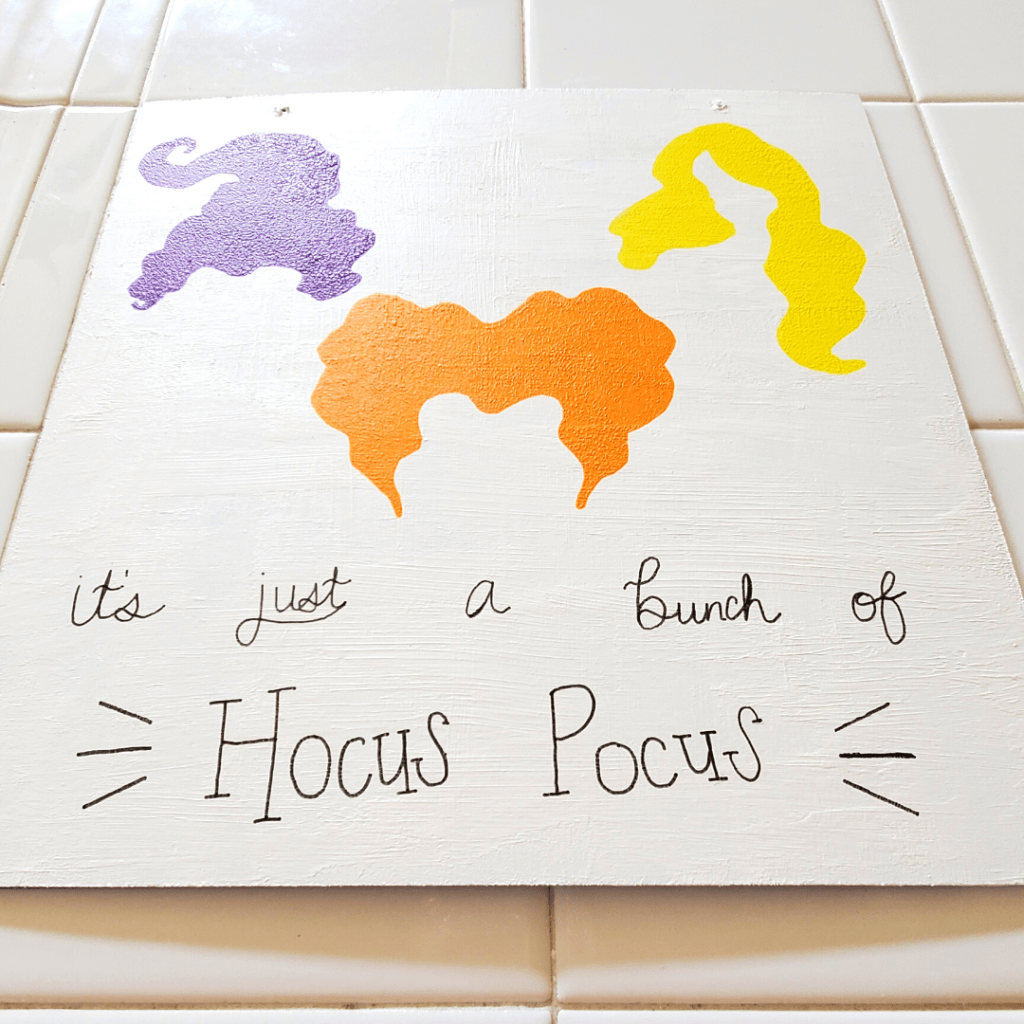
When all of sisters’ shapes have dried, it’s time to put on your Hocus Pocus message (if you want to, or course!). I decided to go with Max’s iconic line: “It’s just a bunch of Hocus Pocus.” There are certainly so many good lines from the movie (like “I smell children!” or “Oh look, another glorious morning…makes me sick!!”), so feel free to choose whichever line is your favorite for your sign!
To add your message to your sign, I suggest starting out with a pencil first to make sure you like how it looks before using a permanent marker. I traced my message out lightly in pencil and found that it erased cleanly when I wanted to make adjustments. Once you are happy with how the message looks, trace over it with your permanent marker. I decided to use a black marker so the message really stood out, but you are more than welcome to use any color! (For example, purple would look really cool!)
After you trace over your message, let your sign rest to make sure that the ink is dry and doesn’t smear.
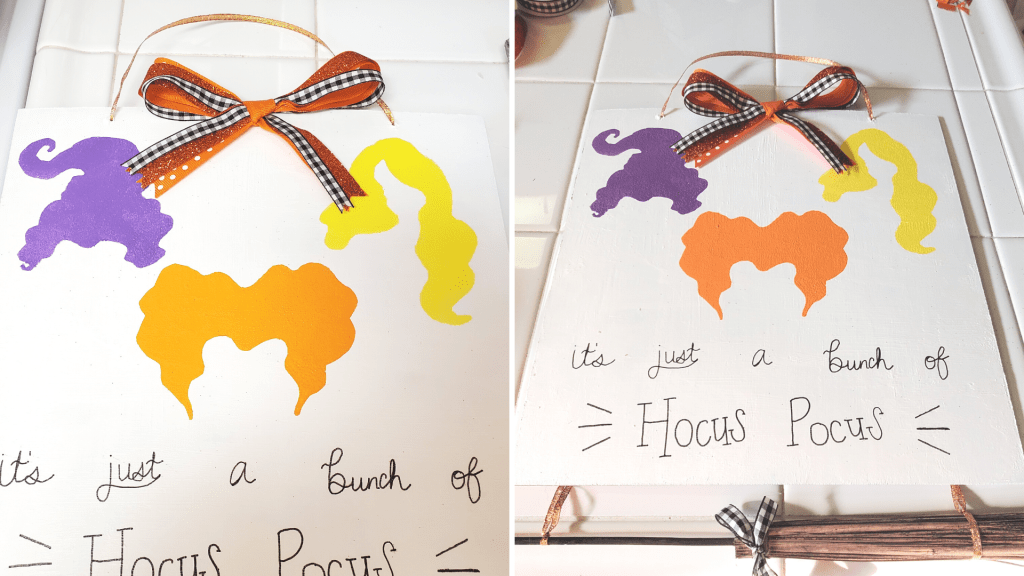
Now that your sign is completed, it’s time to add your hanger back on. You can reuse the the jute/string/ribbon that was originally on your sign, or feel free to use some new ribbon. I chose to use a thin, sparkly orange ribbon for my hanger and just slid it through the hole on the front of the sign and tied two small knots in the back (this way you won’t see the knots). Once you have your hanger tied on, your sign is finished!

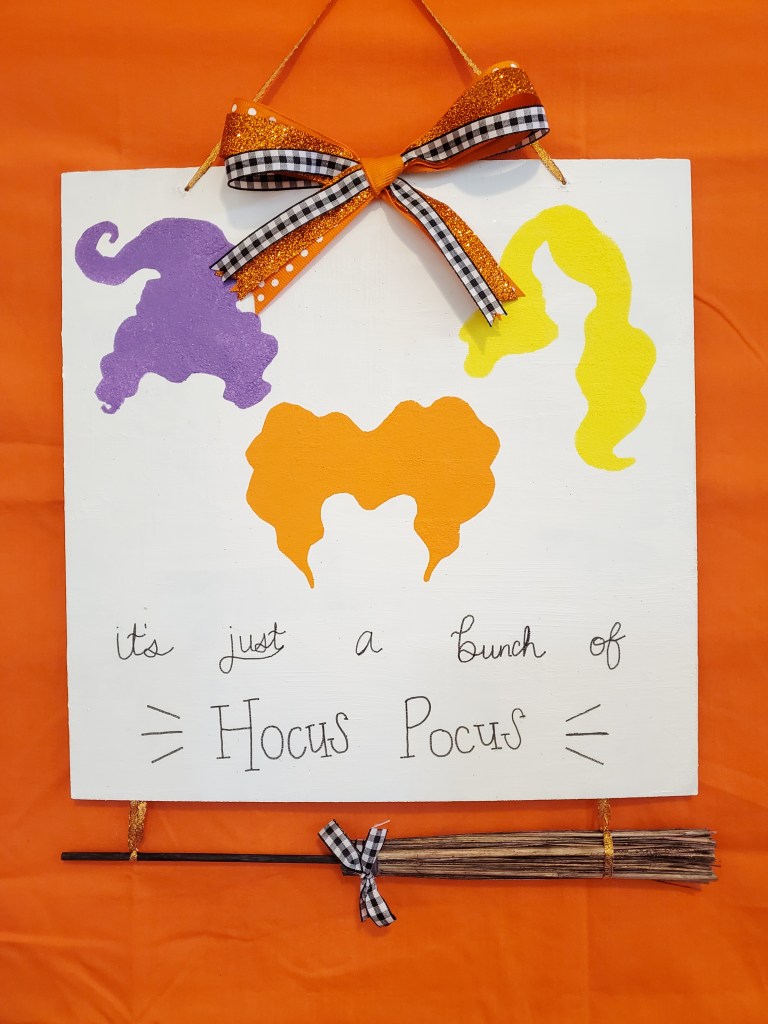
However, you can still add other embellishments if you so choose. I decided to add a bow that I made with a few strands of ribbon that I had lying around and hot glued the bow to the top center of my sign. To add a little extra flair to my sign, I added a witch’s broom (I found them at Dollar Tree) to the bottom of the sign. I just switched out the bow that was on the broom with a strand of one of the ribbons I used for the bow and tied some of the same ribbon I used for the hanger to either end of the broom and hot glued those pieces of ribbon to the back of the sign so it looked the broom hung down below the sign.
And there you go! How cute did this Hocus Pocus sign turn out?! I’d say it turned out pretty spooktacular if you ask me!
Remember to just have fun with it and to make it your own by adding whatever ribbons, embellishments, and paint you’d like!
As always, you can watch my video tutorial for this Hocus Pocus sign on my TikTok!
Witching you a very Happy Halloween!
