
Hang your stockings and say your prayers because Santa Claus comes tonight!
(Disclaimer: This post contains gifted product. The tie-dye kit used for this project was provided for free by Tulip Color, but this post is 100% mine and all opinions are my own. For full transparency, you can see all of The Colorventurer’s gifted posts by searching “gifted” on this site.)
If you’re anything like me, you probably like to hang a stocking up by the fireplace for Christmas. Each year, my family and I always put up the same Christmas stockings that we have had for ages on the mantle, and they have, in a way, become a focal point of our holiday decorations. Stockings are such a jolly part of our Christmas decor. For me, shopping for presents to put in everyone’s stockings is just as enjoyable as hunting for all of the other gifts. I love to add cute, whimsical trinkets for my family to find in their stockings on Christmas morning.

This year, I thought it would be fun to update my Christmas stocking with a brighter, more colorful version that I could personalize. Using a tie-dye kit, I crafted a vibrant stocking that I monogrammed with fabric paint to make them extra special for the holidays—and they sure look festive on the mantle!
Decorating a Monogrammed Tie-Dye Stocking can be a fun project for the entire family to create new stockings or update old ones. In fact, they would even make an adorable gift bag alternative for a friend or family member’s gift!
Read on to learn how to make your own Monogrammed Tie-Dye Stocking!
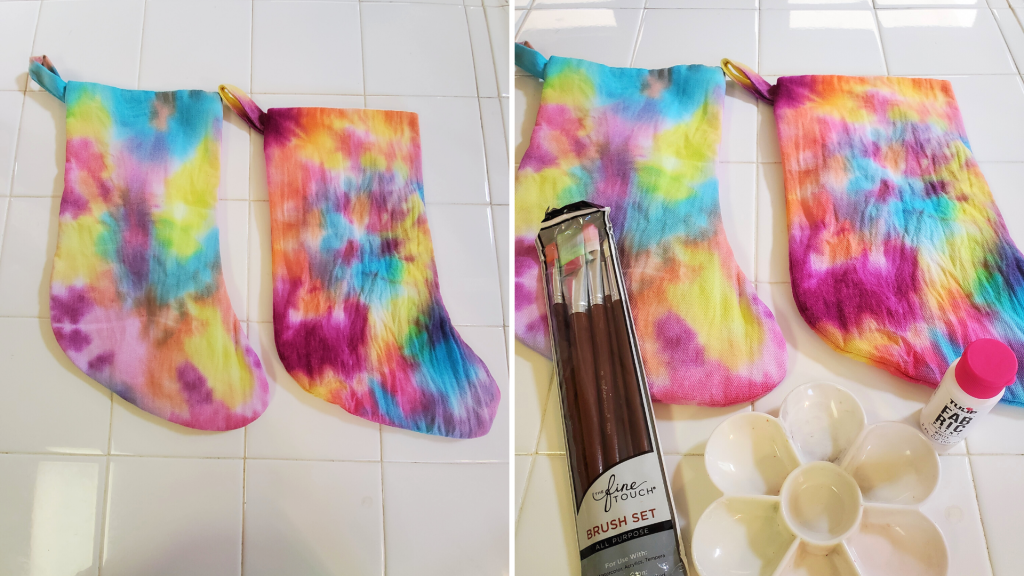
Here’s What You’ll Need:
- White canvas stockings
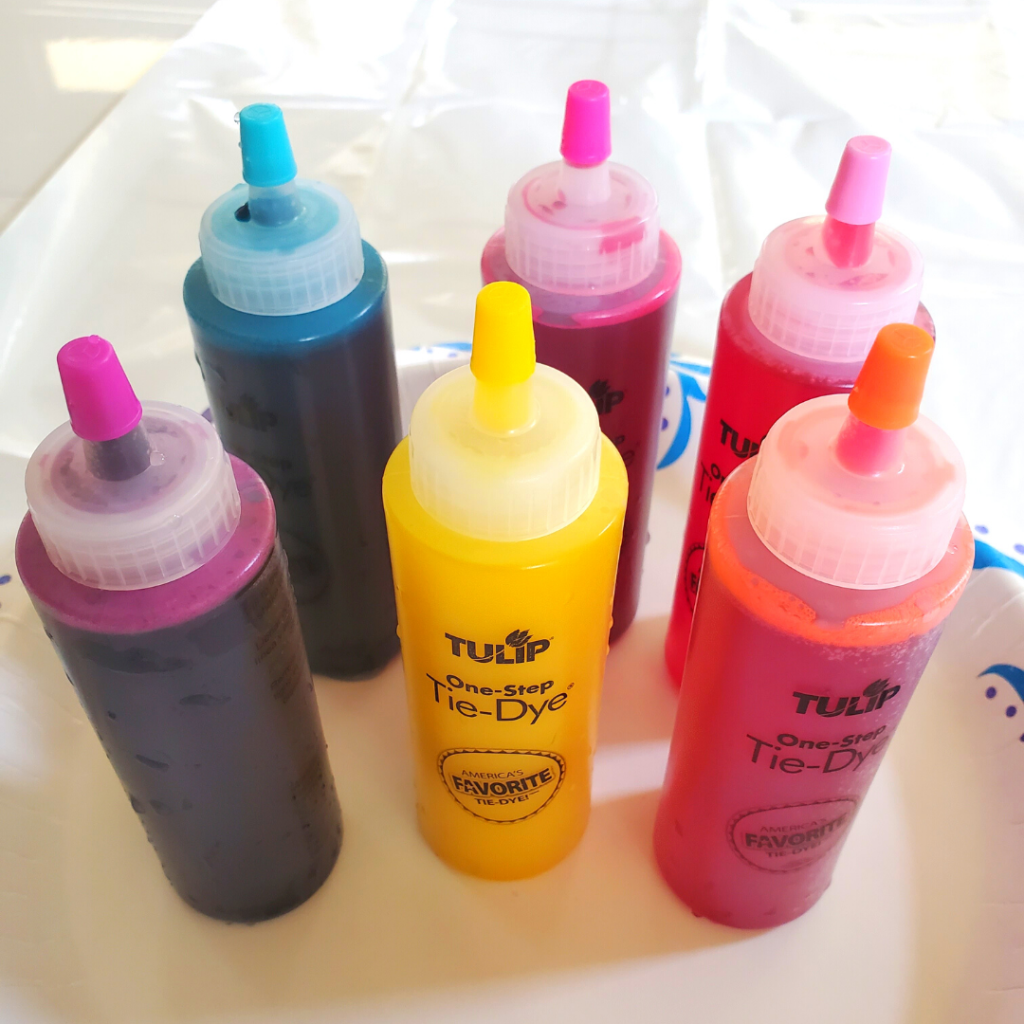
- A Tulip Color tie-dye kit (tie-dye kit was gifted by Tulip Color and included dye, gloves, rubber bands, and a table cover for tie-dyeing)
- White fabric paint (I used this one from Tulip Color)
- Paintbrushes
- Painter’s palette (or a paper plate to put your paint on)

How to Make Your Own Monogrammed Tie-Dye Stockings:
To start making your tie-dye stocking, run it under water to dampen it. The tie-dye process works best when the fabric is wet so you’ll get brighter and more blended colors. You could also throw your stocking in the wash, but since these were only going to be hung on the mantle for Christmas, I opted to simply rinse mine.

Once your stockings are damp, set them aside to prepare your dye according to the instructions on the package. Use whatever tie-dye colors are your favorite, or even use colors that match your Christmas decorations!
Next, tie your stocking up with rubber bands to create a pattern with your tie-dye. You can always leave your stocking flat and splash on your colors in different spots. I decided to wrap mine up in a circular motion to create a somewhat spiral effect. After you have your stocking tied up, don your plastic gloves (trust me, you’re going to want to have them on so you don’t get tie-dye hands!) and begin adding your dye!
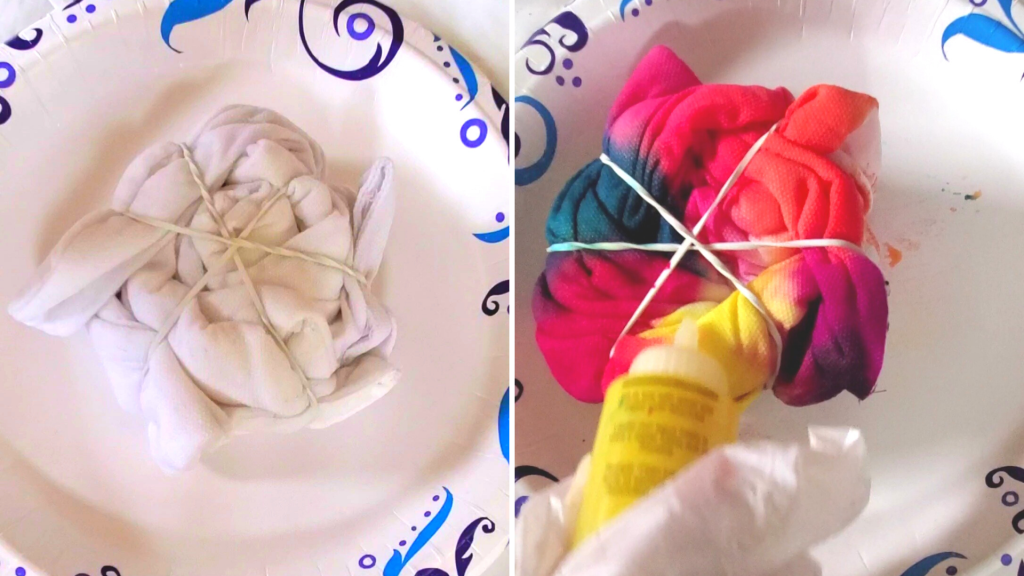
Apply your tie-dye colors to your stocking until you are satisfied with the coverage and design.
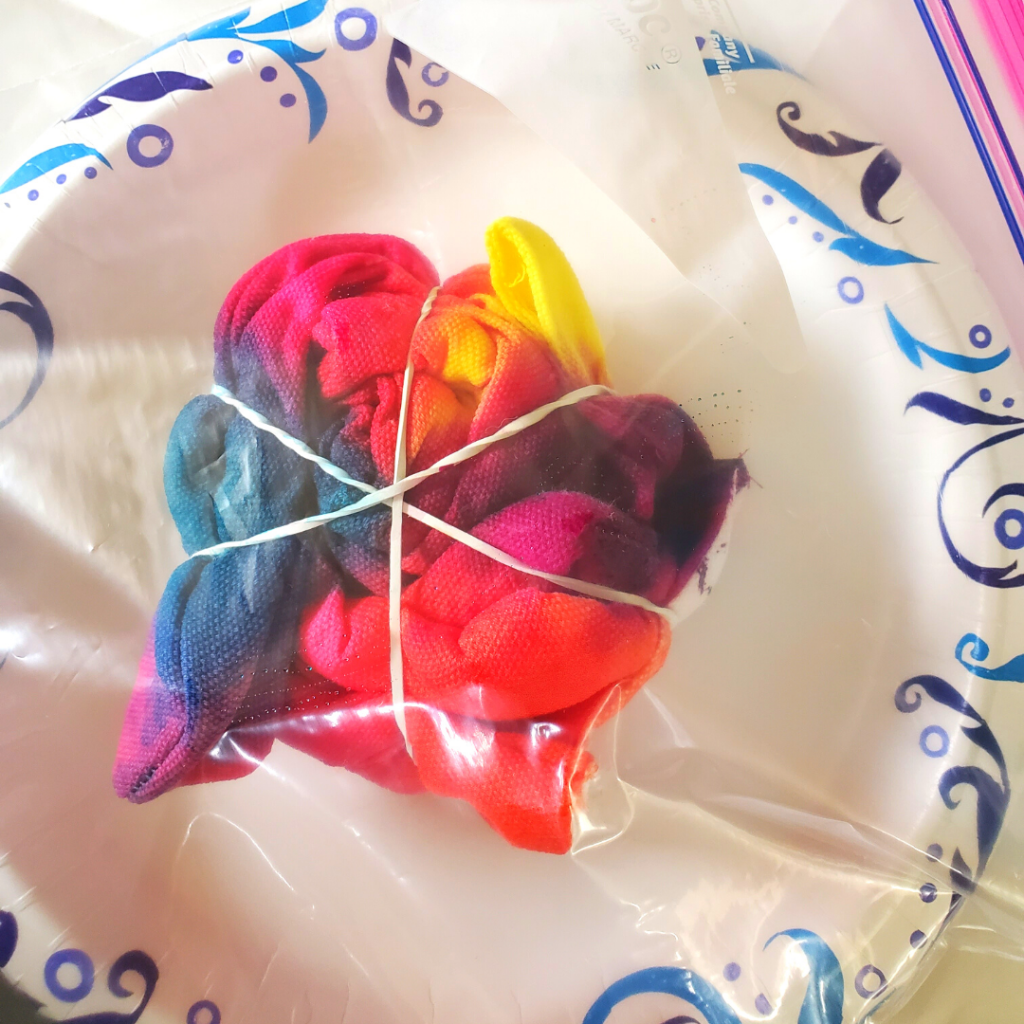
Once your stocking is completely tie-dyed, set it aside in a plastic bag for 24 hours to get maximum saturation for your color. You can always let it rest for less time for lighter, more pastel colors.
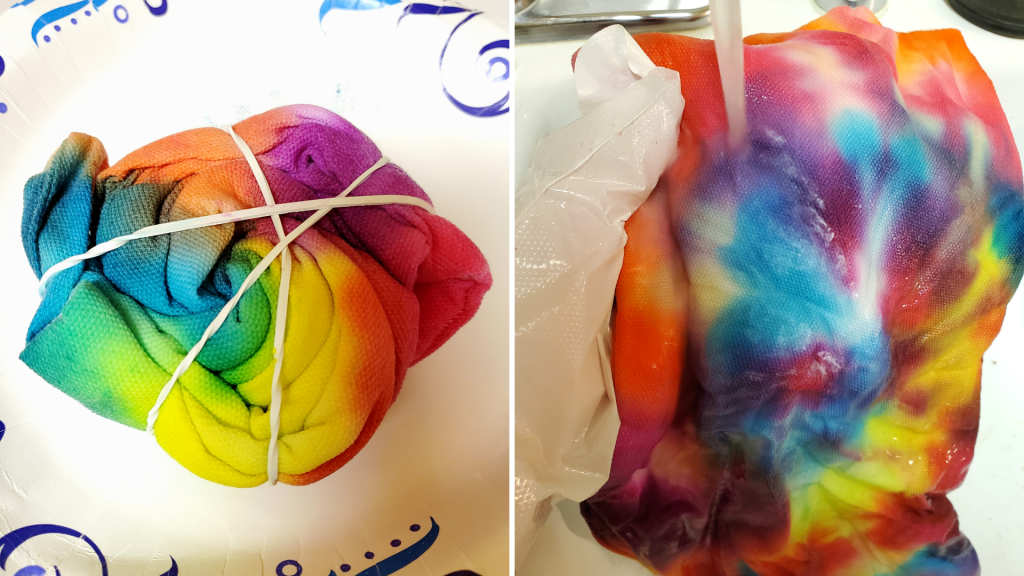
After letting your stocking rest for the color to soak in, carefully pull it out of the bag (make sure to wear your gloves again!), slide off the rubber bands, and rinse it with cold water to remove any excess dye. Keep rinsing it until the water runs clear.
Now, hang the stocking to dry completely. You could also opt to throw it in the wash to further remove any excess dye, but, again, since this was only for decoration at Christmastime, I decided that rinsing and letting it dry was perfectly enough. I found my stocking needed several hours to dry, but you could use a hairdryer to help speed up the process.
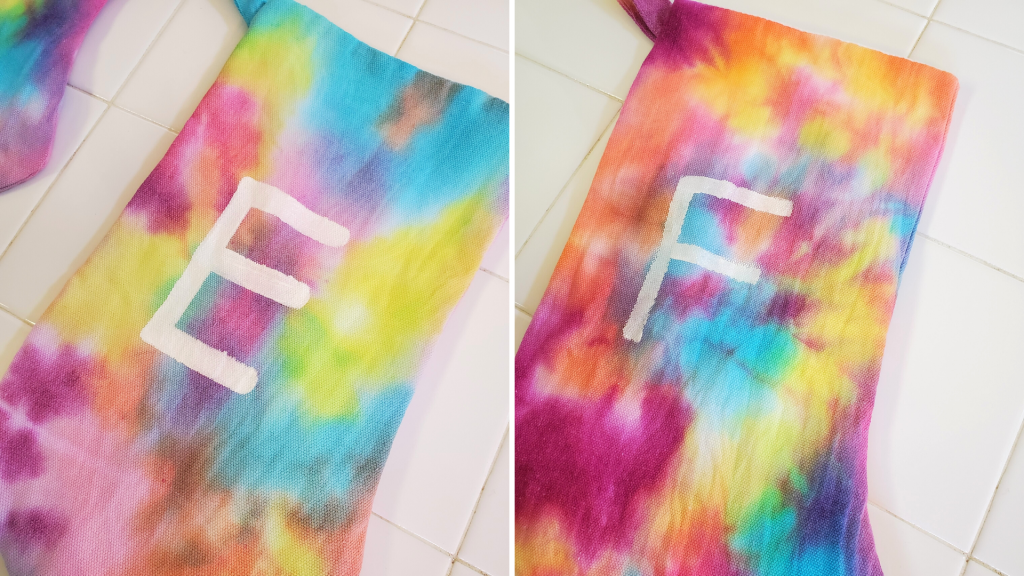
When your stocking is fully dried, it’s time to monogram it! I made my stockings for both my fiancé and me, so I added an “F” and an “E” to the stockings.
Using white fabric paint, I painted our initials on each stocking. You can paint your initial on either freehand or use a template. In addition, you can use a fabric spray paint to add on your initial. Apply as many coats as needed until you are satisfied with the brightness of your monogram (I applied two coats of paint), letting each coat dry fully before applying the next one.
Once you have your initial painted on, allow the stocking to dry completely before hanging it on the mantle.
There you go! Now it’s ready for your Christmas presents!
How cute and colorful are these Monogrammed Tie-Dye Stockings? Aren’t they so adorable on the mantle?

Would you make one of these festive, colorful stockings for Christmas? Let me know in the comments below!
As always, you can find the video tutorial for these Monogrammed Tie-Dye Stockings on my TikTok!
I hope you have a very Merry Christmas and don’t forget to hang up your stocking for Santa!

I think those santa stockings would add a nice splash of color to Christmas. This would be a fun Christmas project to do. We already having matching pajamas why not stockings too. Thanks for a great idea! 🎅👍
LikeLiked by 1 person
Matching stockings would be so fun! And they certainly make Christmas more colorful! So glad that you like them.
LikeLiked by 1 person