
Want to make some Easter decorations to add some cute bunny decor to your home? Learn how to create this easy decorative DIY Glass Jar Easter Bunny craft using dollar store glass jars and paint for a fun Easter decor idea!
One fun decorative element that I will never get over when it comes to spring is all the cute Easter bunnies. It always fills me with such joy to bring out my bunny decor because nothing brings more cheer than the Easter Bunny! After all, bunnies are just so cute, fuzzy, and cuddly!
This spring, I wanted to create a new and unique bunny craft for my Easter decor ideas and came up with this fun DIY Glass Jar Easter Bunny! Isn’t it fun?!

With some glass jars from the dollar store, paint, craft foam, ribbon, and other various crafting supplies that you likely have on hand, this DIY Glass Jar Easter Bunny turns out so adorable. While this project did take some time to put together, it was by no means a difficult project. (If I can do it, you can do it, too!) Plus, it was just such a fun project to make.

The best part about this DIY is you could easily personalize it to your spring and Easter decor style—from the paint to the ribbon you use. The options are endless, but the finished product will always be perfect for spring and Easter since it’s a bunny! This “hoppy’ little bunny would look lovely as a centerpiece, on an entryway table, or wherever you love to display your spring and Easter decor.
Read on below to learn how to make your own DIY Glass Jar Easter Bunny!
Here’s What You’ll Need:
- Two glass jars (like these small fish bowls from the dollar store)
- White black, and pink paint
- White and pink craft foam (with painter’s palette or paper plate)
- Ribbon
- Baking soda
- Paint brushes
- Pencil
- Scissors
- Hot glue gun

Here’s How to Make Your DIY Glass Jar Bunny:
To prepare the glass jars for making your bunny, wipe down the jars to remove any dust or dirt. Pour some white paint onto your painter’s palette or paper plate, add just a dash of baking soda to the paint, and mix it into the paint. I have found that using some baking soda (like when crafters create the pottery-like look when up-cycling glass vases) makes the paint thicker and helps it to stick to the glass better when painting. Paint the inside of two glass jars with the white paint (this will make it easier to decorate the outside of the bunny later) and set them aside to dry.
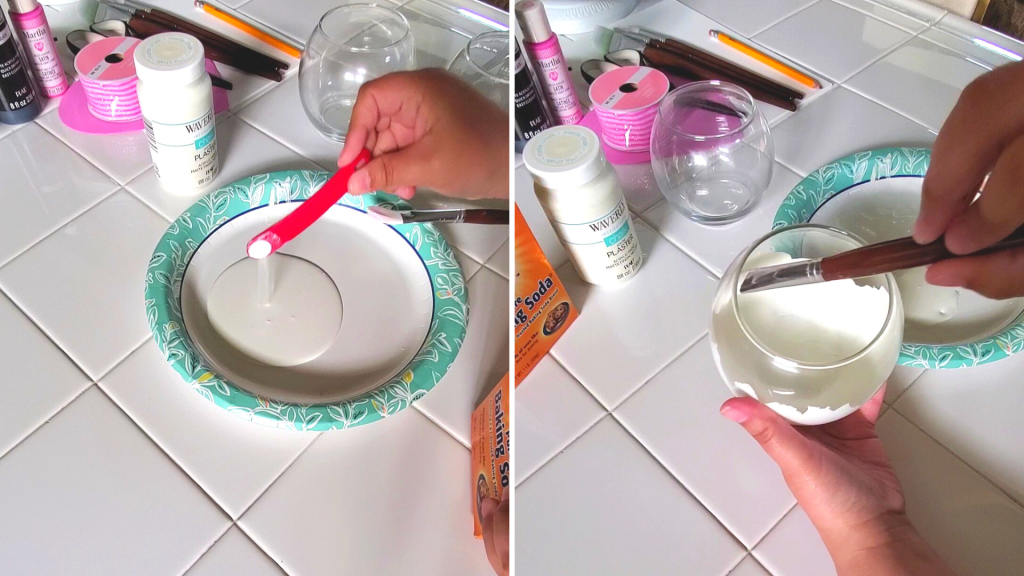
For my glass jars, I needed to paint a second coat after the paint dried, so paint as many coats as you need to get full coverage for your bunny, letting the glass jars dry completely between coats.
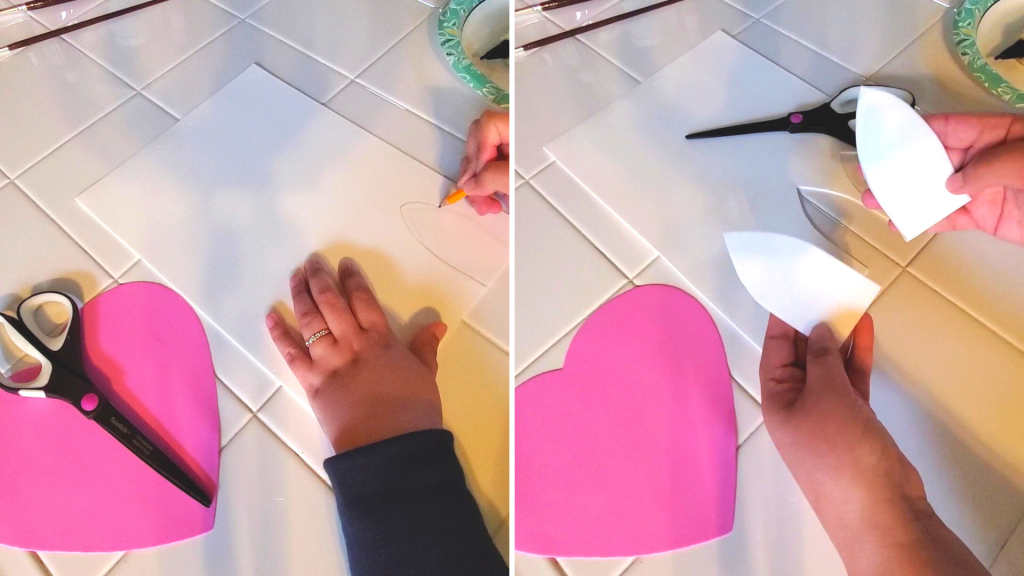
While you are waiting for the glass jars to dry, create the bunny ears. Using the white craft foam, draw out two bunny ears shapes. You can use a template to assist you or simply freehand them as I did. When you have one bunny ear drawn, cut it out and trace the ear on the craft foam so you have two, equally-sized bunny ears.
Now, repeat this process with the pink craft foam to create the pink within the bunny ear. This time, however, make the pink part smaller so it will fit within the outer white part for the ear.
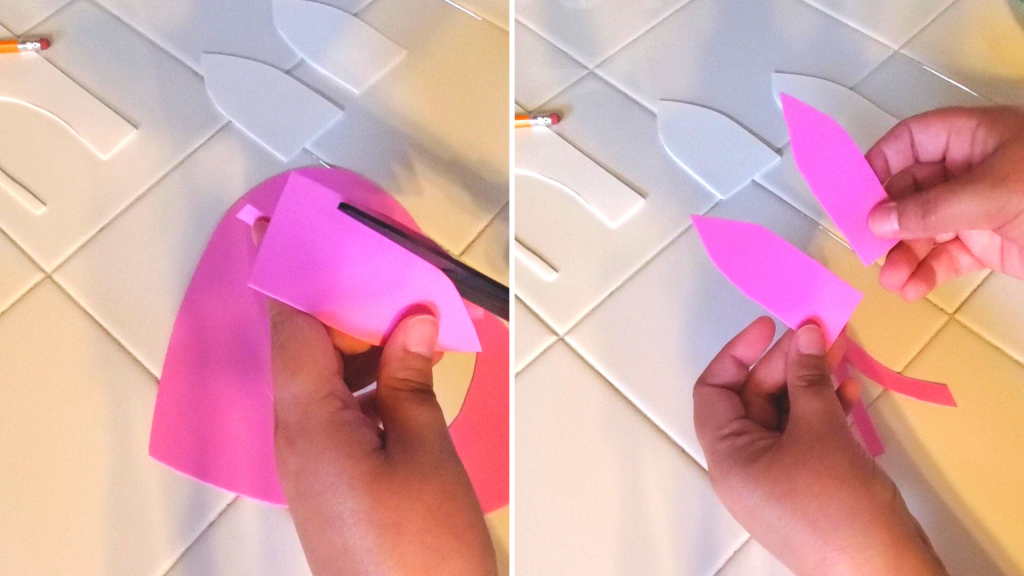
With all of the parts for the ear cut out, warm up the hot glue gun. Place a small amount of hot glue onto the pink earpieces and press them firmly onto the white pieces until they are dried.

Once the jars are ready, apply hot glue to the top rim of one of the glass jars, and, flipping the second jar upside down, place the upside-down jar on top of the hot glued-edge and firmly press down until the two jars are stuck together.

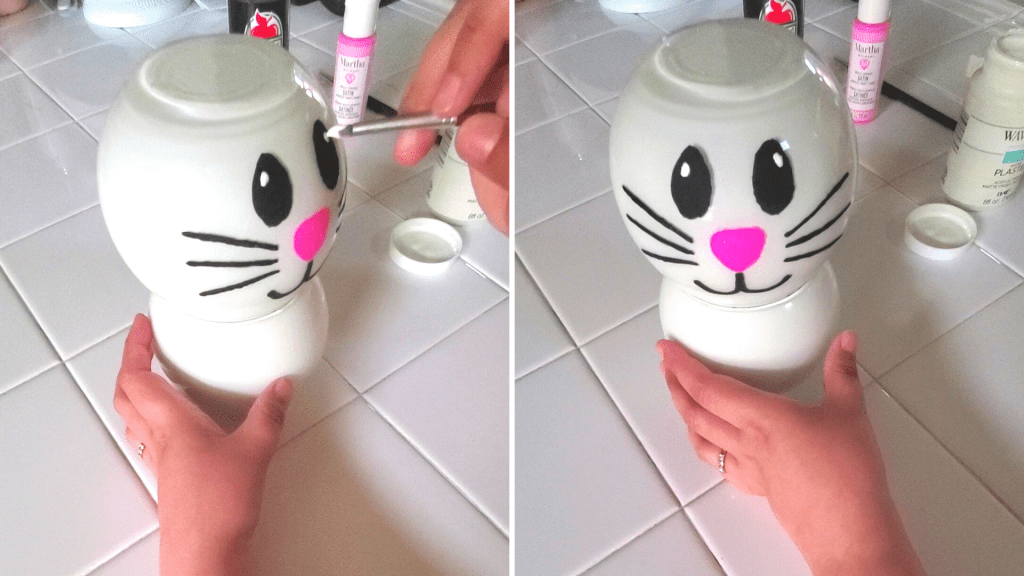
Now that the glass jars are glued together, create the bunny’s face on the top of the two jars. With some black paint, paint two oval-shaped eyes. Next, with pink paint, make an upside-down, rounded-edge triangle for the bunny’s nose.

For the bunny’s mouth, start by painting a line with the black paint underneath the nose and create two curved lips stemming from that line (like shown below). Of course, no bunny is complete without whiskers, so paint three whiskers on either side of the bunny’s face with the black paint.

Once the eyes are dry, take some of the white paint and create a singular small dot at the top, outer edge within each eye to make them appear more animated (like shown below). Let the bunny’s face dry completely before proceeding.
Using the hot glue gun again, attach the ears to the top of the bunny. Apply some hot glue on the bottom edge of the ears and press them down to the glass jar until they are dry.

Lastly, to give the bunny some extra flair for Easter, add a small bow to the front. You can use whatever Easter- or spring-themed ribbon you’d like, but I thought this pink and white-striped ribbon looked so cute. Also, this ribbon had a wire edge, which made it easier to fluff out to make it look fuller. Just make a simple bow, apply some hot glue to the center of the back of the bow, and firmly press it where the two glass jars meet, underneath the bunny’s face.

Now you have an adorable Glass Jar Easter Bunny!

Isn’t that the cutest little Easter Bunny you’ve ever seen?! It is just too cute, and it was pretty easy to create!
Would you make this little bunny for Easter? If so, how would you decorate yours? Let me know in the comments below!
As always, you can find my video tutorial for this DIY Glass Jar Easter Bunny with commentary to walk you through each step on my TikTok!
Before you go, make sure to save this post to your favorite spring Pinterest board by clicking on the Pinterest button at the bottom of this article!
Have a very hoppy Easter!

I’ll have to admit all your Easter decorating projects are just too darn cute. Thanks for sharing such great ideas. If I don’t run out of time I might attempt to do all of them. During this pandemic I’ve had extra time and doing things with my daughter has brought us closer together. Thank you 🙂👍
LikeLike