
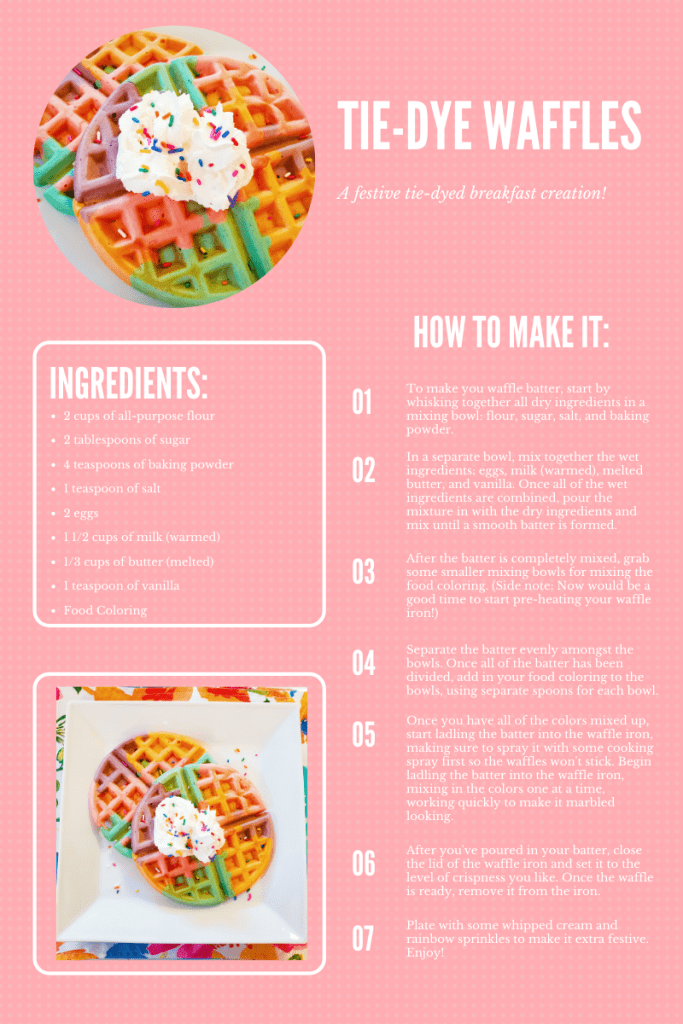
These vibrant waffles are an edible and fun tie-dyed creation.
If there’s one thing you should know about me, it’s that I always try to upgrade things and give it a super colorful Colorventurer makeover. Ha! One of my favorite things to jazz up is breakfast, because I think we should start out our days on a fun note. Why not? It’ll put you in that feel-good mood for the rest of the day.
When it comes to cooking breakfast, I often like to make the usual: pancakes, French toast, and waffles. But one day, as I was thinking about making waffles, I thought about how I could make it more exciting and put a colorful spin on it. I know that the tie-dye trend has been so unbelievably popular lately, so then it hit me: How about tie-dye waffles?!
They turned out absolutely adorable and they were so much fun! Here, I’m breaking down how to make Tie-Dye Waffles so you, too, can have a totally groovy breakfast.

Here’s What You’ll Need to Make Tie-Dye Waffles:
- Flour
- Sugar
- Baking Powder
- Salt
- Eggs
- Milk
- Butter
- Vanilla
- Food Coloring
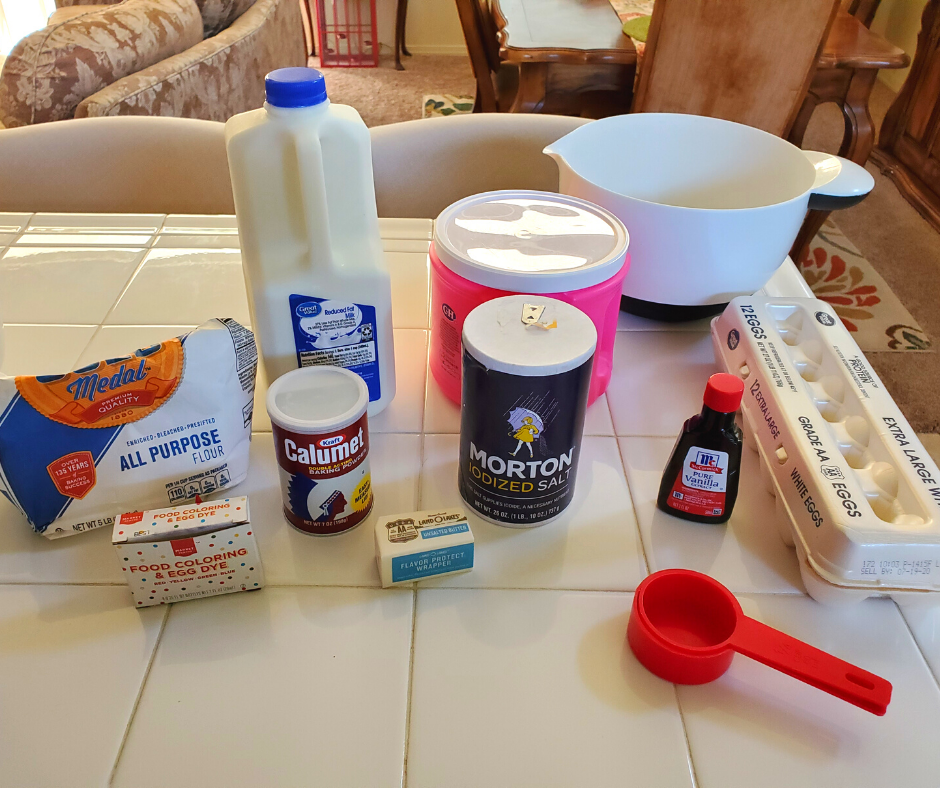
Other Various Items You Will Need:
- Lots of mixing bowls (2 for prepping the batter, and 1 bowl per each color you’d like for the waffles)
- Spoons for mixing
- Waffle iron
- Cooking spray
Making Your Tie-Dye Waffles:
To make you waffle batter, start by whisking together the dry ingredients in a mixing bowl: 2 cups of all-purpose flour, 2 tablespoons of sugar, 1 teaspoon of salt, and 4 teaspoons of baking powder. In a separate bowl, mix together the wet ingredients: 2 eggs, 1 1/2 cups of warm milk (make sure it’s not too hot), 1/3 cup of melted butter, and 1 teaspoon of vanilla. Once all of the wet ingredients are combined, pour the mixture in with the dry ingredients and mix until a smooth batter is formed.
After the batter is completely mixed, grab some smaller mixing bowls to mix in the food coloring. (Side note: Now would be a good time to start pre-heating your waffle iron!)
For my tie-dye waffles, I decided to use pink, purple, orange, and blue, so I used 4 bowls. Separate the batter evenly amongst the bowls. (I just used a measuring cup to help me so I knew each bowl had the exact same amount of batter.) Once all of the batter has been divided, add in your food coloring (you can use whatever colors you’d like) to the bowls.
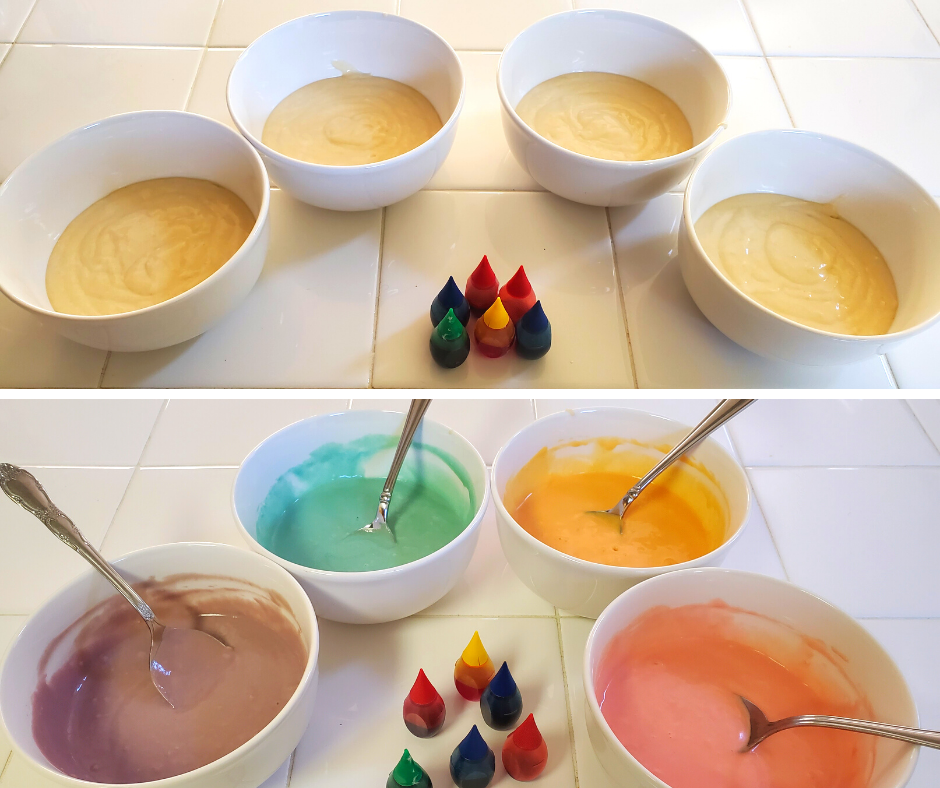
For the pink, I added in just a few drops of red; for the orange, I used about 5 drops of yellow and a drop of red; for the blue, I used about 5 drops of blue and a drop of green; and for the purple, I used about 7 drops of red and 2 drops of blue. Again, don’t be afraid to have fun with it! Use whatever colors you’d like and just keep adding small drops of food coloring here and there until you come up with a color that you love!
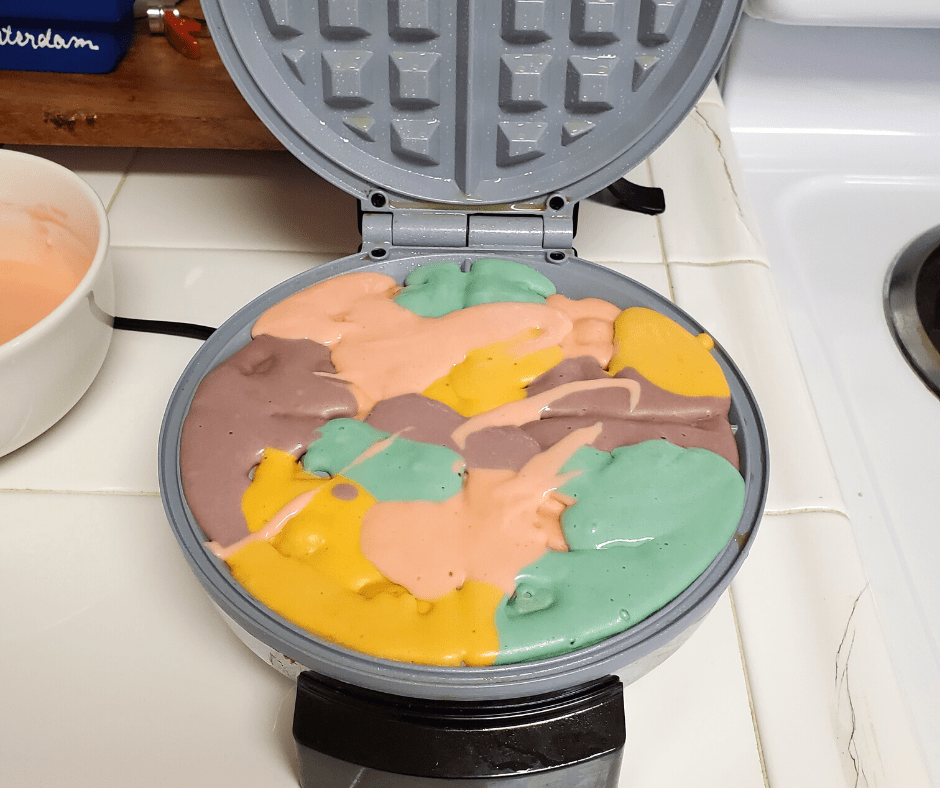
Once you have all of the colors mixed up, it’s time to head over to the waffle iron.
Before you start ladling the batter into the waffle iron, make sure to spray it with some cooking spray so the waffles won’t stick! Next, begin pouring the batter into the waffle iron. You can just use the spoons you used to mix the colors or use a ladle—just make sure to use a different one per color. Now, there is no rhyme or reason for pouring the batter into the waffle maker. Simply mix in the colors one at a time, working quickly to make it marbled looking. Also, don’t be afraid to go back and add some batter to any spots you may miss before closing the lid. You batter should look something like this (see picture below).
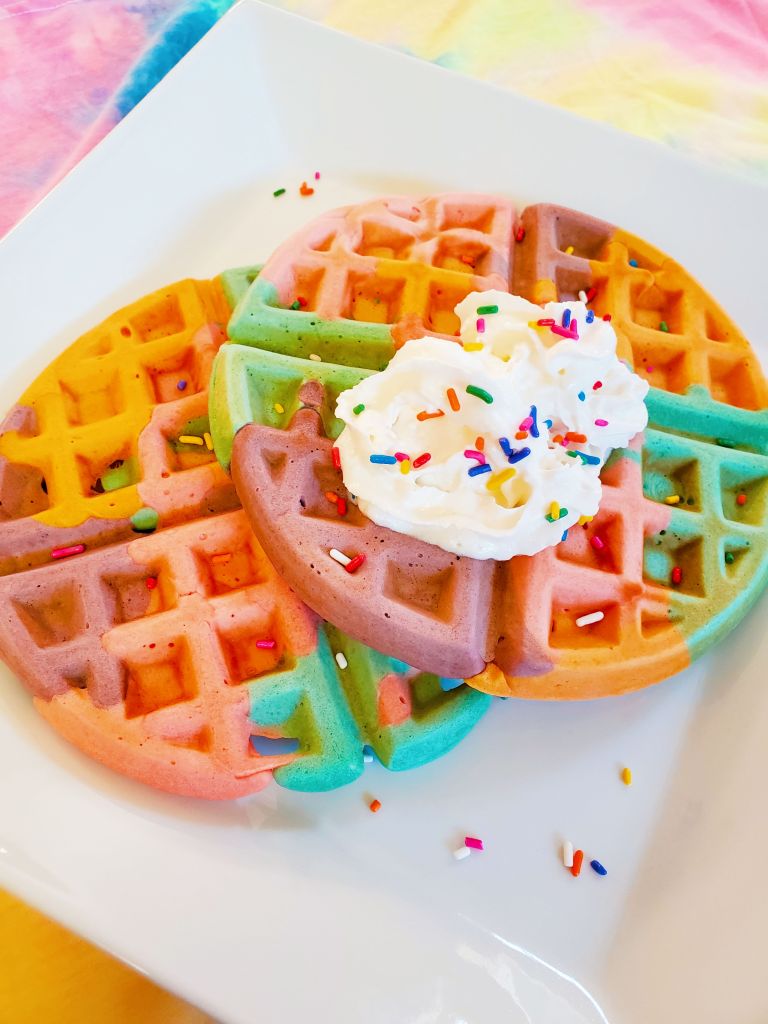
After you’ve poured in your batter, close the lid of the waffle iron and set it to your desired level of crispness. Once the waffle is ready, remove it from the iron and plate it.
I chose to plate mine with some whipped cream and rainbow sprinkles and look at how cute it turned out!
Overall, this batter will make anywhere from 4 to 5 full-sized waffles (depending on the size of your waffle iron). If you end up having leftover waffles, you can store them in a bag in the refrigerator after they’ve cooled for a few days. When you go to rewarm them for a future groovy breakfast later on, put them under the broiler for a couple minutes on both sides and they will be nice and crisp again.
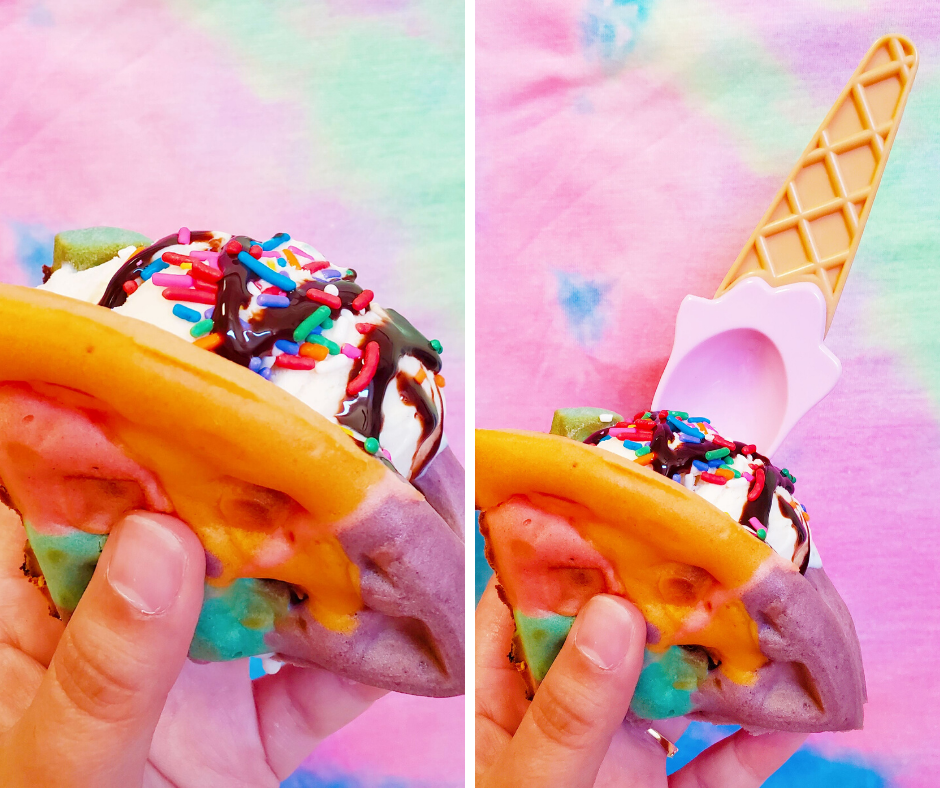
But these tie-dye waffles aren’t just for breakfast. They also make for a great dessert!
Using half of a waffle, I make some Tie-Dye Dessert Tacos and made the waffle into a shell. I filled it with some vanilla ice cream, chocolate sauce, and rainbow sprinkles. How fun is that?! The options for your tie-dye waffles are endless!
I hope you have a groovy time making these Tie-Dye Waffles! If you try them out for yourself, make sure to tag me on social media @thecolorventurer!
You can find the full recipe below, and watch the Tie-Dye Waffles tutorial video on my TikTok!

1 thought on “Put a Groovy Twist on Breakfast With These Tie-Dye Waffles”