
Don we now our fun and festive holiday apparel!
(Disclaimer: This post contains gifted product. The fabric spray used for the Snowflake Shirt was provided for free by Tulip Color, but this post is 100% mine and all opinions are my own. For full transparency, you can see all of The Colorventurer’s gifted posts by searching “gifted” on this site.)
One of the most enjoyable parts of Christmastime is getting all dressed up for the season. Oh what fun it is to don festive ugly sweaters, Santa hats, and other exciting, traditional holiday apparel. Wearing Christmas gear is a little bit like putting up all of the holiday decorations—it is a huge part of the aesthetics of Christmas! You contribute to the festive theme and bring the cheerful spirit of the festive season wherever you go. Plus, holiday apparel really does put a smile on everyone’s face! Christmas, after all, only comes one time a year, so why not celebrate it by wearing things that are a little bolder and brighter!

This year, to help you completely “sleigh” the holidays, I have created two fun t-shirt designs that “yule” absolutely love: a Snowflake and Santa Holiday Shirt!
With just a t-shirt, some cute die-cut, wooden templates, and some Tulip Color ColorShot Fabric Spray Paint, you can have some fun creating festive shirts for the holiday season! (Fabric spray paint for this the Snowflake Shirt was gifted to me by Tulip Color.) It’s also super easy to make!
These shirts make for a great family holiday project (how cute would these be for a family photo?!), gifts for a friend, or even just a fun treat for your “elf”.
Read on to learn how to make some festive Snowflake and Santa Holiday Shirts!
Here’s What You’ll Need:

- A t-shirt
- For the Snowflake Holiday Shirt, I used a white, long-sleeve t-shirt.
- For the Santa Holiday Shirt, I used a red, short-sleeve t-shirt.
- Tulip Color ColorShot Fabric Spray Paint
- Fun, die-cut templates
- For the Snowflake Holiday Shirt, I used wooden die-cut snowflakes from Hobby Lobby and Dollar Tree.
- For the Santa Holiday Shirt, I used a decorative wooden die-cut Santa from Hobby Lobby.
- Painter’s tape
- A t-shirt form or a piece of cardboard
- Paper to cover your work surface (optional)
Here’s How to Make Your Snowflake and Santa Holiday Shirts:
To begin making your holiday shirts, insert the t-shirt form or a piece of cardboard in between the layers of your shirt to ensure that none of the paint bleeds through the front of the shirt to the back.

Lay your shirt out on your paper-lined work surface. (The paper isn’t necessary, but I highly recommend you cover your work area to make sure you don’t accidentally get paint on it.) Now, get creative with your design!
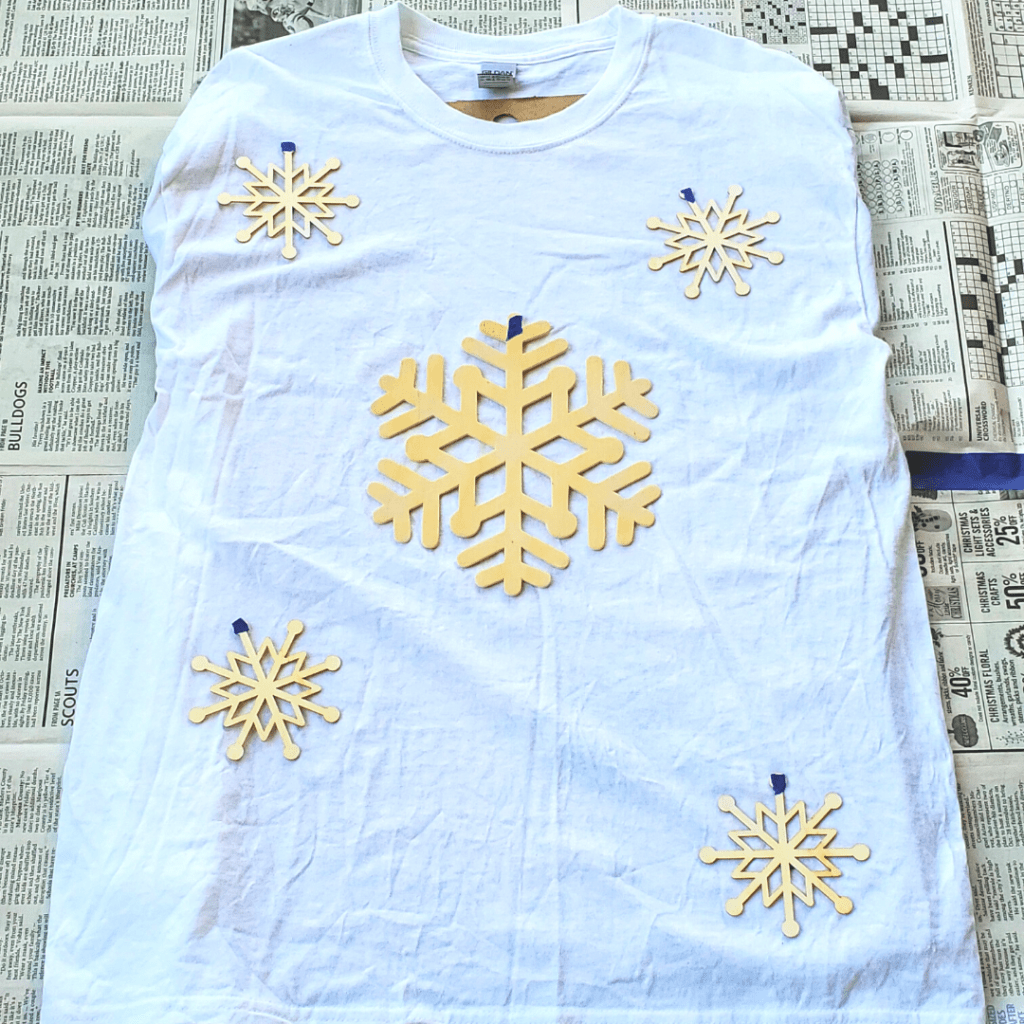
For the Snowflake Holiday Shirt, I took a large, wooden die-cut snowflake (this one was from Dollar Tree) and placed it in the center of the white t-shirt. From there, I laid out some smaller wooden die-cut snowflakes that I found at Hobby Lobby surrounding the larger snowflake to make it look like they were falling. You can line out your snowflakes however you would like. It’s your holiday shirt, after all, so have fun with it!
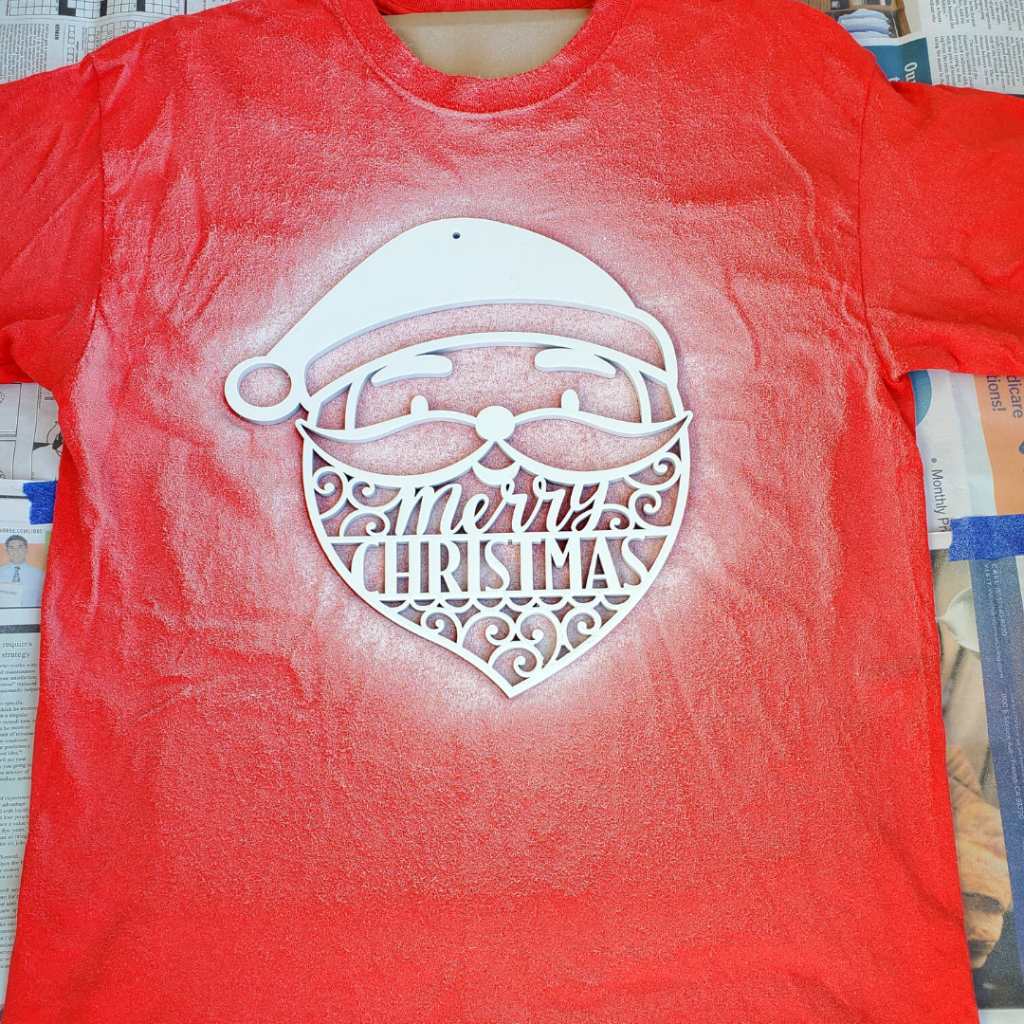
For the Santa Holiday Shirt, I found a fun decorative wooden die-cut Santa that said “Merry Christmas” on it at Hobby Lobby. I simply laid the Santa in the very center of the t-shirt.

With both of these shirts, you don’t have to use wooden templates (or decorative signs), but I do recommend it since they hold up really well when they are painted over. You could also try to use the fun felt designs at Dollar Tree, or even make your own out of felt.
After figuring out the placement of my die-cut templates, I gently lifted them up and put painter’s tape in strategic points on the back and pressed them down on the shirt. The painter’s tape will ensure that your template will not move when you are painting over them. Also, these wooden cutouts were also technically ornaments so I covered over the ornament hook hole with painter’s tape so the paint didn’t go through it and made a small circle in the design.
With your design laid out, it’s time to paint!
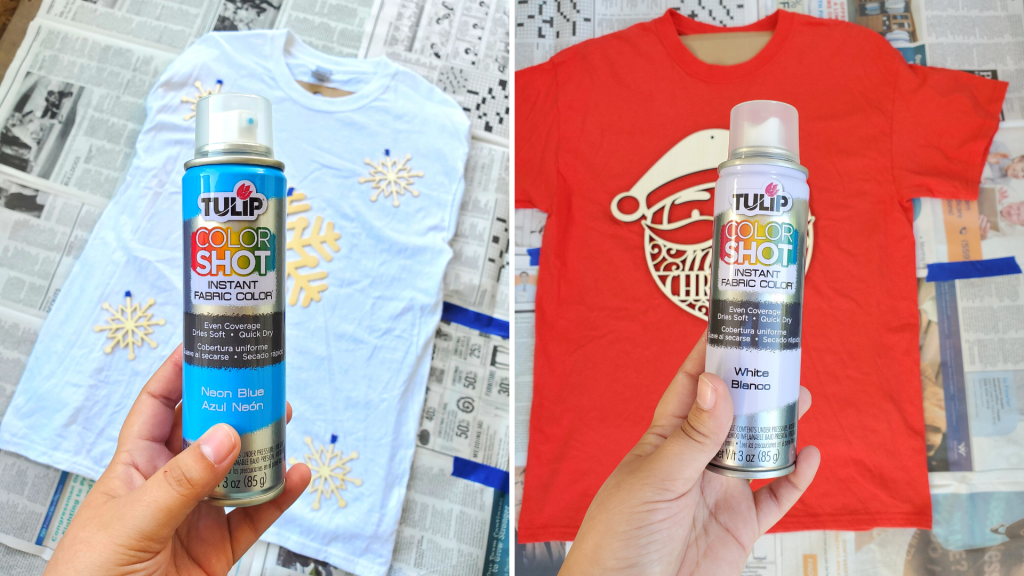
For the Snowflake Holiday Shirt, I took my Tulip Color Neon Blue ColorShot Fabric Spray Paint and sprayed in even strokes of the snowflakes, going over each dendrite, or arm, of the snowflakes. I made sure the paint was a little thicker while painting over the snowflakes to ensure that they would really pop against the blue once I removed the templates from the shirt.
Afterwards, I laid out the arms of the long-sleeve and gently sprayed over the body and sleeves of the shirt to give the shirt more of a falling snow effect.

For the Santa Holiday Shirt, I took my Tulip Color White ColorShot Fabric Spray Paint and sprayed over the design, making sure to get between the letters and intricate parts of the template. I also sprayed lightly all around the design to give it a snowy look.
Once you have finished painting your shirt, allow it to sit and dry for 30 minutes.
After your shirt is completely dry, carefully lift your template off of the shirt and marvel at your new Christmas shirt!

How cute are these shirts?! I think they are so festive for the holiday season!

What do you think of these Snowflake and Santa Holiday Shirts? Or what’s your favorite thing to wear during the holidays? Let me know in the comments below!
As always, you can find the video tutorials for the Snowflake Holiday Shirt and Santa Holiday Shirt on my TikTok!
I hope “yule” have a very Merry Christmas!

I’m definitely one of those type of people that like to wear festive shirts during the Christmas season. So your craft idea comes at a perfect time. I also like your idea of doing a family picture with these, because we love to do that for our Christmas cards. I’m excited to give a try! ❄🎅
LikeLiked by 1 person
That is so awesome! I’m glad you like this fun and easy holiday craft! Making these shirts for a family Christmas photo would be absolutely adorable! I hope you have fun creating your own holiday shirt, and be sure to check out this fabric spray!
LikeLiked by 1 person