
Let’s be jolly, so deck the halls with boughs of holly…and this little Christmas tree made from terra cotta pots!
It’s officially time to start rockin’ around the Christmas tree!
Putting up the Christmas tree is, hands-down, my favorite thing to do during the holidays. There is just something so magical about a Christmas tree with all of its twinkling lights, shiny decorations, and glistening tree topper. It fills my heart with such joy! Plus, you know that Christmas is officially here when the tree is up.
I wanted to bring the magic of the Christmas tree throughout the home, so I made a miniature Christmas tree using only terra cotta pots, paint, and a fun, little tree topper!

This little Christmas tree would make for a great mantle or tabletop decoration or even a cute gift for a friend. Even better, these trees can be made in whatever color scheme you like so you can match all of your or your recipient’s holiday decor! Super festive and easy to make, this DIY Terra Cotta Pot Christmas Tree will make your holiday even more magical.
Read on to learn how to make this DIY Terra Cotta Pot Christmas Tree!
Here’s What You’ll Need:
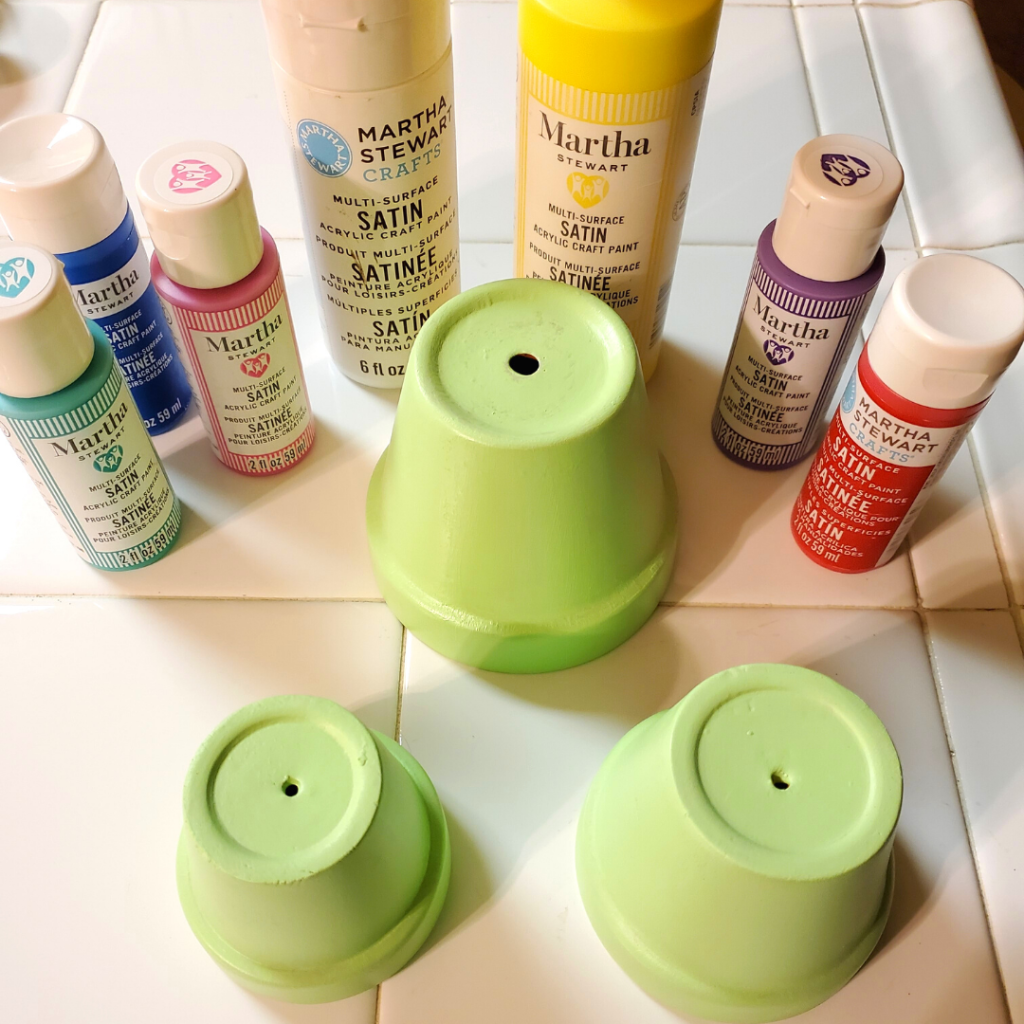
- An assortment of colorful paint
- For the tree, I went with the traditional green and used Martha Stewart’s Multi-Surface Satin Acrylic Craft Paint in Pistachio.
- For the ornaments, I used Martha Stewart’s Multi-Surface Satin Acrylic Craft Paint in: Wedding Cake, Sunshine Yellow, Hot Pink, Lavender Fields, Habañero, Indigo, and Jungle Green.
- Paintbrushes (I also used Q-tips to help me create the ornaments!)
- Stackable terra cotta pots
- Tree embellishments (My miniature tree topper is from Hobby Lobby.)

How to Make Your DIY Terra Cotta Pot Christmas Tree:
For this project, I used three small terra cotta pots to build the tree. You can use as many as and whatever size you’d like—just make sure they can all be stacked on top of one another.

Start by painting each terra cotta pot with your base color. Since I wanted mine to look more like a traditional Christmas tree, I went with green paint (Martha Stewart’s Multi-Surface Satin Acrylic Craft Paint in Pistachio). However, you can paint the base of your tree whatever color you’d like to match your holiday aesthetic, whether that be a traditional green, a festive red, or even a bold pink!
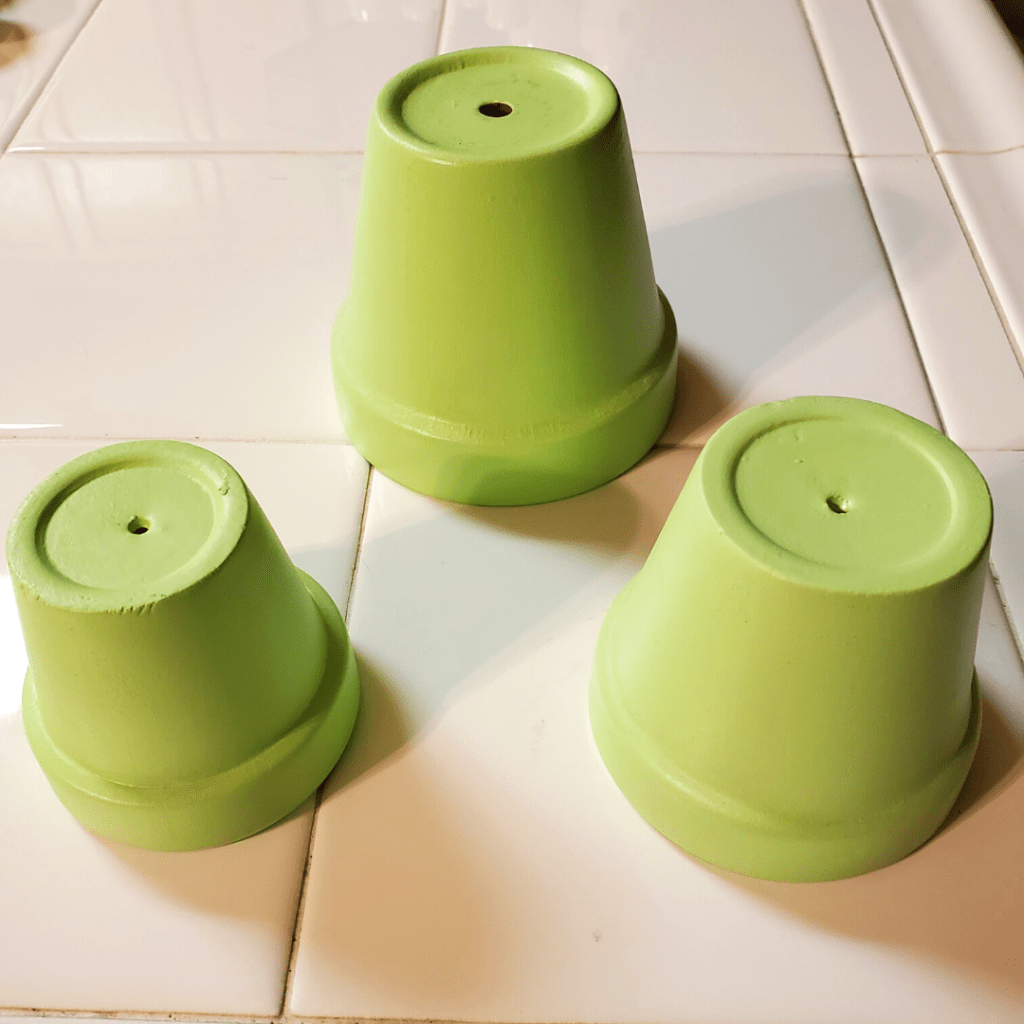
After painting each terra cotta pot, I set them aside to dry completely before adding on any embellishments.
Once the terra cotta pots are dry, I began to paint on little “ornaments” on the tree. I painted the ornaments on each individual terra cotta pot first versus stacking them then adding the ornaments, so if I ever unstacked them/reused them, they would all have the fun and colorful polka dots.
For the ornaments, I actually used a Q-tip since they would make a perfect, small circle. Using an assortment of colorful paints (I have all the paint colors listed above in the supplies list), I dipped one of the Q-tips into the paint and carefully dabbed it onto the terra cotta pots. There was no rhyme or reason for the placement of the ornament dots; I only made sure not to have any particular color to close to each other. But, of course, use whatever colors you like, or even just paint you have on hand! Just have fun with it!

After all the ornaments were painted on, I let the terra cotta pots sit to dry again.

Meanwhile, as they were drying, I hot glued the tiny tree topper I picked up from Hobby Lobby to the top (the smallest) terra cotta pot so my tree had the quintessential Christmas tree embellishment. You could, of course, add ribbon trim to your terra cotta pots or any other fun Christmasy items once they dried. Again, make your Christmas tree yours to fit your holiday aesthetic!

Once everything was completely dry, I stacked my three terra cotta pots to create my Christmas tree!
Isn’t it the cutest little Christmas tree you ever did see?!

You bet I’ll be rockin’ around this cute, little DIY Terra Cotta Pot Christmas Tree!
And, as always, you can check out the video tutorial for these DIY Terra Cotta Pot Christmas Tree on my TikTok!
I hope you have a rockin’ Christmas!

I really like this idea. The idea for a centerpiece or a gift idea is really good. And with the colors you chose i can see using them in the spring! Thanks for showing us all these great ideas i appreciate it. I know I’ll be rocking around the Christmas 🎄
LikeLiked by 1 person
I’m so happy to hear that you like it! Yes, choosing the colors is the best part because you can tailor it to your taste or even make it so it’s matches the different seasons. Have a rockin’ Christmas!
LikeLiked by 1 person