
This DIY Snow Globe is super easy to make and is perfect for a holiday gift or for your Christmas decorating!
Growing up, I always loved to collect snow globes. There was something so magical about turning the snow globe upside down, twirling it, and turning it right-side-up again, watching the flurry of snow swirl around a cheery snowman or a forest of trees until slowly drifting down over the miniature scene inside. It simply captured the wonder of the winter season. Seeing that they are such a big part of the holidays with their traditional wintery scenes, I thought it would be fun to make some of my own snow globe magic for the holidays.
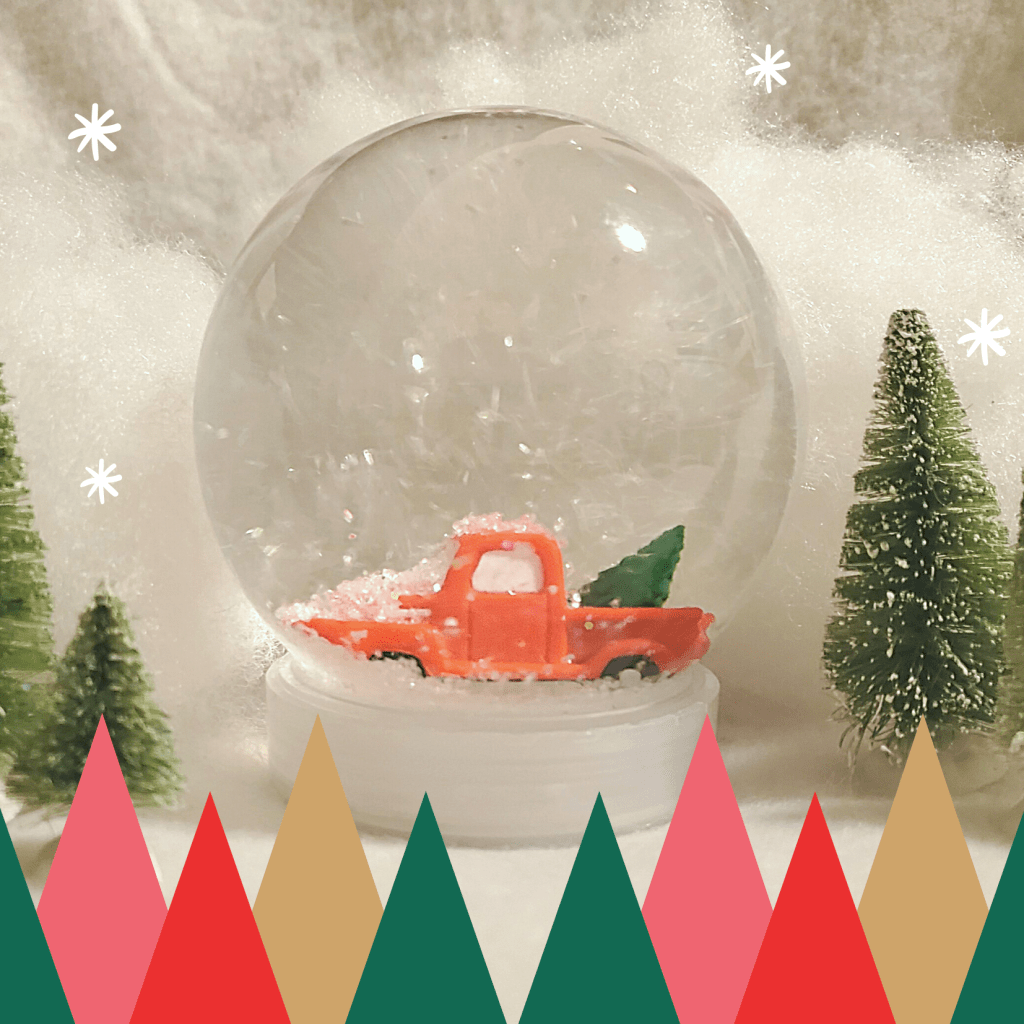
Only requiring a few items, a snow globe is actually surprisingly easy to make. This DIY Holiday Snow Globe would be the perfect Christmas gift to someone you cherish or even as just a new piece to your holiday decor. While it can certainly be made in no time at all, this snow globe will surely create lots of magical memories for holiday seasons to come.
Read on to learn how to make you very own DIY Holiday Snow Globe!
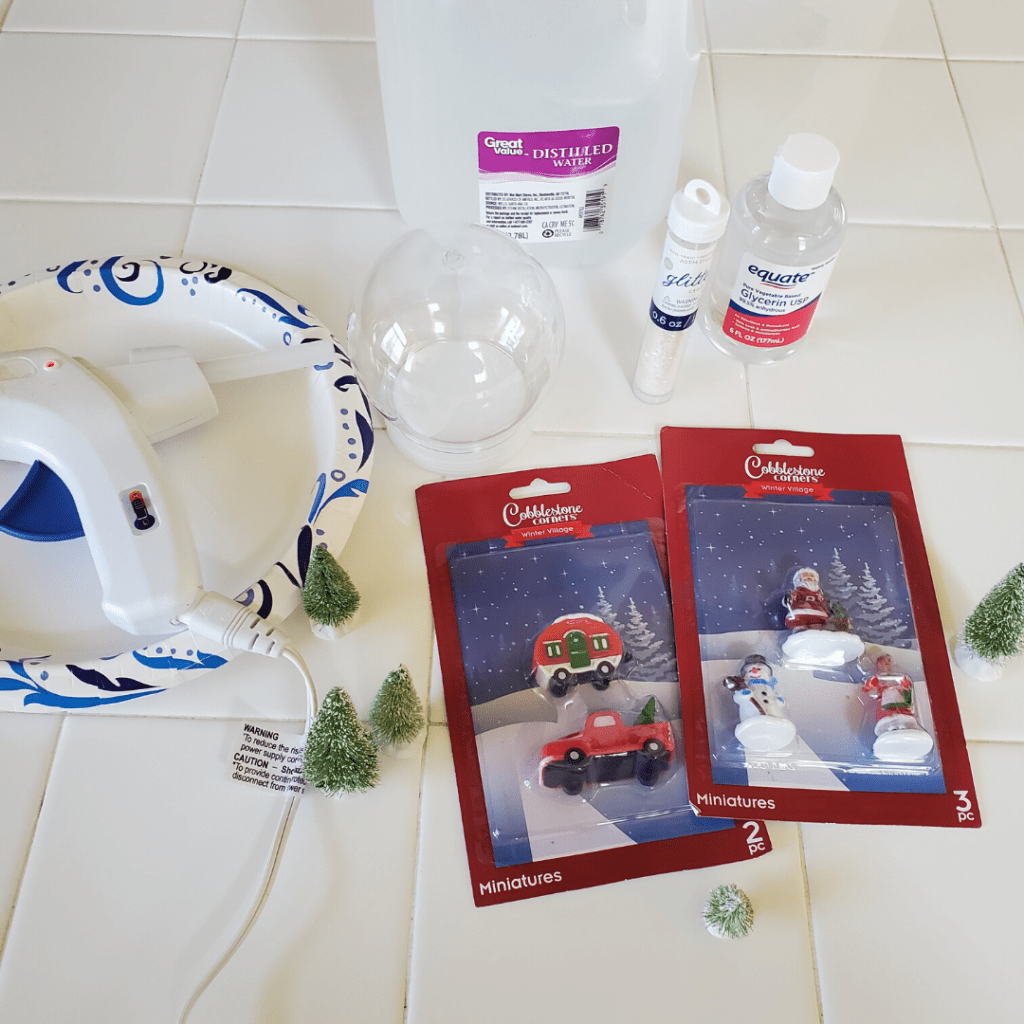
Here’s What You’ll Need:
- A shatterproof water globe
- Focal piece(s) for your snow globe
- Glitter
- Distilled water
- Hot glue gun/glue
- Glycerin (optional)
How to Make Your Own DIY Holiday Snow Globe:
For my snow globe, I used a shatterproof water globe I found at Hobby Lobby, but you can easily use an old glass or plastic jar (i.e. a mason or pickle jar) for your snow globe. Use whatever you have on hand!
To start, I disassembled my water globe by removing the lid and seal.

Using my hot glue gun, I glued my figurine for my snow globe onto the top of the seal. If you use an old jar, just glue your figurine onto the inside on the jar’s lid. In addition, make sure that the focal piece easily fits within the seal or lid so the top can be replaced on your water globe or jar.
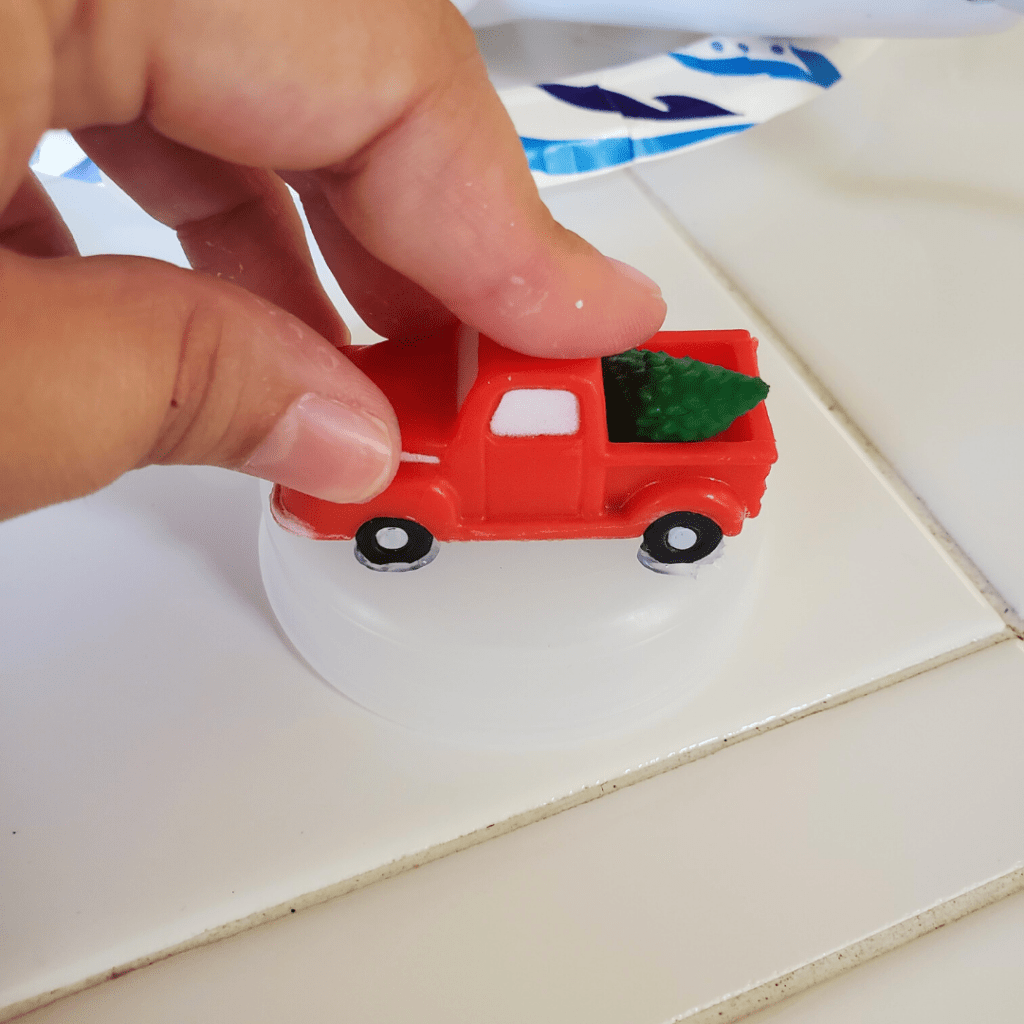
Set aside the seal to allow for glue to completely dry.
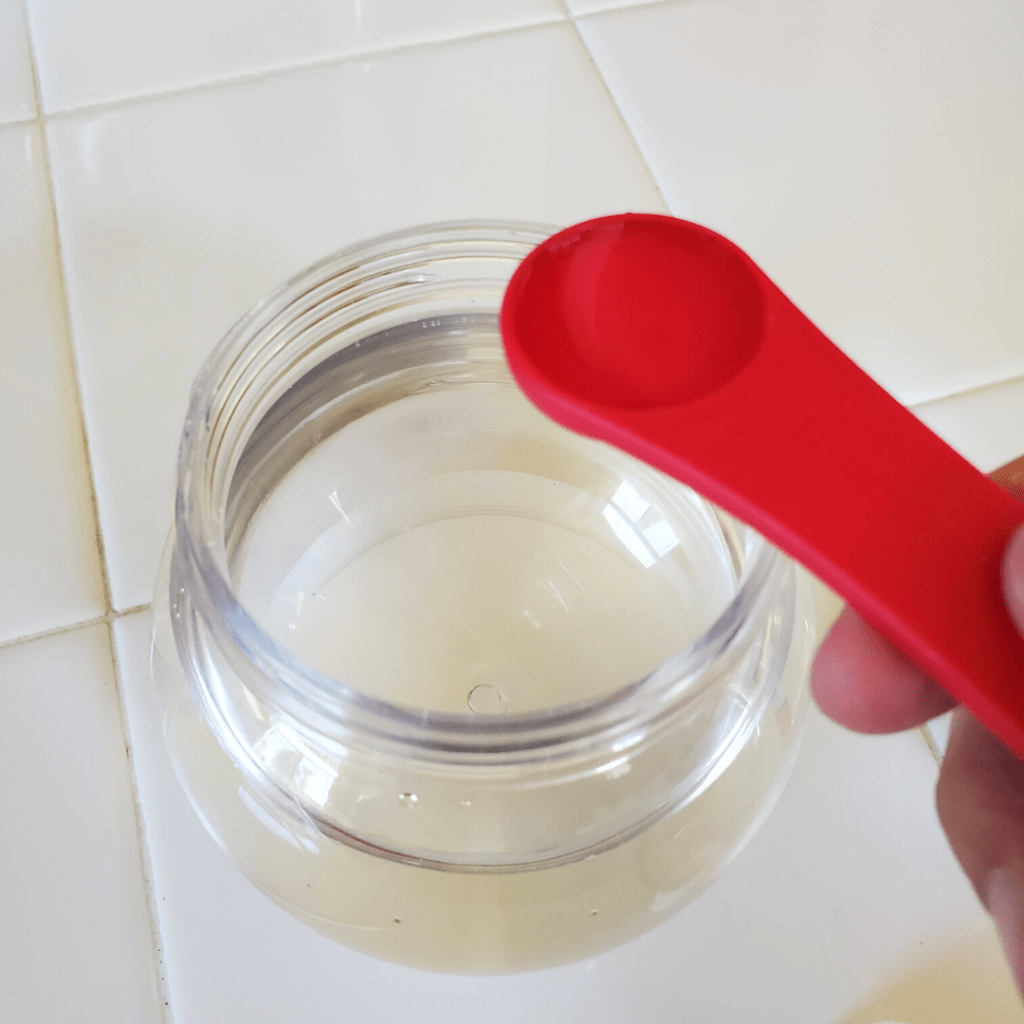
Once the figurine has dried to the seal, it’s time to fill the globe with water.
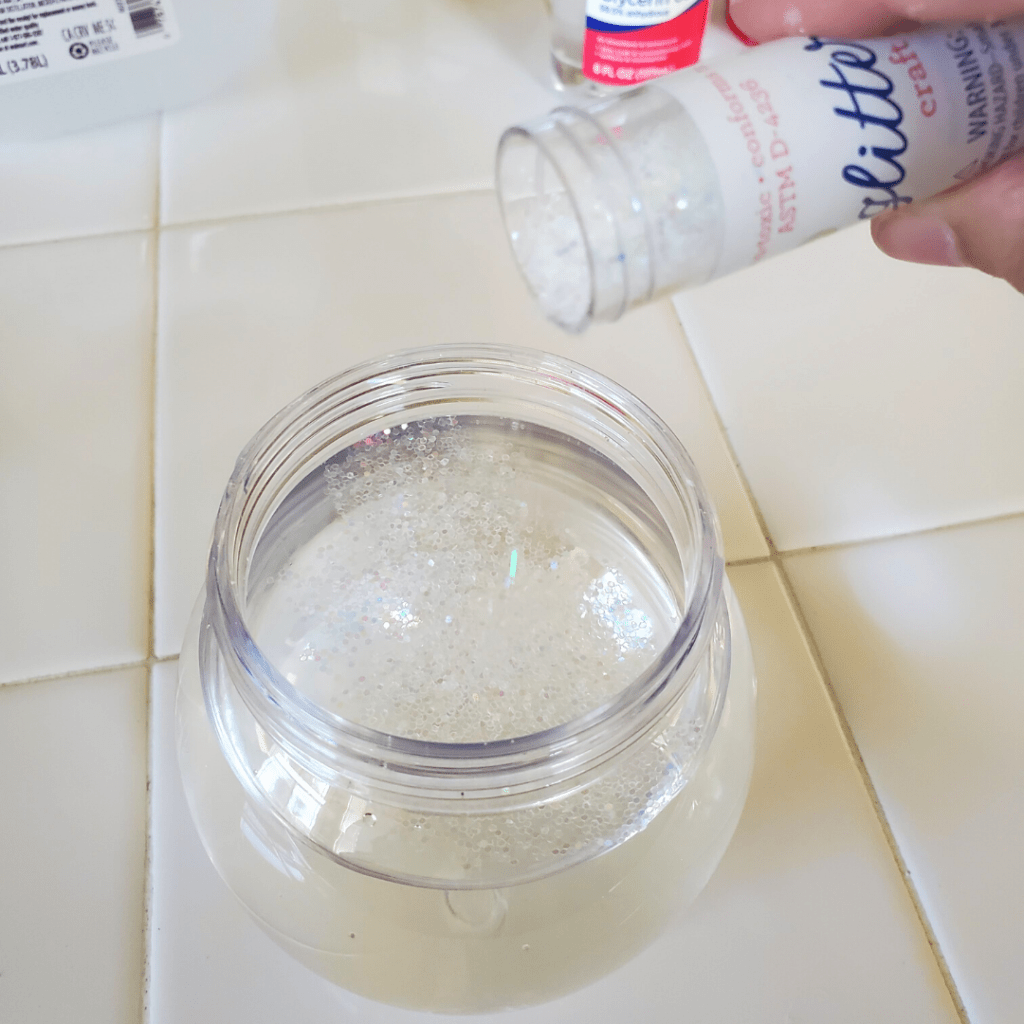
Fill your globe with your distilled water, making sure to not fill it all the way to the top as water will be displaced when the figurine is inserted into the water.

Next, add two teaspoons of glycerin and mix it in with the water. The glycerin is optional, but it does make the flurry of glitter “snow” really swirl inside of your snow globe.
After you mix in the glycerin, sprinkle in your glitter. You can add as much or as little as you’d like depending on how “snowy” you want your snow globe to appear.
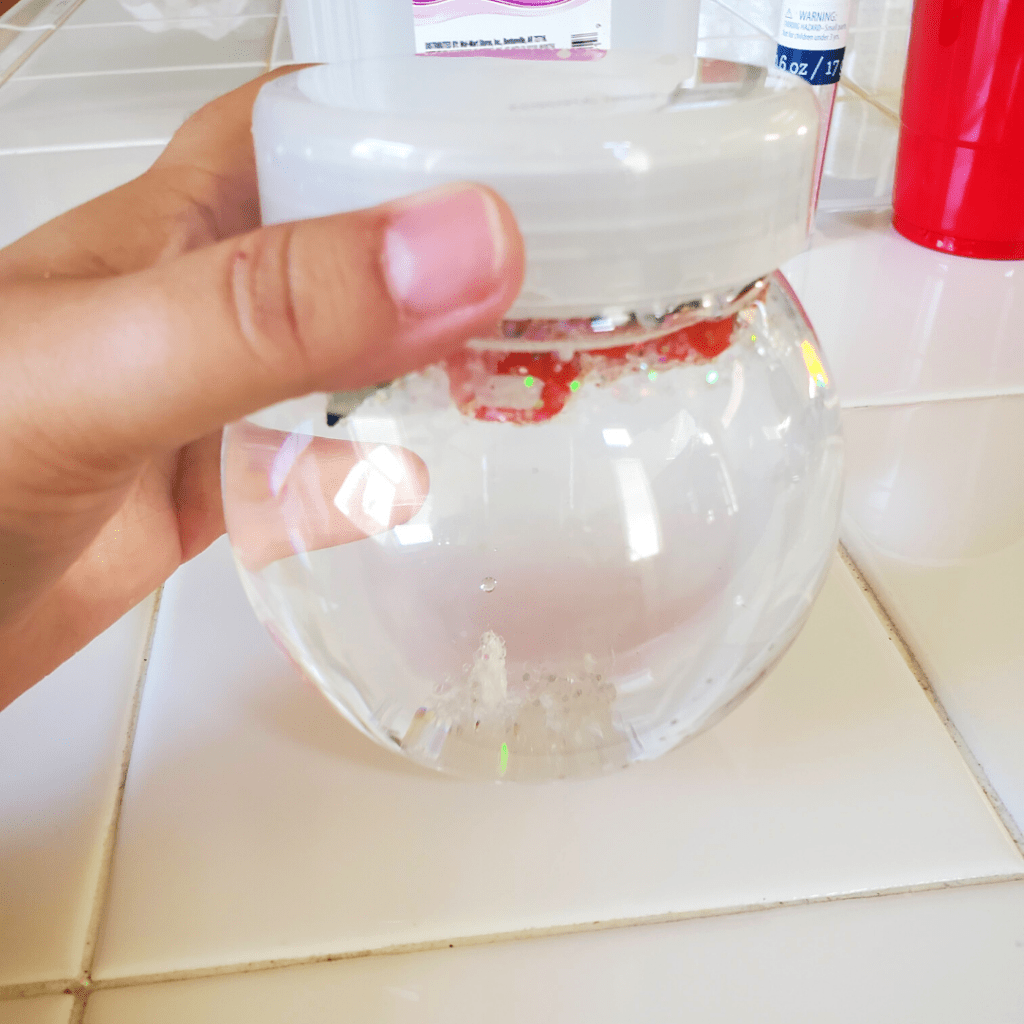
Insert the seal with the figurine into the globe water, carefully pushing the seal down until it is flush with the globe rim. Then, screw on the base, making sure it is screwed on evenly. If you’re using an old jar, gently place the lid with the figure into the water and screw the lid on tightly.
Turn your snow globe right-side up and give it a good swirl. Watch the snow go!
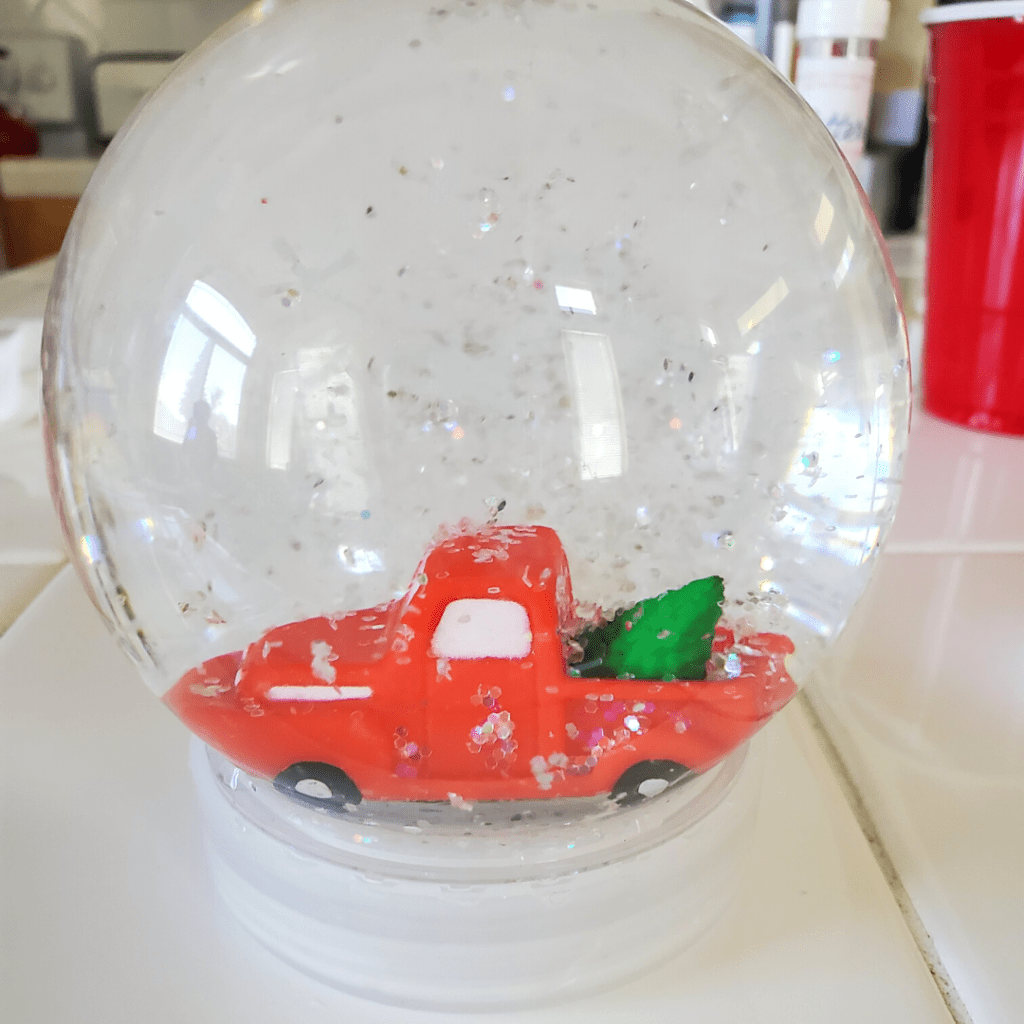
Isn’t that the most magical thing ever?!
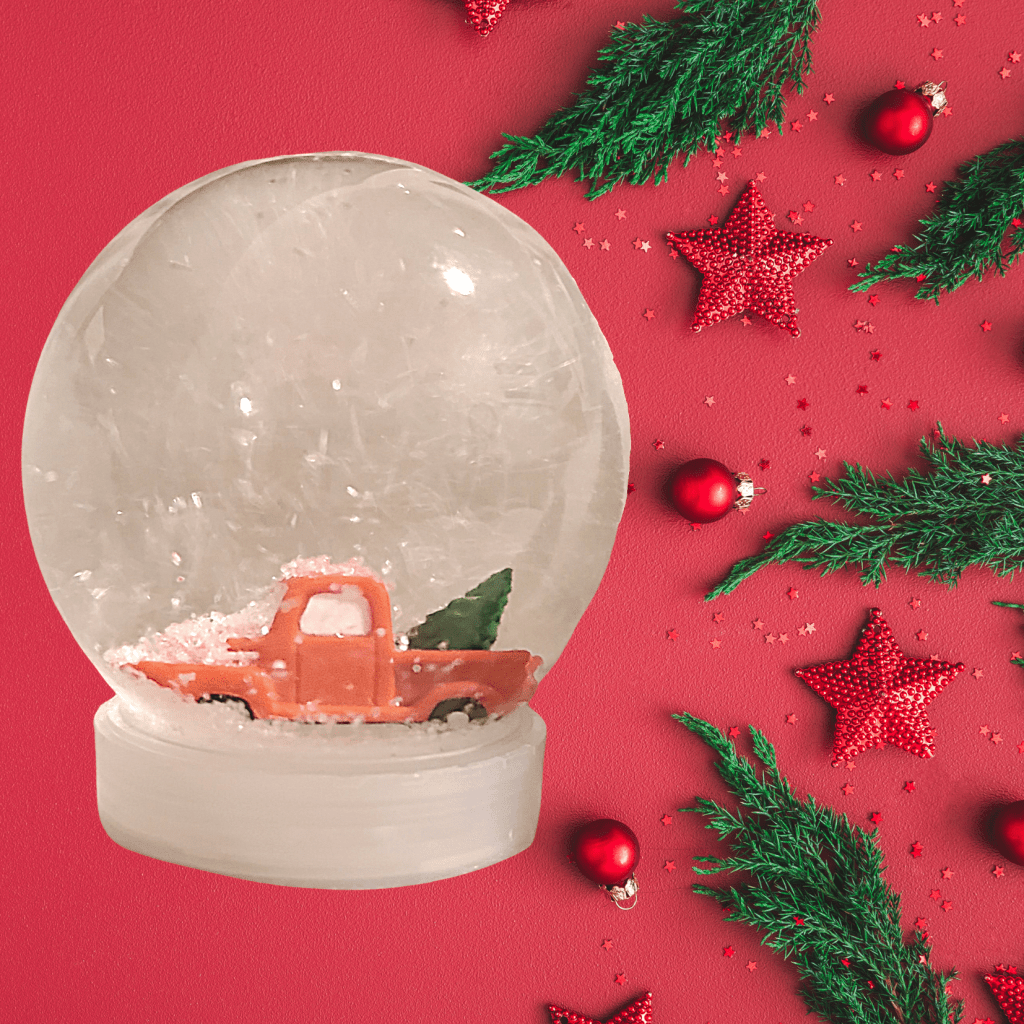
Give the snow globe as a fun gift to someone or use it as part of your holiday decor!
What do you think of the DIY Holiday Snow Globe? Will you be making one for someone on your gift list? Let me know in the comments below!
As always, you can watch the video tutorial for my DIY Holiday Snow Globe on my TikTok!
Happy Holidays! I hope you have “snow” much fun making this magical wintery project!

This looks like a global amount of fun. Always like the diy projects that can be family friendly. Awesome idea!!!
🙂👍
LikeLiked by 1 person
It certainly is! Snow globes are so easy to make at home, and they are so fun for the family. I’m glad to hear you liked this DIY!
LikeLiked by 1 person