
Jingle bell time is a swell time!
Bells are ringing and carolers are singing, because it’s the most magical time of the year! I don’t know about you, but bells seem to make the Christmas season even more enchanting—from all the jingle bells in our favorite Christmas songs to the sleigh bells of Santa’s sleigh. Once you hear the ringing of a bell, you just know it’s Christmastime.

To celebrate the magic of Christmas, I have crafted a fun DIY for Christmas: Dome Lid Jingle Bells! This craft is perfect if you, like me, enjoy going to your favorite coffee shop (hi, Starbucks!) during the holidays because you can recycle those dome lids from your cold drinks. These Dome Lid Jingle Bells also make a fun craft for kids who might want to have a special jingle bell like the one from Santa’s sleigh in “The Polar Express”.

Only requiring the dome lids, paint, glue, and some decorative elements (if you choose to include some), these bells are incredibly simple to make and are a great Christmas craft for the family.
Read on to learn how to make your own DIY Dome Lid Jingle Bell!
Here’s What You’ll Need:
- Plastic dome lids (You’ll need 2 per bell, and I just saved my old Starbucks lids!)
- Paint
- White paint: Martha Stewart Crafts® Multi-Surface Satin Acrylic Craft Paint in Wedding Cake
- Black paint: Apple Barrel Matte Acrylic Paint in Black
- Paintbrushes and painter’s palette (or paper plate)
- Hot glue gun
- Rope (I found mine at Dollar Tree)
- Decorative greenery (optional)
- Twine (optional)
- Small jingle bells (optional)

How to Make Your Own DIY Dome Lid Jingle Bells
To begin making your DIY Dome Lid Jingle Bells, start by painting your dome lids (you will need two dome lids per bell you create!) with your base color. I used white paint as my base color to have a white and red theme for my Christmas decor, but you can use whatever color you’d like, such as a copper-like color for a more antique looking bell or silver to make it look like a bell from Santa’s sleigh. Choose whatever color will match your Christmas aesthetic!
Once the dome lids are painted, set them aside to dry, especially if you plan to do another coat (I ended up painting two coats on my dome lids).

Next, to make the bell look more realistic, paint on the slivers/openings on the bell. Taking one of the dome lids, add the openings onto what will be the bell’s base. I used a pencil to lightly trace out the shape before painting it in with black paint, creating a rounded teardrop-like shape towards the bottom of the lid (which will end up being the middle of the bell) and making a narrow line connecting it to the straw hole of the lid (see photo below).
After the shape was drawn out, I filled it in with black paint and set it aside to dry completely. Feel free to paint a second coat to make sure it is vibrant enough after the first coat has dried, but I ended up only needing one coat.
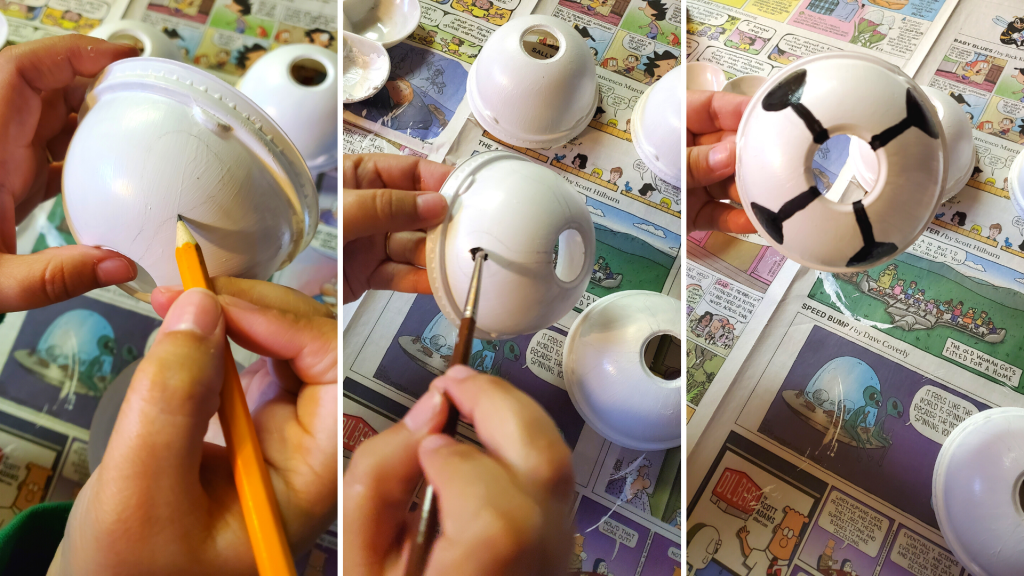
While that dries, create a handle for the bell. To do so, cut a piece of rope (I would suggest making it a little longer than you think) and tie a knot at the end (like shown below). The handle of the rope will slide through the straw hole at the top of the bell and the knot will ensure it doesn’t slide out.

Once all the lids are dry, it’s time to glue them together to create the bell!
Apply hot glue on the edge of the bottom half of the bell (the one with the openings painted on) and press both halves of the bell together to adhere them to one another. Make sure your rope handle is inserted within the top half of the bell before gluing both halves to one another. Hold both pieces together until the glue hardens.

Now, set aside your bell and work on the embellishments for the bell.
I found a greenery pick at Walmart and separated the berries and leaves from the stem to create more pieces of greenery to work with. Using some hot glue, I glued the leaves together, then tied some twine around the leaves and berries while also stringing on a small, red bell (to match the berries) so when I shook the bell, it jingled like a real bell. You can put together any greenery you’d like—use whatever matches your Christmas decor or the theme you are going for!
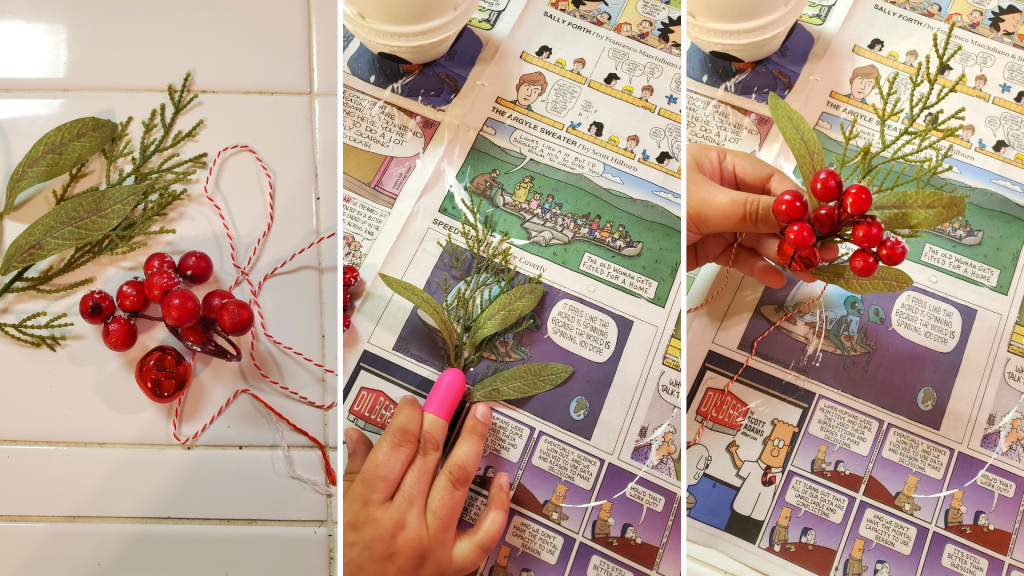
After all the greenery was tied together, I tied the rest of the twine around the handle of the bell so all of the greenery sat at the top of the bell.

And there you go! How cute is this bell?
It looks so cute on a decorated table for the holidays!

What do you think of these DIY Dome Lid Jingle Bells? Would you make one for the holidays? Let me know in the comments below!
As always, you can watch the video tutorial (with commentary to follow along with!) for these DIY Dome Lid Jingle Bells on my TikTok!
I hope your Christmas (jingle bell) rocks!

Now I have to say, that is absolutely a clever idea. And your recycling! This will be one I’ll have to try with my daughter, because we love Christmas bells. And maybe an ulterior motive being I’ll have to drink coffee!!! 🎅👍
LikeLiked by 1 person
Thank you! It’s a great way to recycle and create the cutest Christmas decoration ever. Haha, yes, that’s the best part–drinking the coffee for the lids!
LikeLiked by 1 person