
This cute bag can double as a valentine card holder or just a fun handbag to pair with your Valentine’s Day outfit!
I absolutely love conversation hearts. They may be incredibly sweet and hard on the teeth, but they are one of my favorite Valentine’s Day candies. As you may have seen on the blog lately, I am also obsessed with Valentine’s Day fashion—because who wouldn’t love pink and red and heart-themed everything! So, I thought it would be fun to marry my love for conversation hearts with Valentine’s Day fashion, and thus I created a darling Conversation Heart Handbag!

This Conversation Heart Handbag would be the perfect addition to a romantic, heart-themed outfit for a Valentine’s Day date (though, do stay safe when going out right now!) or even just a fun and much cuter option for a card box while exchanging valentines with BFFs! (Plus, it would make a sweet bag for a young girl to take to school and exchange valentines in class!)

It was incredibly easy to make this Conversation Heart Handbag with a dollar store gift box, and you can whip this bag up in no time, so you’ll have it ready in plenty of time for Valentine’s Day!
Read on below to learn how to make your own Conversation Heart Handbag!
Here’s What You’ll Need:
- Heart gift box (I found mine at the dollar store)
- Ribbon
- Dimensional paint
- Hole punch
- Craft knife
- Hot glue gun

How to Make Your DIY Conversation Heart Handbag:
First removing the lid of the box, use a hole puncher to punch two holes on either side of the heart box, along the curved top of the heart.

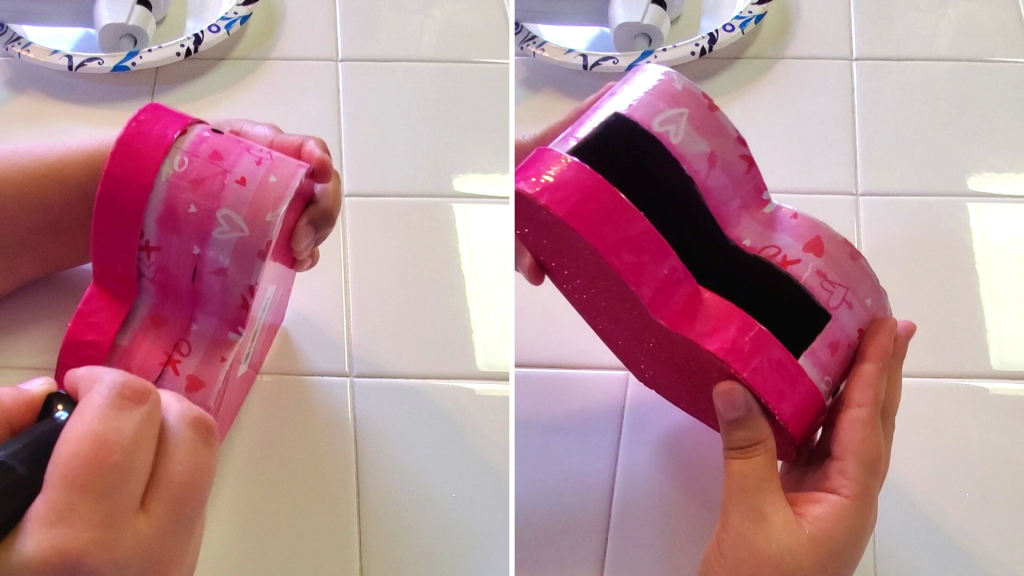
Next, apply some hot glue on the inside edge of the lid of the heart box and place the lid onto the box. Press down firmly along the edges of the lid, pushing it against the base of the box until the glue dries.

Now, using a craft knife, cut a rectangular opening at the top of the box, right along where the lid and the base of the box meet. You can make the opening as wide as you’d like, but I made my a bit longer so it would be easier to get items in and out of the bag (especially if you decide to use it to hold all of your valentines!).
To create the strap for your bag, grab your ribbon. I found this beautiful pink, glittery ribbon at Walmart and I thought it looked so cute with the sparkly heart. Measure out how long you would like for your strap to be (I wanted mine to be more like a hand-held bag versus a crossbody) and cut the ribbon.
Next, slide each end of the ribbon into one of the holes punched into the box. Tie a double-knot at each end of the ribbon to keep it from slipping out.

For the conversation heart part of the bag, I used some white dimensional paint to add of the phrase “Love U” to the front of the box, but you can add any phrase you’d like, such as “XOXO”, “Be Mine”, or “UR Cute”. The options are endless!
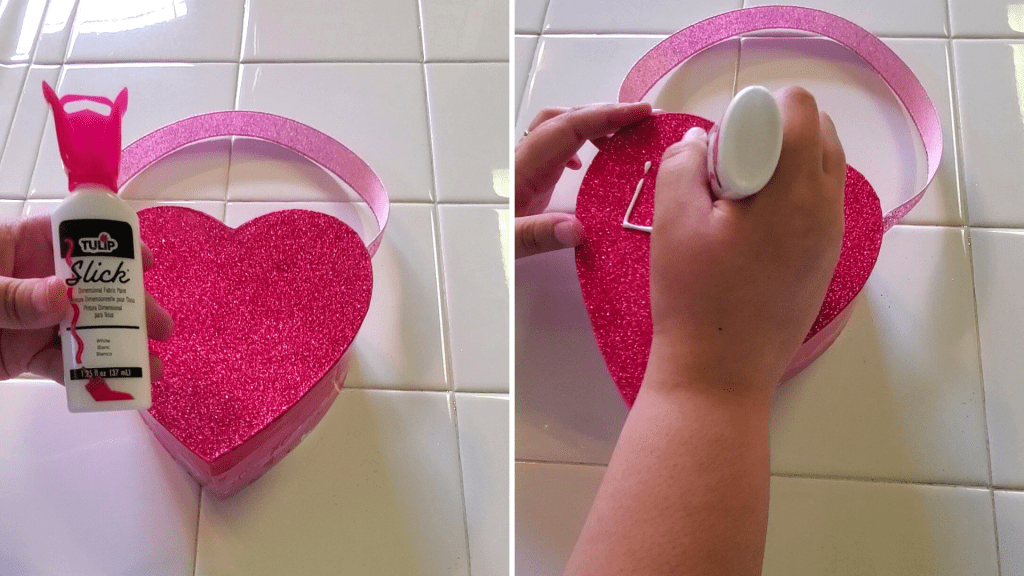
Once you have your conversation heart phrase painted on, let the box dry completely before using it.

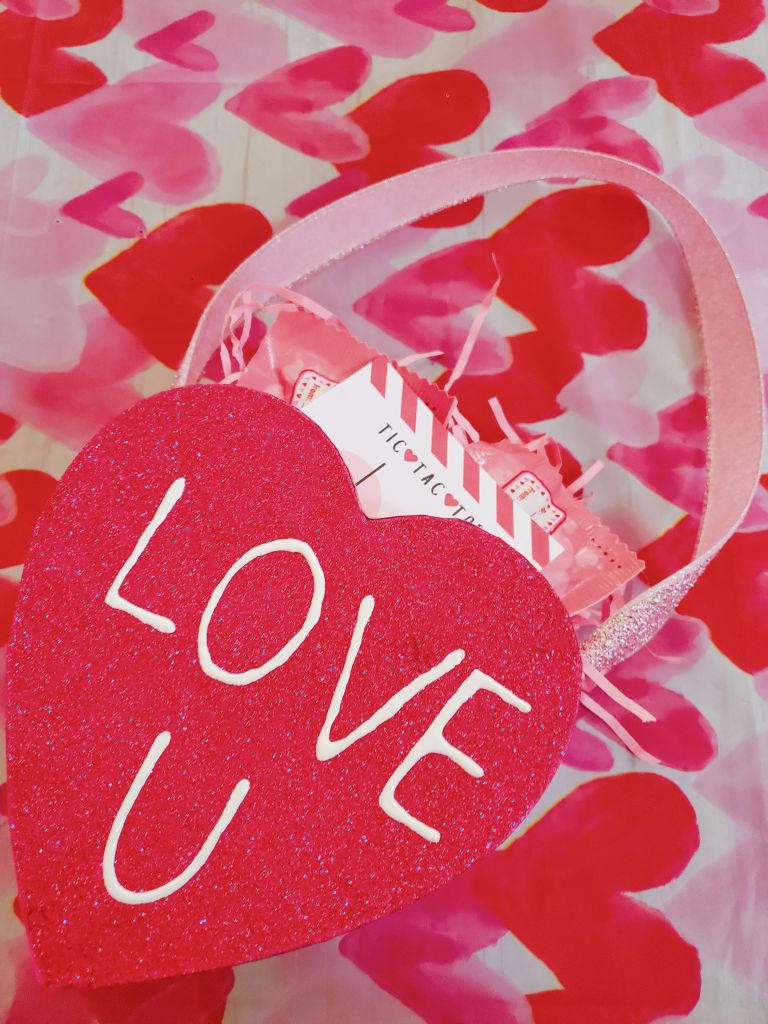
There you go! It’s so easy to make, but doesn’t it just come out so dang cute?!

I think this is such a fun way to hand out and collect valentines or just to wear as a special purse for Valentine’s Day (or maybe throughout the year because it is too stinkin’ adorable!).
What do you think of this DIY Conversation Heart Handbag? Would you try this out for Valentine’s Day? Let me know in the comments below!
As always, you can find the video tutorial for the DIY Conversation Heart Handbag (with commentary to walk you through each step) on my TikTok!
I hope you have an amazing Valentine’s Day! Love U, Colorventurers!

Well that looks like a simple and fun project to do! You have certainly given a lot of fun and creative ideas for valentine day crafts. Thanks for all your efforts.
🙂👍
LikeLike
It sure is easy to make! Thank you so much! I am so happy to hear that you have enjoyed these fun Valentine’s Day ideas!
LikeLike