
With some water, nail polish, and Dollar Tree candleholders, create these easy yet one-of-a-kind DIY “Marbled” Tealight Candleholders for Mom this Mother’s Day!
(Disclaimer: This post contains an affiliate link for the nail polish used in this DIY project, meaning, at no additional cost to you, I will earn a small commission if you decide to click onto my link.)
Mother’s Day is almost here! If you’re still in need of a cute gift idea for your mom or mother figure, this quick and easy DIY gift will help her see just how much you appreciate her.
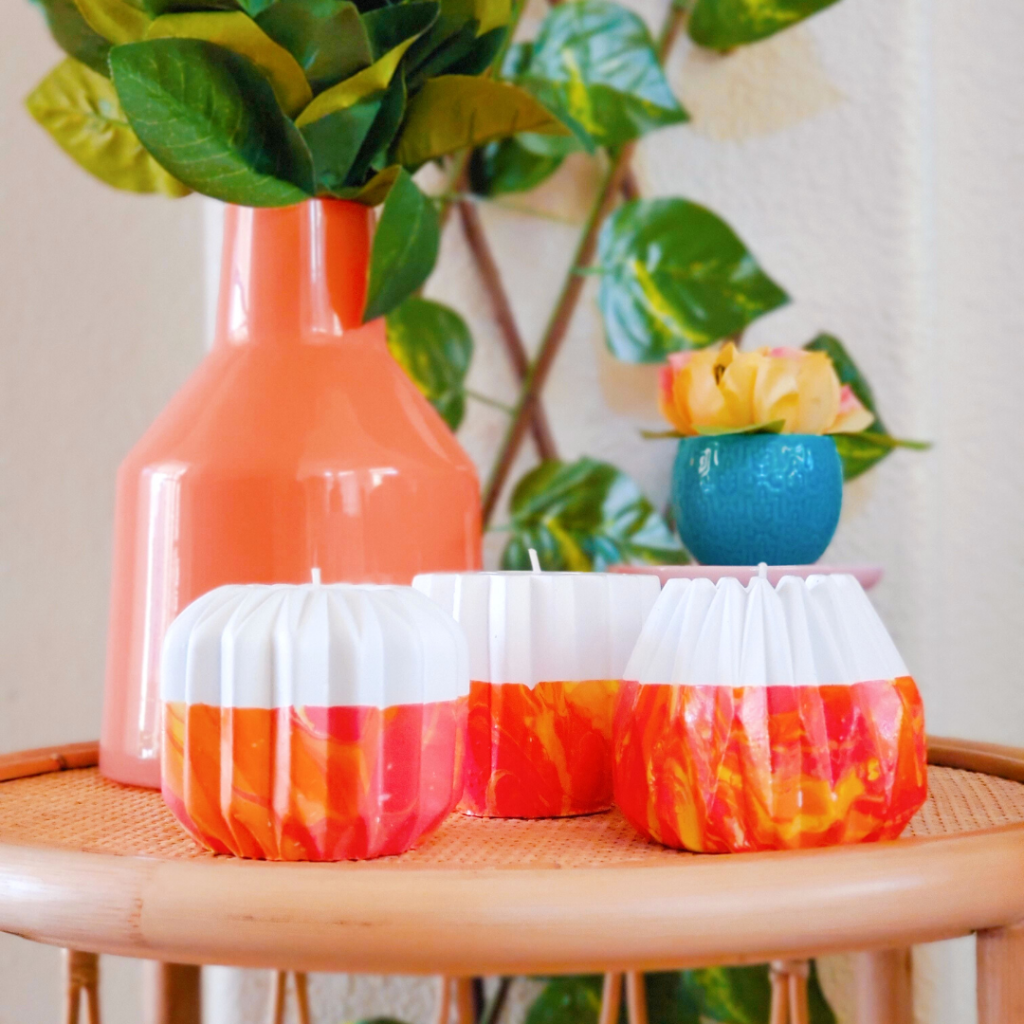
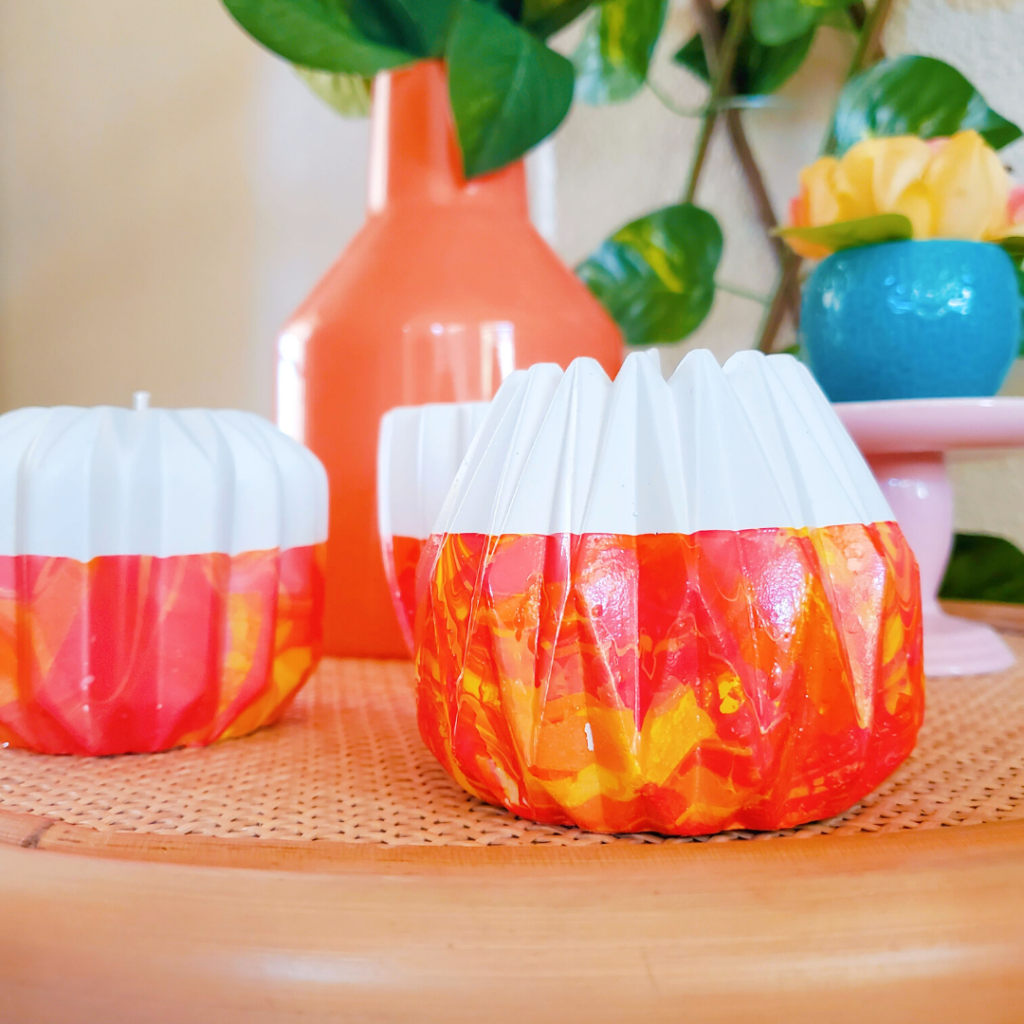
Light up her special day with these super simple DIY “Marbled” Tealight Candleholders! These hand-dipped candleholders are inexpensive to make but look like you picked them straight from Anthropologie—so you’ll definitely impress her!
Using an assortment of candleholders from Dollar Tree, these “marbled” beauties pretty much make themselves. All you need is some water, nail polish, and a few spare minutes to create this one-of-a-kind gift that Mom will love. Plus, you can personalize these candleholders specially for Mom by choosing an assortment of nail polish colors that she likes!
Read on below to learn how to make your own DIY “Marbled” Tealight Candleholders!
Here’s What You’ll Need:
- Ceramic candleholders (I found mine at Dollar Tree)
- Warm water
- A container or tub large enough to (mostly) submerge the candleholders
- Skewers or toothpicks
- Nail polish (I used Sally Hansen Xtreme Wear nail polish in Sunkissed (orange), Coral Reef (pink), and Daisy Dukes (yellow).)
Here’s How to Make Your Own DIY “Marbled” Tealight Candleholders:
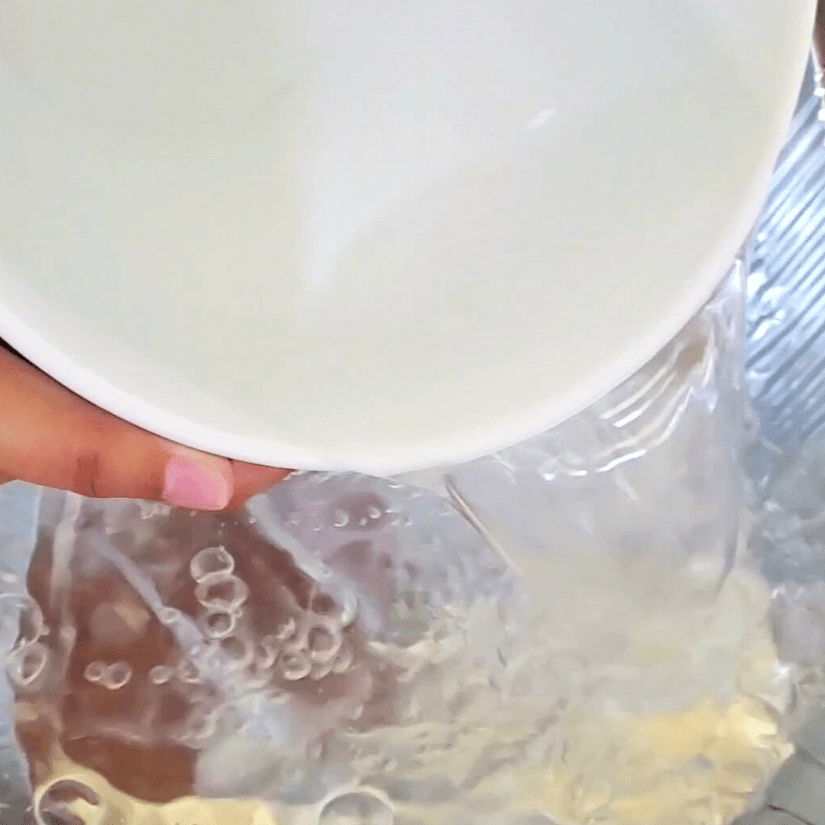
Begin by filling a container or tub that is deep enough for your candleholder with warm water. For the candleholders I used from Dollar Tree, I filled the disposable aluminum tray I had three-fourths of the way so they would be mostly but not completely submerged.
Working quickly, pour a bit of nail polish in any color of your choosing into the container of water in random squiggles. Tip: If your nail polish isn’t spreading across the water when you pour it, try to use distilled or filtered water or a newly-opened nail polish.
I used three colors for the candleholders I created: pink, coral, and yellow. I would highly suggest not using any more than three colors if you want multiple colors in your design. If left too long before dipping the candleholder, the nail polish will begin to clump together. If you are worried about having to work quickly, you can always dip the candleholder once for each individual color, allowing it to dry completely between each dipping.
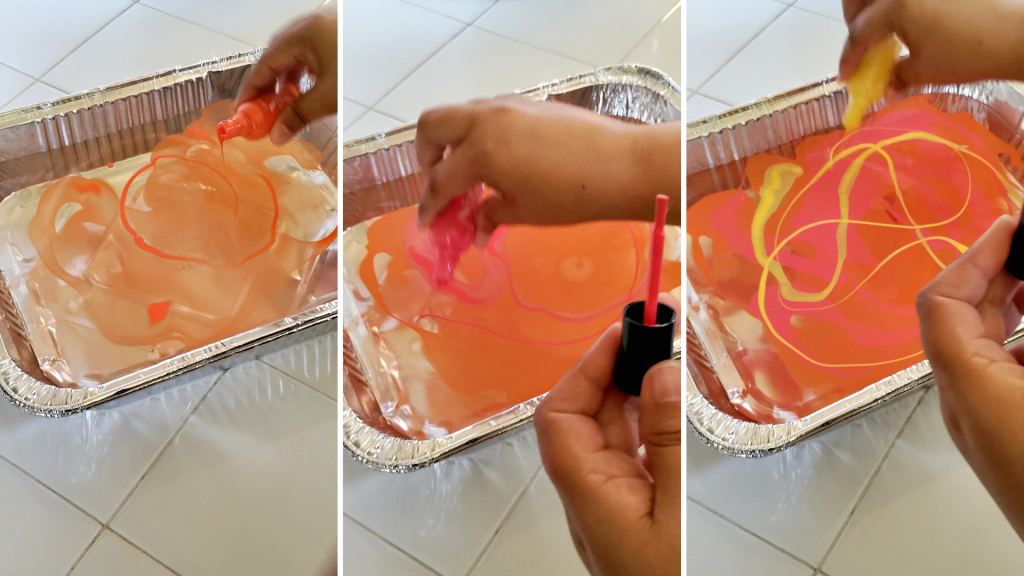
Pour one color in first quickly followed by the second (and third) nail polish color(s).
Once the nail polish is poured in, quickly swirl the nail polish with a skewer or toothpick to break up concentrated clumps and help create your marbled design.
With the nail polish spread out thinly across the water, slowly dip your candleholder into the water, gently twirling the candleholder so it captures the nail polish and gets the marbled effect.
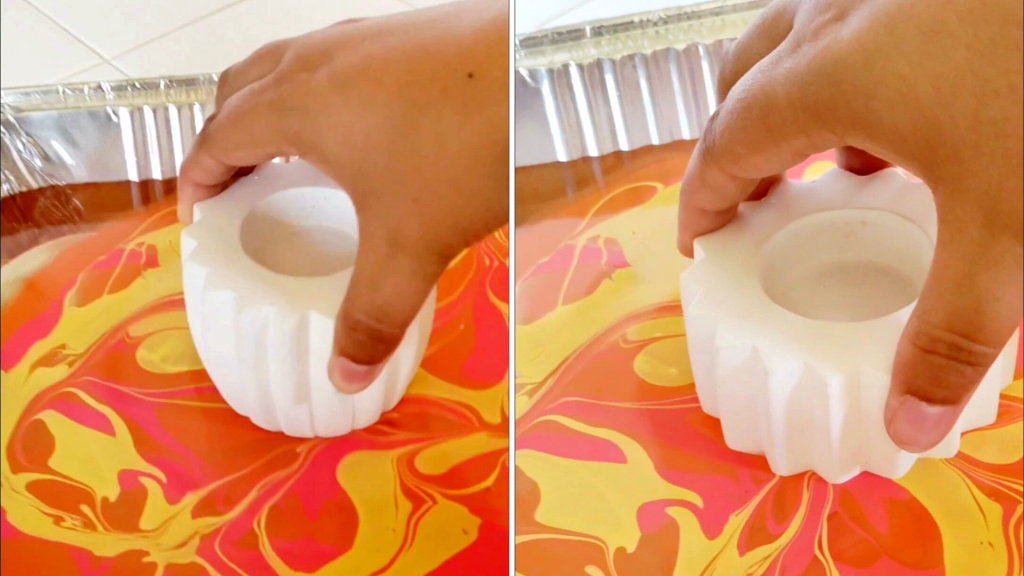
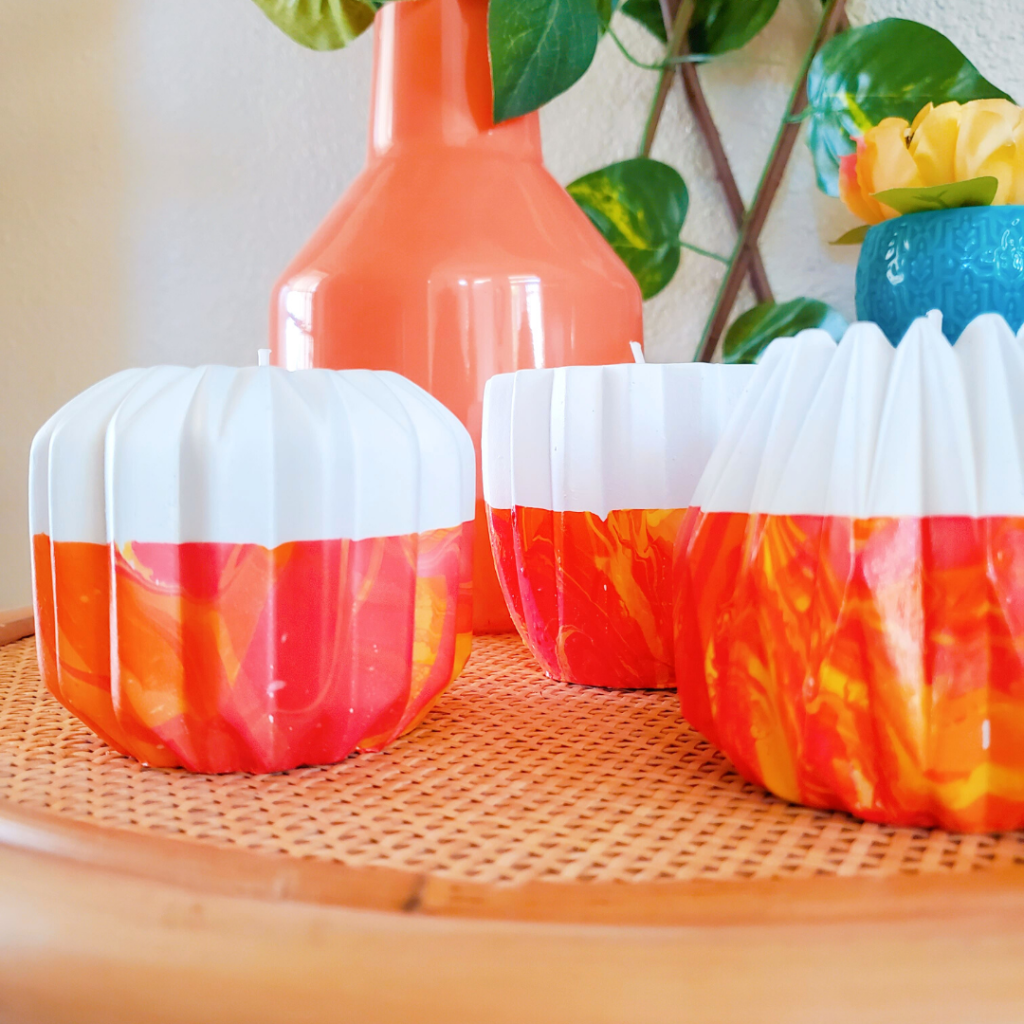
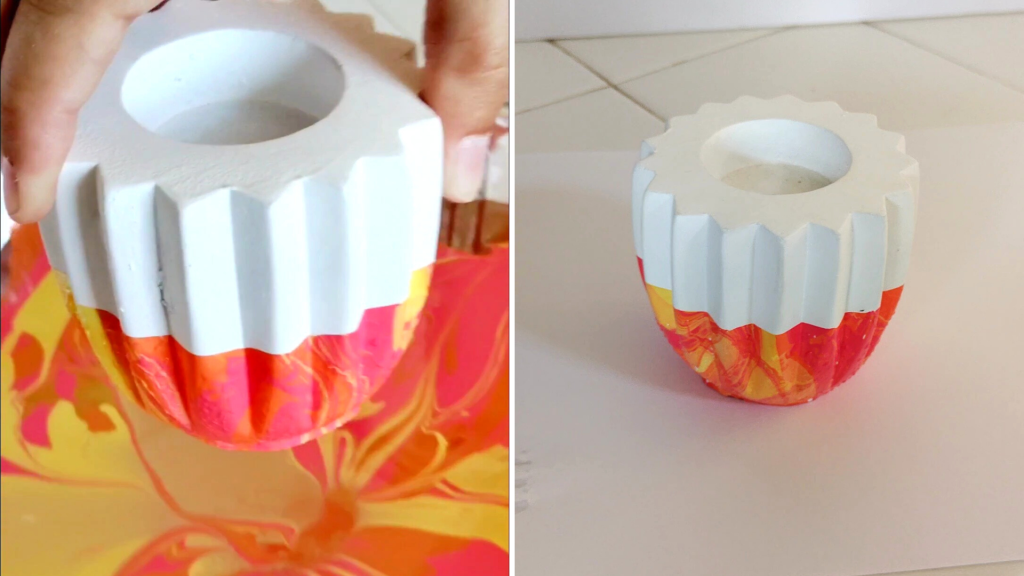
Carefully lift the candleholder out of the water. The thin layer of nail polish should have transferred from the water to the candleholder. Set the candleholder aside on some paper or paper towel to dry.
If you’ve accidentally messed on your design or are simply not happy with it, don’t worry! You can take a cotton pad and clean up the candleholder with some nail polish remover.
I created three “Marbled” Tealight Candleholders for this project. If you, too, plan to create multiple candleholders, skim off the excess nail polish for the water with a skewer or toothpick so that it doesn’t cling to your next candleholder. Carefully empty the water of the container and refill it with fresh warm water.
Next, simply repeat the above steps for the remaining candleholders.
That’s it!
What do you think of these DIY “Marbled” Tealight Candleholders? Let me know in the comments below!
I truly hope you’ve enjoyed this fun DIY and that you’ll make them for Mom (or even yourself)!
As always, you can find the video tutorial for these DIY “Marbled” Tealight Candleholders on my TikTok!
Before you go, make sure to save this post to your Pinterest board! (You can find the Pinterest button at the bottom of this article.)
I hope your mom has a wick-ed Mother’s Day!

This looks like a quick and easy project and quite elegant looking. Thanks for these great mothers day ideas! 🙂👍
LikeLike