
With spooky season around the corner, it’s time to get crafty! In this Halloween garland DIY step-by-step post, learn how to make a spooktacular garland for your fireplace mantle or entryway with twine and pre-cut craft felt Halloween shapes!
Spooky season is upon us, so it’s time to start bringing out all of those fun spooky decorations! I love to bring out all of the Halloween decor, including skeletons, pumpkins, and bats! But I wanted to add a little extra spookiness to my fireplace mantle, so I decided to make a spooktacular Halloween garland.
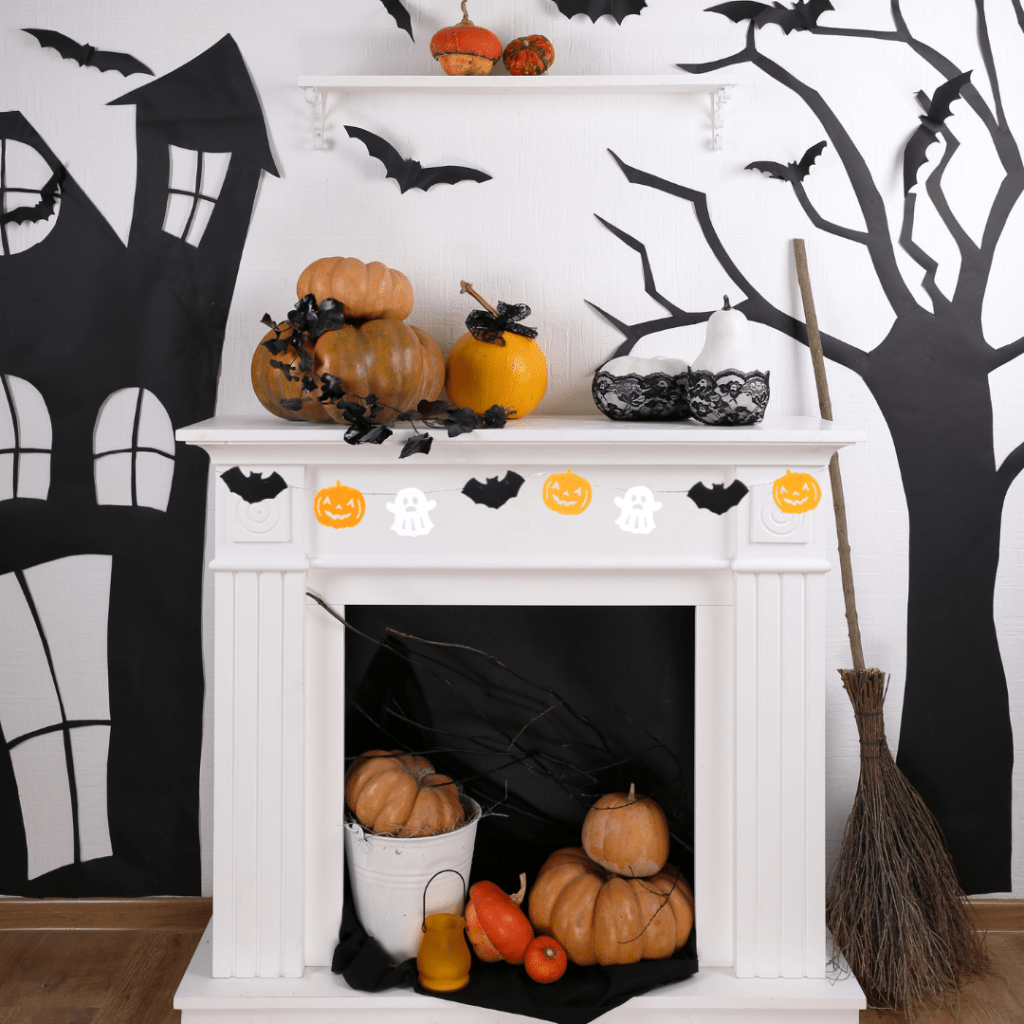
I found these fang-tastic Halloween craft felt shapes at Dollar Tree and was instantly inspired for my Halloween garland. These Halloween jack-o-lantern, ghost, and bat shapes are all pre-cut, so this garland is so easy to make and is perfect for crafters of all skill levels!
You can also get creative with this garland by choosing different Halloween shapes and personalizing it to your decor. This DIY Halloween Garland is perfect for displaying on your fireplace mantle or in a spooky entryway! However you display it, it’s going to look boo-tiful in your home!
Read on to learn how to make your own DIY Halloween Garland!
Here’s What You’ll Need:
- 12 craft felt Halloween shapes (I found these jack-o-lantern, ghosts, and bats at Dollar Tree)
- Twine
- Cardstock
- Hot glue gun
- Scissors

How to Make Your DIY Halloween Garland:
Start by picking out 12 pre-cut craft felt Halloween shapes. I found these packs of craft felt bats, ghosts, and jack-o-lanterns at Dollar Tree! I wanted to use all of these fun Halloween shapes, so I selected four of each color for a total of 12. For this garland, you can use any Halloween shapes or figurines you’d like. Get creative with it!
Once you have all your Halloween shapes, it’s time to build your garland.
With some cardstock and scissors, cut out 12 pairs of small circles (or 24 circles). When gluing the Halloween shapes to the twine for the garland, these circles will help to keep the twine in place.

With all 24 circles cut out, prepare the twine for the garland. Start by knotting one end of the twine before gluing on all the Halloween shapes.

Now, take one of your Halloween shapes and slide it underneath the twine. Lay the twine across the top back of the shape. Taking one of the cardstock circles, apply a small dot of hot glue on top of the twine on the left side and quickly place the cardstock circle over it and press down firmly (you can also apply the glue directly to the cardstock circle and then press it down if that is easier for you!). This will encase the twine between the Halloween shape and the cardstock, keeping it in place and attaching the Halloween shape to the twine. Plus, this way the twine will appear on the back so as not to detract from the spooky shapes.

Then, do the same to the right side, placing a small amount of hot glue over the twine under and, again, place the cardstock circle over the glue and firmly press down until the glue has dried.
Keep repeating this process to attach all of the other Halloween shapes, making sure that each one is relatively equidistant from each other. Arrange the Halloween figurines in any pattern you’d like to make it your own!

Once all of the shapes are glued onto the twine, cut the end of the twine, still leaving a bit behind so you can knot the end. Knot the end of the twine so you can now hang up your garland.
Now your garland is done!

That certainly was an easy craft but is sure makes the space extra spooky for Halloween!
What do you think of this DIY Halloween Garland? Let me know in the comments below!
As always, you can find my video tutorial for this DIY Halloween Garland on my TikTok!
Before you go, make sure to save this post to your Halloween Pinterest board by clicking on the Pinterest button at the bottom of this article!
Happy Halloween, “ghouls” and boys!

Usually you associate garland with Christmas, but I love this idea for Halloween! This is definitely a must do!
🙂👍
LikeLiked by 1 person