
With an orange baseball cap and some black fabric paint, you can create this easy Pumpkin Jack-o-Lantern Hat for your Halloween outfit! Plus, it’s a great addition to your Halloween costume idea!
When it comes to Halloween, I am a huge fan of dressing up in festive and spooky outfits and costumes. I’m an even bigger fan of DIY Halloween accessories and costume ideas that take no time at all but still have that special spooky spirit.
This Halloween, I wanted to make a fun hat to accompany my jack-o-lantern shirt and came up with this DIY Pumpkin Jack-o-Lantern Hat. This hat is so easy to put together as it primarily only requires an orange baseball cap (I found mine at Dollar Tree!) and some black fabric paint, and you’ll have a gourd-geous Halloween hat!

This Halloween fashion DIY is easy enough for both kids and adults to create and will look adorable paired with a spooky season ‘fit or a Halloween costume.
Read on below to learn how to make your own DIY Pumpkin Jack-o-Lantern Hat!
Here’s What You’ll Need:
- Orange baseball cap (or a color of your choice)
- Jack-o-lantern template (optional, if you’re not comfortable drawing the face on your own)
- Tape (optional, to keep template in place)
- Pencil
- Scissors
- Black fabric paint (or a color of your choice)
- Paint brush(es)/paper plate or painter’s palette for paint

Here’s How to Make Your Own DIY Pumpkin Jack-o-Lantern Hat:
If you’re using a template for your jack-o-lantern face on your hat, start by printing it out. You can use the one linked in the supply list to make it even easier! Once the template is printed out, cut out the facial features (eyes and mouth) so you can trace them onto your hat.
Apply tape to the back of the template to keep your template secure on the hat. Adhere the template to the hat.
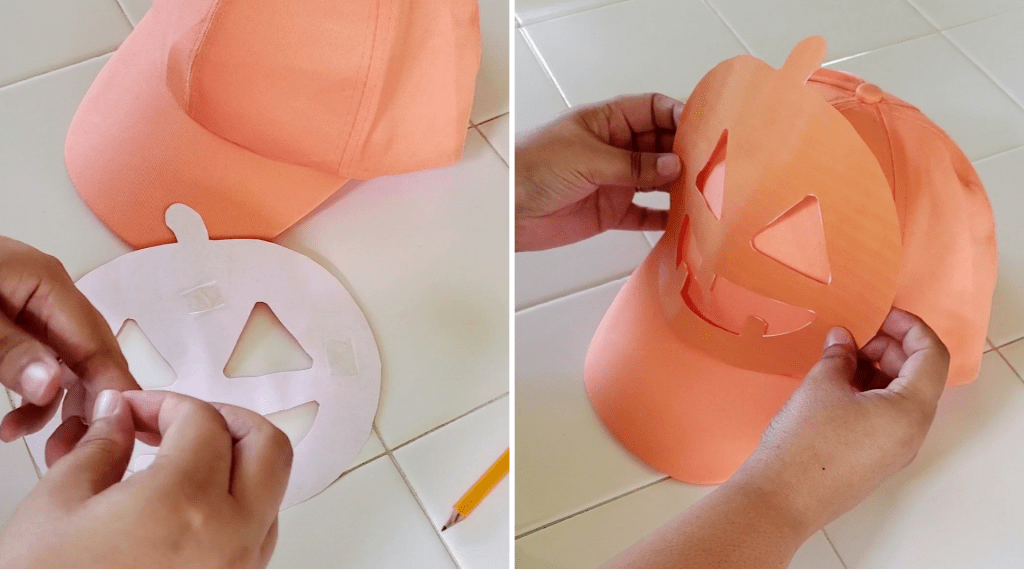
Take a pencil and lightly trace out the facial features onto the hat.
Remove the template and prepare your paint to begin painting your hat. This is optional, but for the painting, I would highly suggest lining the inside of the hat. I just used some paper towels to line the inside to ensure that no paint bled through to the back.

With your paint brush, apply the black fabric paint inside of the facial features you traced, starting with the eyes, then the mouth.

Allow the paint to dry completely before applying any additional coats. I only ended up needing one coat for my hat. Once you are satisfied with the jack-o-lantern face, allow the hat to dry completely before wearing it.
That’s it!

Wasn’t that such an easy DIY?! And it’s perfect for Halloween, especially for a quick costume!
If you make your own DIY Pumpkin Jack-o-Lantern Hat at home, make sure to share it on social media using #wearecolorventurers so I can see!
As always, you can find the video tutorial for this DIY Pumpkin Jack-o-Lantern Hat on my TikTok!
Before you go, make sure to save this craft to your Pinterest board! (You can find the Pinterest button at the bottom of this article.)
Have a spooky Halloween!

My hats off to you for coming up with a fun idea for Halloween 🎃
LikeLike